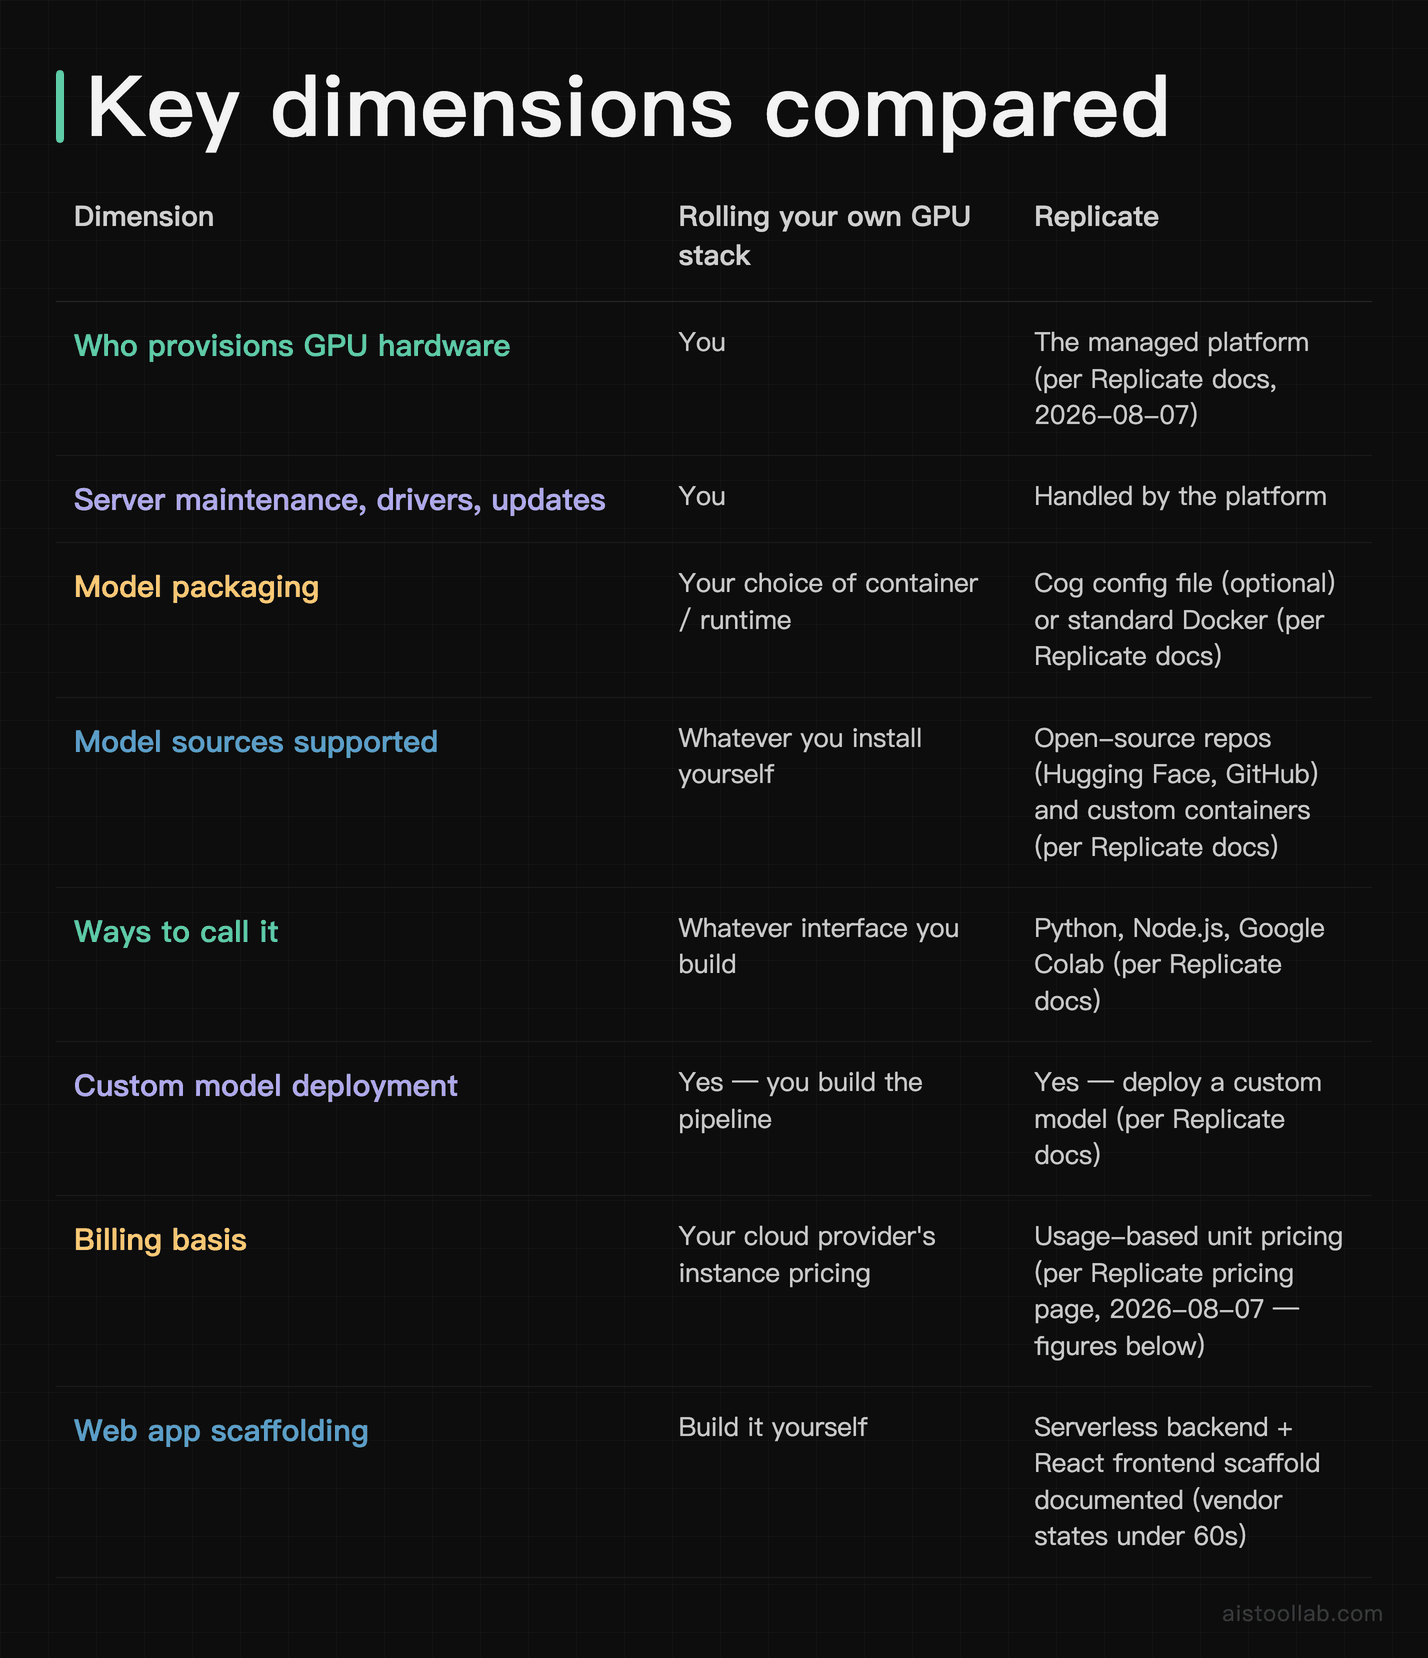
n8n’s cheapest cloud plan is 20€ a month, billed annually, for 2,500 workflow executions. Zapier’s free plan gives you 100 tasks a month for $0. Neither of those numbers is the free, self-hosted option this article focuses on — that option exists, but neither pricing page attaches a dollar figure to it. I pulled both vendors’ own pricing and license pages to see what the comparison actually rests on, checked 2026-08-27.
What n8n’s own pricing page says
n8n’s pricing page lists four business tiers, plus a separate free option below them. Two of the four are hosted by n8n only:
That’s Business, and the page marks it Self-hosted, not Hosted by n8n — it’s the cheapest priced tier where you’re the one running the server. Above it, Enterprise is quote-only and is the single tier offered either way, “Hosted by n8n or Self-hosted.” Below all four sits a fifth option with no monthly figure attached to it at all:
> A standard, self-hosted version of n8n is available on GitHub.
Source: n8n.io/pricing. That Community Edition is the free option, and it isn’t one of the four priced tiers — it’s a separate line pointing to GitHub, with no execution quota or price listed on that pricing page.
What Zapier’s own pricing page says
Zapier has no free self-hosted option — everything runs on Zapier’s infrastructure, priced by tasks rather than executions, and the two units aren’t directly comparable: an n8n execution can contain multiple steps, while Zapier’s own definition of a task counts a successfully completed action in another app, and excludes triggers and some logic steps like Filters and Paths from that total:
> Free forever $0 /month
and:
> Zap workflows, Tables, and Forms included (100 tasks per month).
Above that:
> Professional Starting from $19.99 /month
that entry point covers 750 tasks a month. Zapier’s own task-tier selector on the same page lists task tiers up to 2,000,000 tasks a month, followed by a custom task-limit option. Source: zapier.com/pricing. There’s no “run it yourself for the cost of a server” branch on Zapier’s side at any tier — the option n8n’s Community Edition offers doesn’t exist here.
The free plan comes with a license, not just a price of $0
n8n’s Community Edition is covered by the Sustainable Use License, not a permissive open-source license. Its own FAQ states the limitation plainly:
> You may use or modify the software only for your own internal business purposes or for non-commercial or personal use.
and spells out what that excludes with two concrete examples:
> White-labeling n8n and offering it to your customers for money. Hosting n8n and charging people money to access it.
Source: n8n’s Sustainable Use License FAQ. So the free tier covers running n8n on your own workflows, but not reselling access to a hosted instance — that’s listed as a use the license doesn’t permit. The FAQ does not say that simply selecting Business or the standard Enterprise tier authorizes reselling access to n8n. For a use the Sustainable Use License doesn’t permit, n8n says a separate commercial agreement is required, and which agreement applies depends on the exact use case — that’s not something either pricing page settles.
What a server to run it on costs
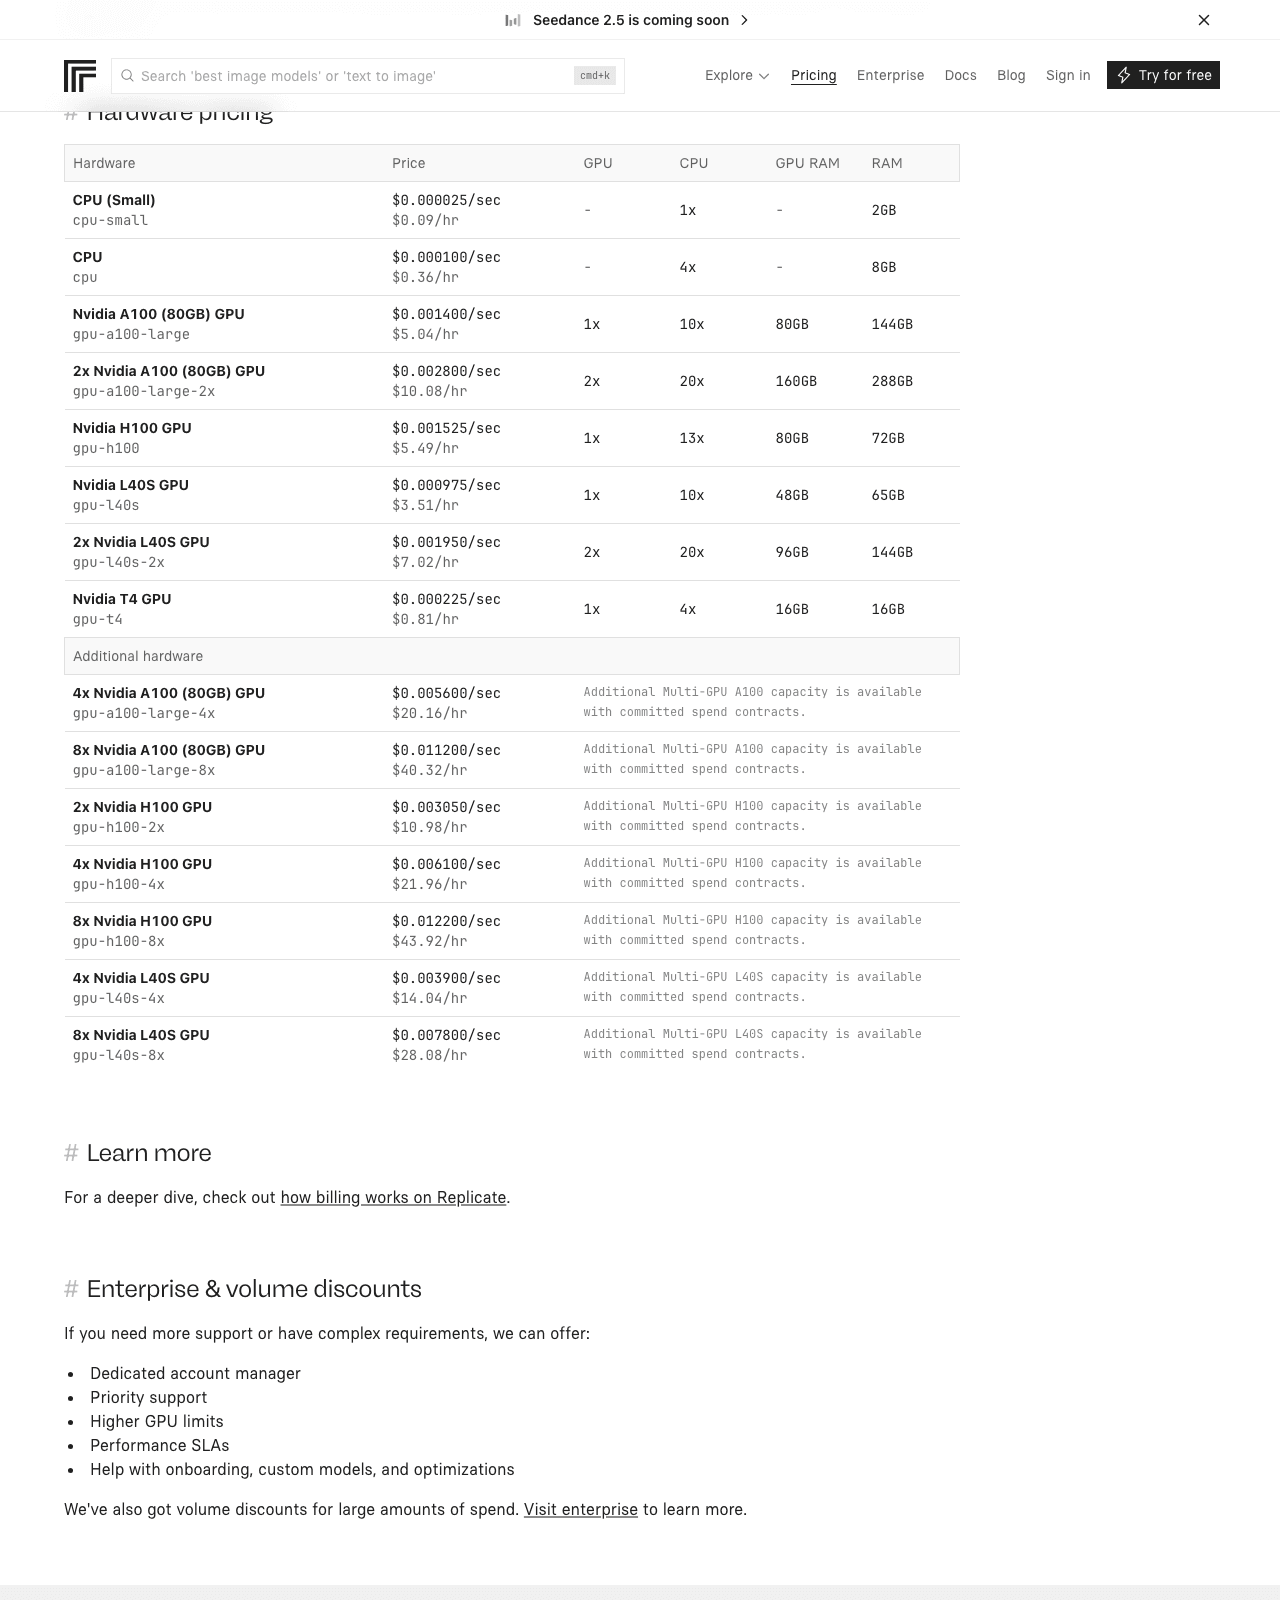
The Community Edition itself is free, but it still needs a machine. I did not run n8n myself to measure how much CPU or memory a given workflow volume actually consumes — I have not benchmarked that, and I’m not going to present a number I didn’t measure. What I can cite is what one provider charges to rent a small server, independent of n8n entirely:
Provider
Spec
Price
DigitalOcean Basic Droplet
4 GiB RAM, 2 vCPUs, 80 GiB SSD
$24.00/mo
DigitalOcean Basic Droplet
2 GiB RAM, 2 vCPUs, 60 GiB SSD
$18.00/mo
DigitalOcean Basic Droplet
1 GiB RAM, 1 vCPU, 25 GiB SSD
$6.00/mo
Numbers pulled from DigitalOcean’s droplet pricing page, checked 2026-08-27 — three example price points from one provider’s line-up, not a floor. DigitalOcean lists a cheaper tier below these, other providers may charge less again, and none of this says how many of your workflows any of these boxes can actually run before it falls behind. DigitalOcean includes basic monitoring and firewalls free with every Droplet; what this price excludes is paid backups, any additional monitoring or alerting tools you choose, and the labor of configuring, patching, and maintaining the instance yourself.
What this comparison does not tell you
Every number above came from a vendor’s own pricing or docs page, not from running either tool at volume myself. That means this comparison can tell you what each option costs on paper and what the license permits — it cannot tell you how many hours a month self-hosting actually takes to keep running, how the two compare on uptime, or how support response time differs once something breaks in production. And because executions and tasks aren’t the same unit, the 2,500-versus-750 numbers above describe two different pricing models, not two prices for the same amount of work.
I build tooling against n8n’s exported workflow JSON myself — this site’s n8n tool listing covers what the platform does before pricing enters the picture — but that’s static analysis of exported files, not a production self-hosted deployment, so it doesn’t answer the operating-cost question either.
One important number neither pricing page can supply is how many hours a month your particular deployment will require, alongside its licensing, reliability, security, and support requirements — none of that is settled by which column has the lower price.
This article was written with the help of AI. The pricing and license quotes above were pulled directly from n8n’s, Zapier’s, and DigitalOcean’s own pages on 2026-08-27, and checked against those pages before publication.
Search OpenAI’s own pricing page for “whisper-1” today and you will not find it. There is no model by that name on the page, checked 2026-08-22. What is there instead is a family of five transcription models under different names.
What OpenAI’s pricing page actually shows
Fetched directly from developers.openai.com/api/docs/pricing:
Model
Use case
Price
gpt-transcribe
File transcription
$0.0045 / minute
gpt-4o-transcribe
File transcription
$0.006 / minute
gpt-4o-mini-transcribe
File transcription
$0.003 / minute
gpt-realtime-whisper
Live transcription
$0.017 / minute
gpt-live-transcribe
Live transcription
$0.017 / minute
On this specific page, the word “whisper” survives in exactly one model name: the live option gpt-realtime-whisper. Batch file transcription is split across three separate names instead — gpt-transcribe, gpt-4o-transcribe and gpt-4o-mini-transcribe — and the cheapest of the three is gpt-4o-mini-transcribe at $0.003/minute, not gpt-transcribe.
OpenAI’s own changelog logs the change plainly:
> Released GPT Transcribe for accurate file transcription and final transcripts of committed Realtime turns, along with GPT Live Transcribe for low-latency streaming transcription.
That entry does not say what happened to whisper-1’s pricing row, and neither does the current pricing page — it simply is not there. So the honest claim is narrower than “Whisper got replaced”: the current pricing page does not price whisper-1, and OpenAI now lists three differently-named, differently-priced models for the same batch-transcription job instead.
The other “Whisper” — the one you can run yourself
This is a separate thing from the API, and worth keeping separate. The original Whisper model is open-weight, hosted on GitHub, and not part of OpenAI’s hosted-API pricing at all:
> Whisper’s code and model weights are released under the MIT License.
Nothing in the pricing-page change above touches this license. The open-weight model still exists, and nothing stops you from running it on your own infrastructure — the MIT license doesn’t remove the cost of doing that, it just moves the cost from a per-minute API fee to your own compute and upkeep.
I checked Deepgram’s own model documentation for an equivalent statement about Nova-3 and did not find one. It describes the model as reachable through Deepgram’s API endpoint and says nothing about the weights being open, self-hostable, or proprietary. I could not find a self-hosted Nova-3 deployment page either. That is not the same as “Nova-3 is closed” — it means I could not confirm a licensing position for it the way I could for Whisper, so this piece does not claim one.
Deepgram Nova-3’s numbers
Fetched directly from deepgram.com/pricing:
Model
Mode
Price
Nova-3 Monolingual
Pre-recorded, pay-as-you-go
$0.0043 / minute
Nova-3 Monolingual
Streaming, current promotional rate
$0.0048 / minute
Nova-3 Monolingual
Streaming, listed regular rate
$0.0077 / minute
Whisper Large (Deepgram-hosted)
Both plans shown
$0.0048 / minute
Two things worth noticing in that table. First, Deepgram’s own streaming price is explicitly split into a current promotional rate and a separate regular rate — the page states this directly:
> No minimums. No expiration. No credit card required.
That line describes the pay-as-you-go plan structure, not a permanent price. If you build a cost model off the promotional $0.0048/min streaming rate, check the page again before it ships — “current” is doing real work in that sentence.
Second: Deepgram hosts Whisper Large itself, priced at $0.0048/min in both plan columns on its pricing page. So the open-weight Whisper model isn’t only available through OpenAI or your own hardware — you can also rent it through Deepgram’s infrastructure, at the same listed price Deepgram charges for its own Nova-3 Monolingual streaming promotional rate.
What this comparison does not tell you
It does not tell you which one transcribes more accurately. I looked for a word-error-rate figure on OpenAI’s own model page and on Deepgram’s own pricing and model pages, and neither publishes a number I could quote and verify on the spot. Third-party benchmark posts claim double-digit error-rate improvements for gpt-transcribe over whisper-1, but I could not trace that number back to a primary source I could check, so it is not in this piece. If you need an accuracy comparison, run both APIs on your own audio — the ten minutes that takes is worth more than a WER number from a page that changes the models under it every few months.
Picking between them
Self-hosting need decides the first branch — that is a licensing and infrastructure question, not a pricing one, and Whisper’s MIT license is the only confirmed open option on that side. Past that, it comes down to whether the job is live audio or a finished file, and the batch and live prices don’t move together.
For a finished file, the pay-as-you-go rates from lowest to highest are: gpt-4o-mini-transcribe at $0.003/min, Nova-3 Monolingual pre-recorded at $0.0043/min, gpt-transcribe at $0.0045/min, Deepgram-hosted Whisper Large at $0.0048/min, then gpt-4o-transcribe at $0.006/min. None of these include volume discounts — Deepgram’s Growth tier brings Nova-3 Monolingual pre-recorded down to $0.0036/min, but that rate requires pre-paid annual credits, not a pay-as-you-go account, so it isn’t a like-for-like comparison with the numbers above it.
For live audio, the two vendors are not close. OpenAI’s live options — gpt-realtime-whisper and gpt-live-transcribe — are both $0.017/min. Deepgram’s Nova-3 streaming is $0.0048/min at its current promotional rate, or $0.0077/min at the regular rate the page states will apply once the promotion ends. Even at the regular rate, OpenAI’s live transcription lists at more than twice Deepgram’s.
If you are budgeting a project that mixes transcription with LLM calls — summarizing the transcript, for example — the per-minute audio cost is only half the bill. A token counter for estimating OpenAI and Claude API costs covers the other half without guessing at it.
This article was written with the help of AI. Every price and quoted sentence above was pulled from OpenAI’s and Deepgram’s own pages on 2026-08-22 and checked against those pages before publication. The first draft named gpt-transcribe as the cheapest OpenAI batch option and called the two live-transcription rates close to each other — both wrong once checked against the same numbers already in this piece’s own tables, and corrected here.
Sort Out Which Gemini Bill You’re Actually Reading
Here’s the thing most “Google Gemini pricing” searches get wrong before they even start: they assume there’s one price. There isn’t. The word “Gemini” covers a consumer chat app you subscribe to like Netflix, and a Developer API you pay for by the token like electricity. Those two are billed on completely different logic, and lumping them together is how people end up quoting a monthly subscription figure to a developer who’s about to send ten million tokens through an endpoint, or vice versa.
So before any dollar signs, split the question in half. If you open the Gemini app in a browser or on your phone and chat with it, you’re on the consumer side — that’s a subscription question. If you’re calling generateContent from your own code, you’re on the Developer API side — that’s a per-token question, and it’s the side where Google has published exact, dated numbers that are about to move.
This piece is mostly about that second side, because that’s where I can point you at hard, sourced figures — and where there’s a deadline worth circling. Google’s Gemini Developer API pricing page (checked 2026-08-14) is running promotional rates that are scheduled to roughly double on January 1, 2027. If you’re building anything that outlives this year, that single date matters more than any feature comparison you’ll read.
The Promo Clock That’s Easy to Miss on the Calendar
The most important fact about Gemini API pricing right now isn’t a single rate — it’s that almost every rate on the page carries two numbers: one “through December 31, 2026” and one “starting January 1, 2027.” And the pattern is brutally consistent: the 2027 number is double the current one.
Here’s the rate ladder as it stands, per Google’s official Gemini Developer API pricing page (checked 2026-08-14). These are per 1,000,000 tokens unless noted, and they’re API rates — not the consumer app subscription:
$0.0375 per 1M tokens through December 31, 2026 → $0.075 (official pricing page, checked 2026-08-14) starting January 1, 2027.
$0.375 (official pricing page, checked 2026-08-14) per 1M tokens through December 31, 2026 → $0.75 (official pricing page, checked 2026-08-14) starting January 1, 2027.
$0.75 per 1M tokens through December 31, 2026 → $1.50 (official pricing page, checked 2026-08-14) starting January 1, 2027.
$1.875 (official pricing page, checked 2026-08-14) per 1M tokens through December 31, 2026 → $3.75 (official pricing page, checked 2026-08-14) starting January 1, 2027.
$3.75 per 1M tokens through December 31, 2026 → $7.50 (official pricing page, checked 2026-08-14) starting January 1, 2027.
Context/cache storage: $0.50 (official pricing page, checked 2026-08-14) per 1,000,000 tokens per hour through December 31, 2026 → $1.00 (official pricing page, checked 2026-08-14) per 1,000,000 tokens per hour starting January 1, 2027.
I’m deliberately listing these as a ladder rather than pinning each one to “this is Flash input, that is Pro output.” Google’s page maps specific rate points to specific models and token types (input, output, cached), and those assignments shift as models get renamed and re-tiered. What the page states plainly is the rate itself and its scheduled change — the mapping you should confirm against your own model on the live page before you commit.
Why does this matter more than it looks? Because the storage line especially compounds. A per-token, per-hour charge is a rate you pay continuously for as long as cached context sits there. If you’re modeling long-lived context caches, model both the pre- and post-2027 rate, not just today’s.
Two Ways to Pay, Side by Side
Before the table, a note on what it’s rating and what it isn’t. The API column below is built from Google’s Developer API pricing page (checked 2026-08-14). The consumer-app column is intentionally light on numbers: The API rates here are the ones that page states; the current app subscription price is not in those sources, so this column stays qualitative rather than quoting a figure with no citation behind it. If you need the exact app subscription cost, that lives on Google’s consumer plan page, and prices there change — treat this column as “how it’s billed,” not “what it costs to the cent.”
How you’re billed — Gemini Developer API: Pay-per-token (official pricing page, checked 2026-08-14); Gemini consumer app: A paid monthly subscription (exact price not in the sources cited here — check Google’s plan page)
Unit of cost — Gemini Developer API: Per 1,000,000 tokens; Gemini consumer app: Per user, per month
Free access — Gemini Developer API: A free tier exists for testing; confirm current allowances on the pricing page; Gemini consumer app: A free tier of the app exists; a paid tier unlocks more
Lowest published rate point (through Dec 31, 2026) — Gemini Developer API: $0.0375 (official pricing page, checked 2026-08-14) / 1M tokens; Gemini consumer app: Not applicable
Same point from Jan 1, 2027 — Gemini Developer API: $0.075 / 1M tokens; Gemini consumer app: Not applicable
A higher published rate point — Gemini Developer API: $3.75 / 1M tokens → $7.50 from Jan 1, 2027; Gemini consumer app: Not applicable
Context / cache storage — Gemini Developer API: $0.50 / 1M tokens per hour → $1.00 from Jan 1, 2027; Gemini consumer app: Not billed separately
Who it’s built for — Gemini Developer API: Developers wiring Gemini into their own apps; Gemini consumer app: People who want the chatbot as a finished product
The practical read: if you’re an end user who just wants a smart assistant, the subscription is a fixed, predictable line item and the whole “doubling in 2027” story doesn’t touch you. The right column is a budgeting choice; the left column is an engineering choice.
If You’re Prototyping This Quarter vs. Shipping Into 2027
This is where the deadline earns its keep. Say you’re a solo developer building a demo you plan to throw away after a hackathon or a client pitch in the next few weeks. The promotional rates through December 31, 2026 are genuinely in your favor — the lowest published point sits at $0.0375 per million tokens, and even the higher points are at half of what they become in the new year.
Now flip it. Imagine you’re shipping something that goes live in November and is meant to still be running in February. Your cost model has to straddle the reset. A workload that costs you, say, one unit of the $0.75 rate through December becomes the $1.50 rate on January 1 — same code, same traffic, twice the token bill. If you write a budget that quietly assumes today’s promotional pricing continues forever, your first January invoice is going to be an unpleasant surprise. Build two lines into the spreadsheet: “now” and “2027-on,” and make the decision to launch with your eyes open.
There’s a strategic wrinkle too. That’s not a reason to rush shoddy work into production, but if you already had a big one-time job on the roadmap, the current rates are a real argument for scheduling it sooner rather than in Q1. Compare that mindset with how usage-priced infrastructure works elsewhere; I dug into a similar pay-as-you-go structure in my Fireworks AI pricing breakdown, and the same “model the compounding, not the sticker” lesson applies.
If Your Workload Leans Input-Heavy vs. Output-Heavy
Token pricing has a quiet asymmetry that trips up first-time API budgeters: the rate you pay usually depends on whether tokens are going in or coming out, and cached context is priced differently again. Google’s page lists a spread precisely because of this — the ladder of published rate points (through December 31, 2026) isn’t arbitrary, it’s different cost buckets for different kinds of tokens and models.
So the shape of your workload changes which end of the ladder you live on.
Caching sits underneath both. If your app reuses the same big system prompt or the same reference document across thousands of calls, context caching can cut your effective cost, but remember it carries that storage rate — $0.50 per million tokens per hour now, $1.00 from January 1, 2027. Caching pays off when the reuse rate is high enough that the storage charge is cheaper than re-sending the tokens every time. That’s a real calculation, not a default; for low-reuse workloads, the storage line can quietly outweigh the savings. The honest move is to estimate your input:output ratio first, then decide which rate point actually drives your spend — don’t budget off the headline number, budget off the number your traffic actually hits.
If You Just Want the App, Not the API
Not everyone reading a “Gemini pricing” article is a developer. Plenty of people land here because they’ve been using the free Gemini app, hit a wall, and saw a prompt to upgrade. If that’s you, none of the token math above applies — you’re looking at a subscription, and the calculus is simpler: is the paid tier worth a recurring monthly charge for how you actually use it?
I’m going to be careful here rather than quote a number I didn’t verify. The consumer subscription price lives on Google’s own plan page, and consumer pricing is exactly the kind of thing that gets restructured and re-tiered without warning. Whether it’s worth it depends entirely on frequency — if you’re opening it a few times a week for quick questions, the free tier probably covers you; if it’s part of your daily working rhythm and the free limits keep interrupting you, the subscription stops being a luxury and starts being a tool you’d miss.
One thing worth flagging for app users specifically: the subscription and the API are separate purchases. If you find yourself wanting both — the polished chat interface for personal use and programmatic access for a project — you’re looking at two bills, not one. That surprises people often enough that it’s worth stating plainly before you click “upgrade.”
So What Should You Actually Do Before January
If I had to compress this into a decision: match the tab you’re stuck on to the right cost model, then respect the deadline: the whole Gemini Developer API schedule — including the $0.50-per-million-tokens-per-hour storage line — is set to double on January 1, 2027, per Google’s pricing page checked 2026-08-14.
The single most useful habit here is dull but reliable: write your cost estimate twice — once at today’s rates, once at the 2027 rates — and make sure the project still makes sense at the higher one. Anything that only pencils out at promotional pricing was never really affordable; it was just borrowing against a deadline.
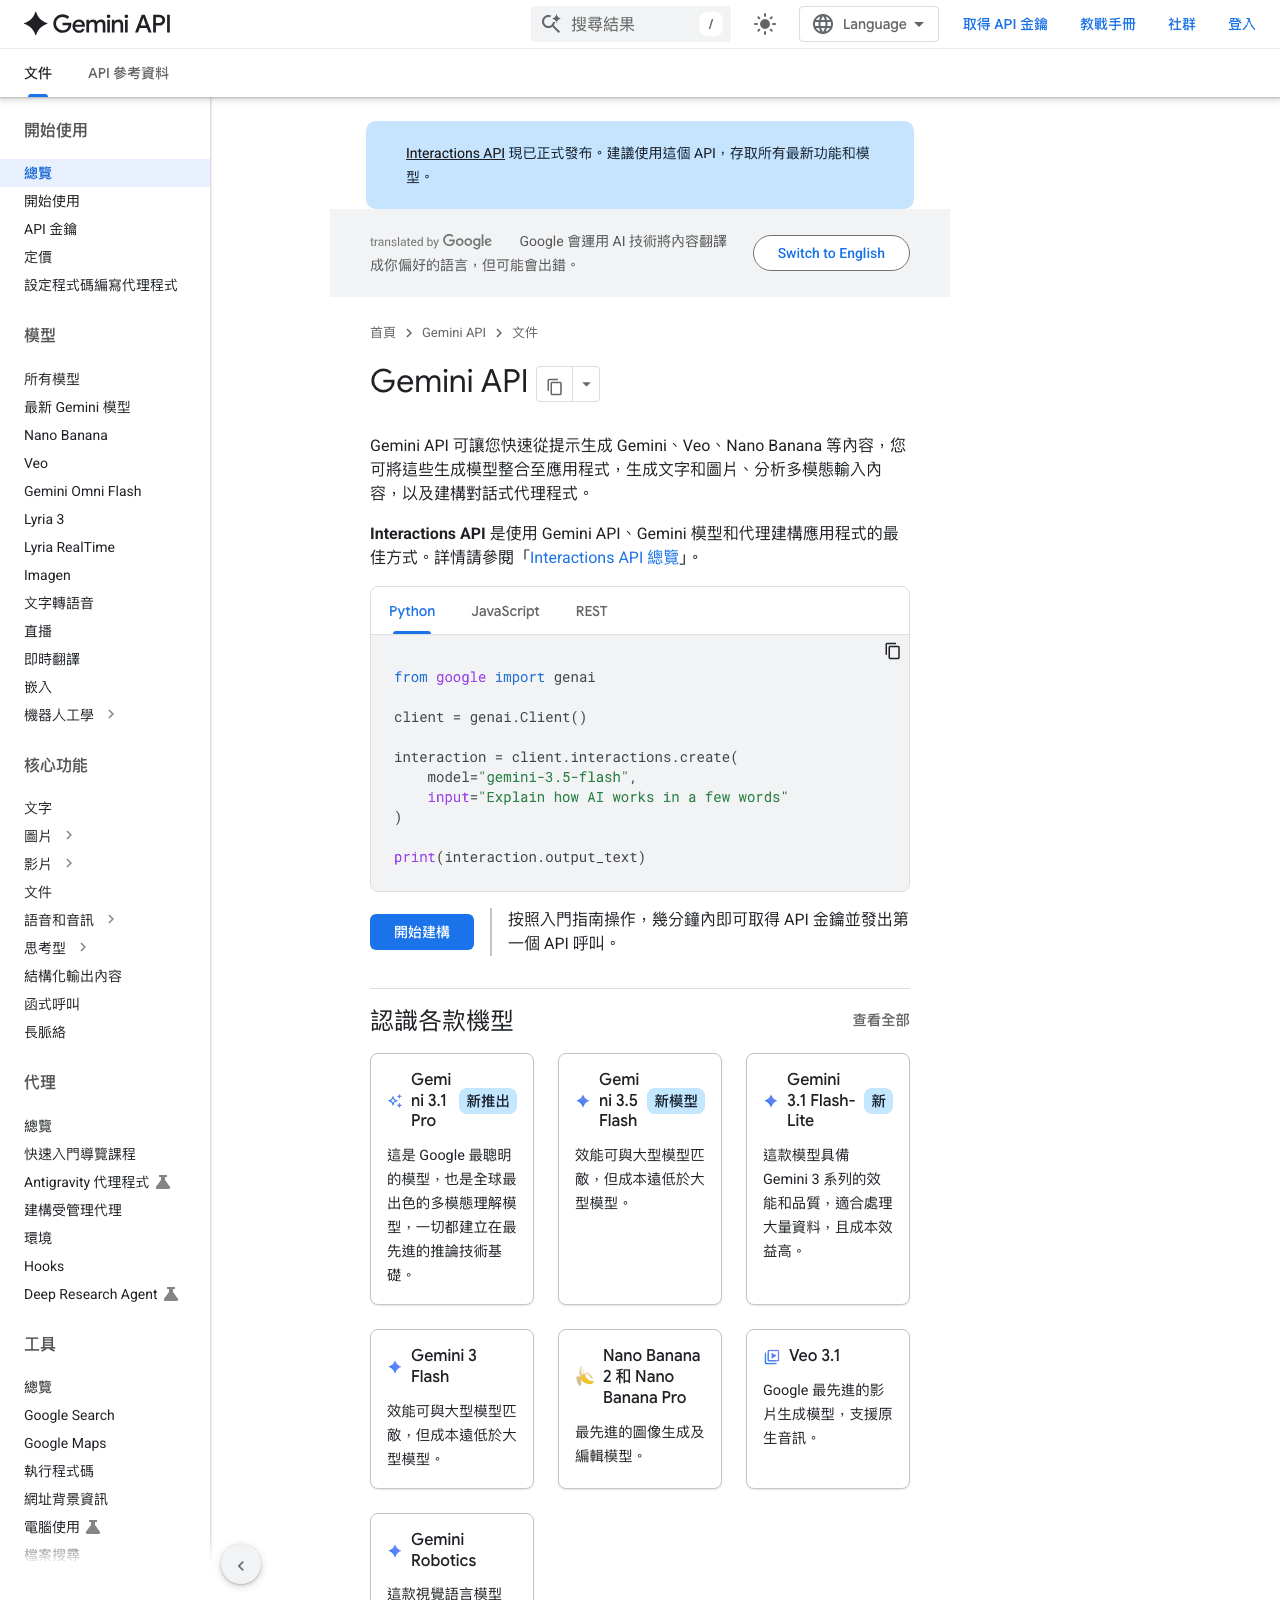
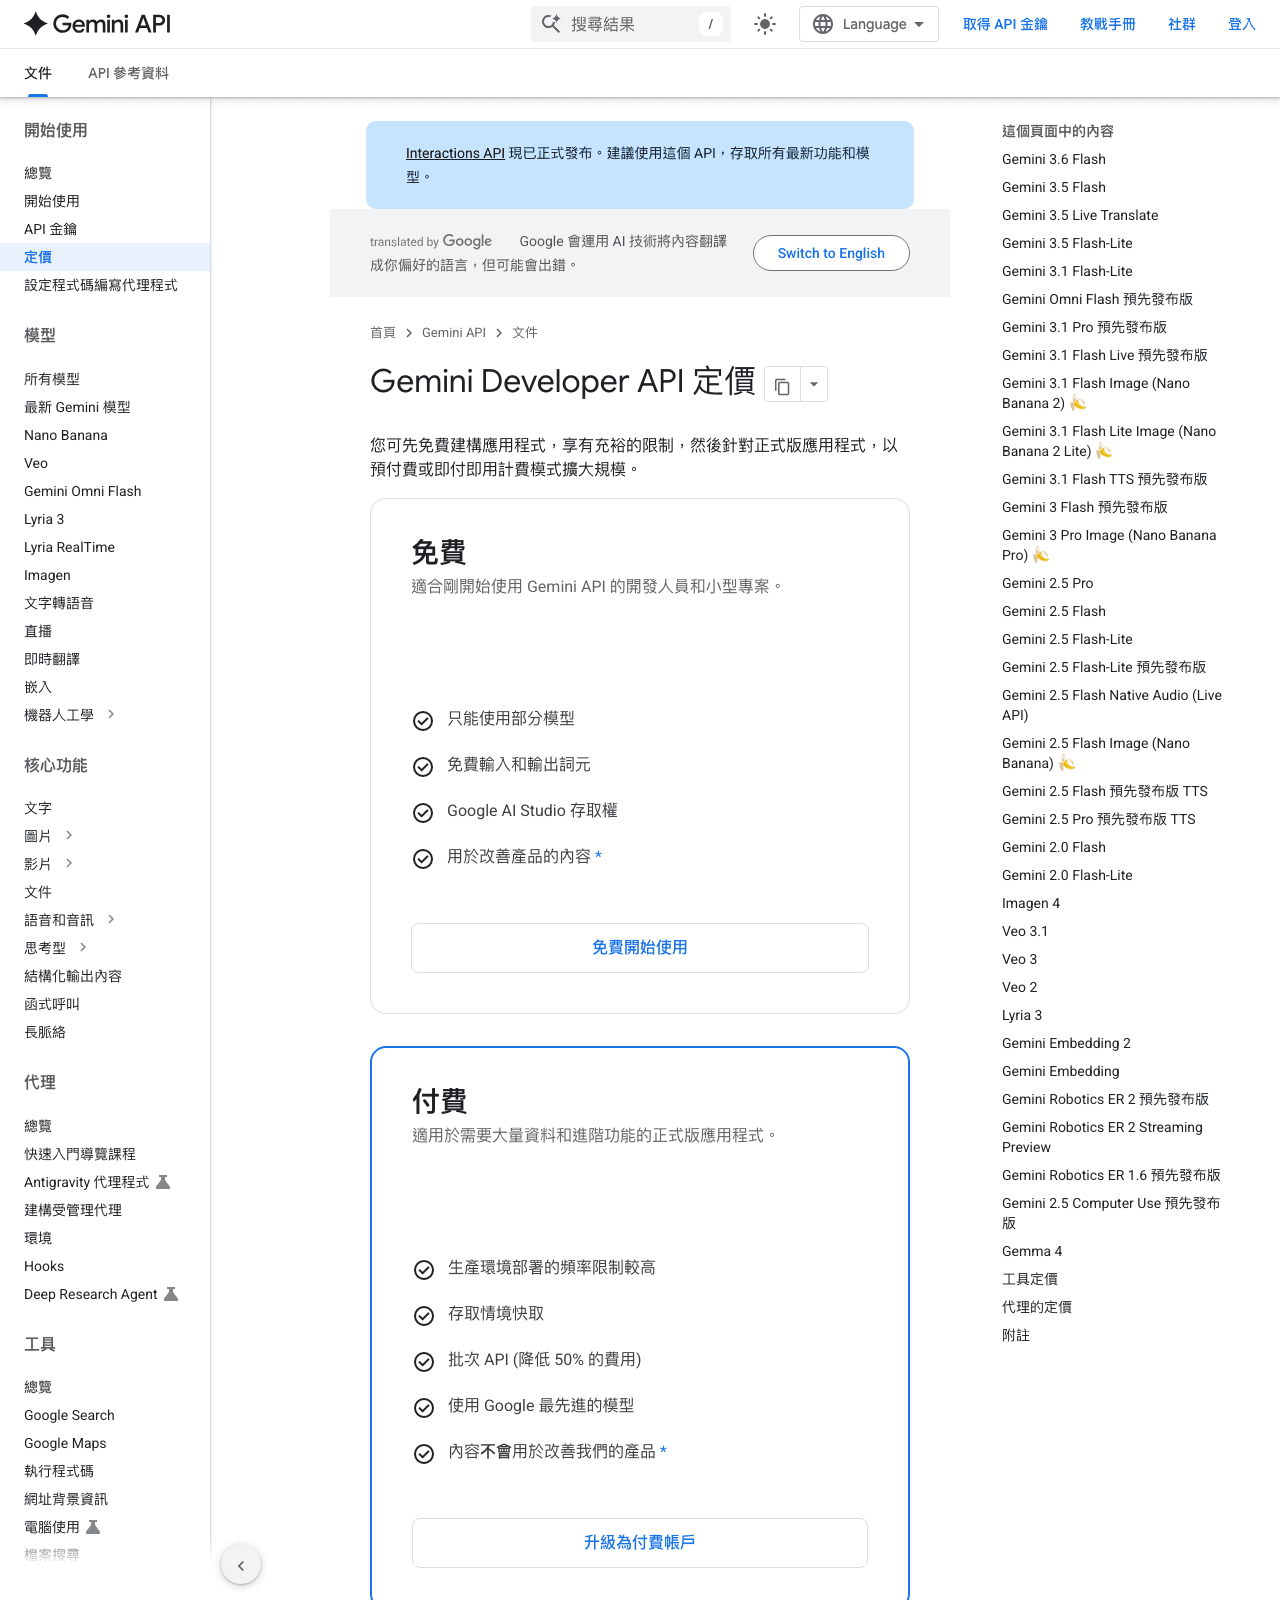
Official documentation page, captured 2026-08-14 (public page, not signed in)Official public page, captured 2026-08-14 (public page, not signed in)
Frequently Asked Questions
Will the January 1, 2027 rates apply to work I’m already running, or only new usage?
This is the question I couldn’t fully answer from the pricing page alone, so this answer stays inside what the pricing page actually states rather than guessing. Google’s Gemini Developer API pricing page (checked 2026-08-14) lists rates by date — a promotional figure “through December 31, 2026” and a higher figure “starting January 1, 2027” — but the cited excerpt states the rates and the dates, not whether existing projects, committed usage, or enterprise agreements get grandfathered at the old rate. The safe assumption for planning is that on-demand, pay-as-you-go usage bills at whatever the current published rate is on the day the tokens are processed, meaning usage that runs on or after January 1 likely bills at the doubled rate regardless of when you built the app. But “likely” is not “confirmed.” If a rate change materially affects your budget or you’re on a negotiated Google Cloud contract, don’t take a blog’s word for it — check the current pricing page and your billing terms directly, because that’s the document Google enforces against.
How do I even estimate token counts so these per-million rates mean something?
Fair — a rate of “$0.75 per 1,000,000 tokens” is meaningless until you know how many tokens your workload actually moves, and that’s where most first-time API budgeters freeze. A rough working intuition: a token is smaller than a word, so a chunk of English text lands somewhere in the ballpark of a token per three-quarters of a word, but that varies by language and content, and code tokenizes differently from prose. The reliable move isn’t to guess from a rule of thumb — it’s to run a representative sample of your real prompts and outputs through the API’s own token-counting, then multiply by your expected call volume, then apply the rate for your model at both the current and the 2027 level. Separate input from output when you do this, because they often price differently, and add the storage line if you’re caching context. The reason this matters: a workload that looks trivially cheap per call can become a real monthly number once you multiply by thousands of daily requests, and the doubling on January 1, 2027 amplifies whatever that base number is. Estimate the shape of your traffic before you commit to the architecture, not after the first invoice.
Read the pricing page like a feature list, not a price tag
Here’s a small habit worth breaking. Most people open an AI vendor’s pricing page, scan for the dollar figure, and close the tab. On Mistral’s page, doing that skips the actual story — because the interesting content isn’t the number in the header, it’s the bullet points underneath each plan describing what the platform can do.
So this piece flips the usual angle. Instead of asking “what does it cost,” I’m reading Mistral’s official pages the way you’d read a capabilities spec: what does the vendor say you can build, train, and run, and what does that imply for how you’d actually spend money on it? Everything below is compiled from Mistral’s own pricing page (mistral.ai/pricing, checked 2026-08-13) and its API documentation (docs.mistral.ai/api, checked 2026-08-13). I did not test any of it — this is a documentation read, not a hands-on review, so treat the capability lines as what the vendor states, not as verified performance.
That distinction matters more than usual with a platform like this, because Mistral’s pricing page reads less like a menu and more like a table of contents for an entire model-development stack. Let’s walk through what it lists and, more usefully, figure out which of those lines actually matter for your situation.
What the official page says you get
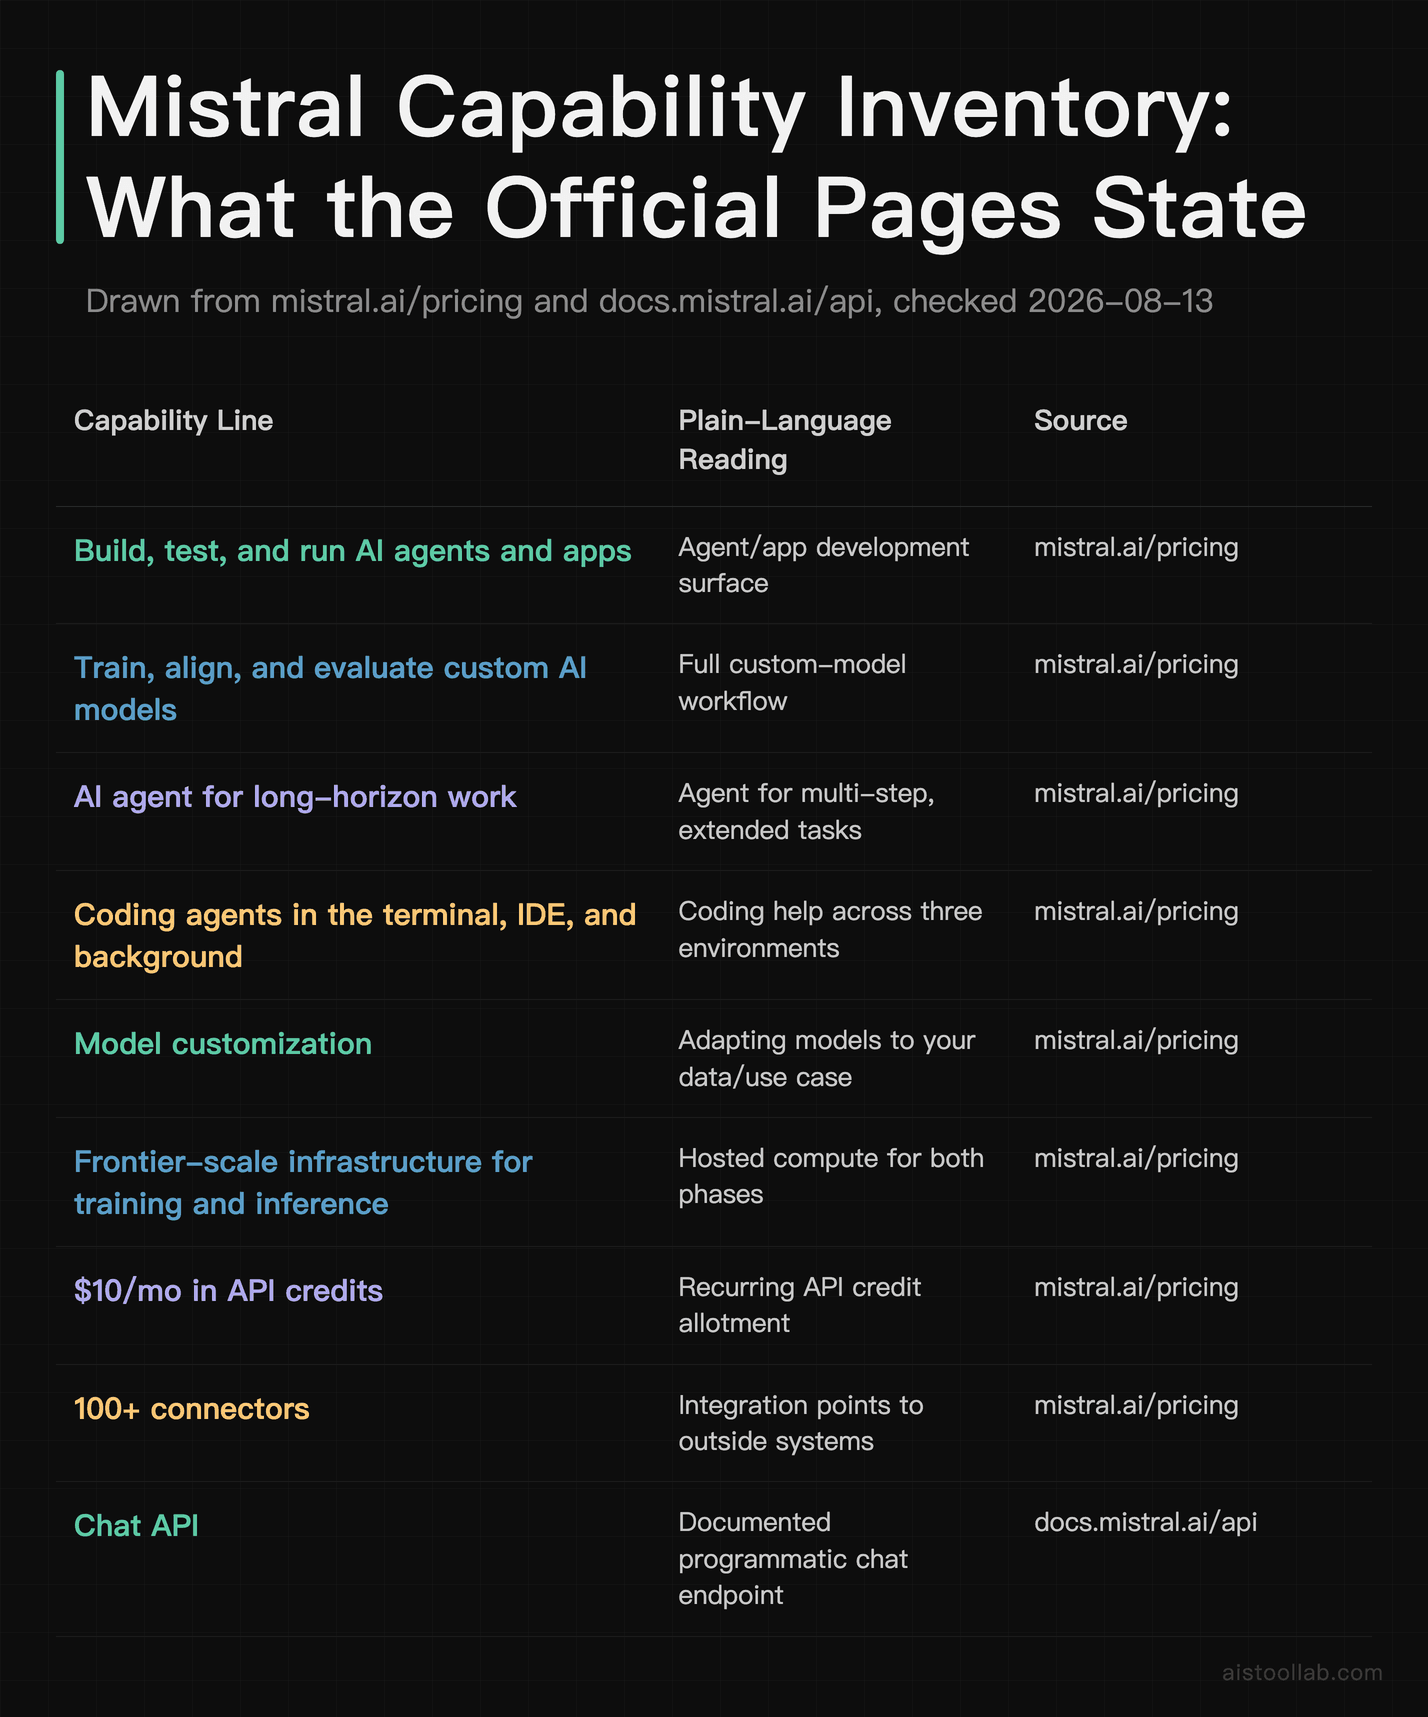
Before splitting things by scenario, here’s the flat inventory. Every row below is drawn verbatim (or near-verbatim) from Mistral’s official pages, with the source and check date attached. There are no relative ratings here and no comparison to other vendors — just what the documentation states exists.
Build, test, and run AI agents and apps — Plain-language reading: An agent/app development surface; Source (checked 2026-08-13): mistral.ai/pricing
Train, align, and evaluate custom AI models — Plain-language reading: A full custom-model workflow; Source (checked 2026-08-13): mistral.ai/pricing
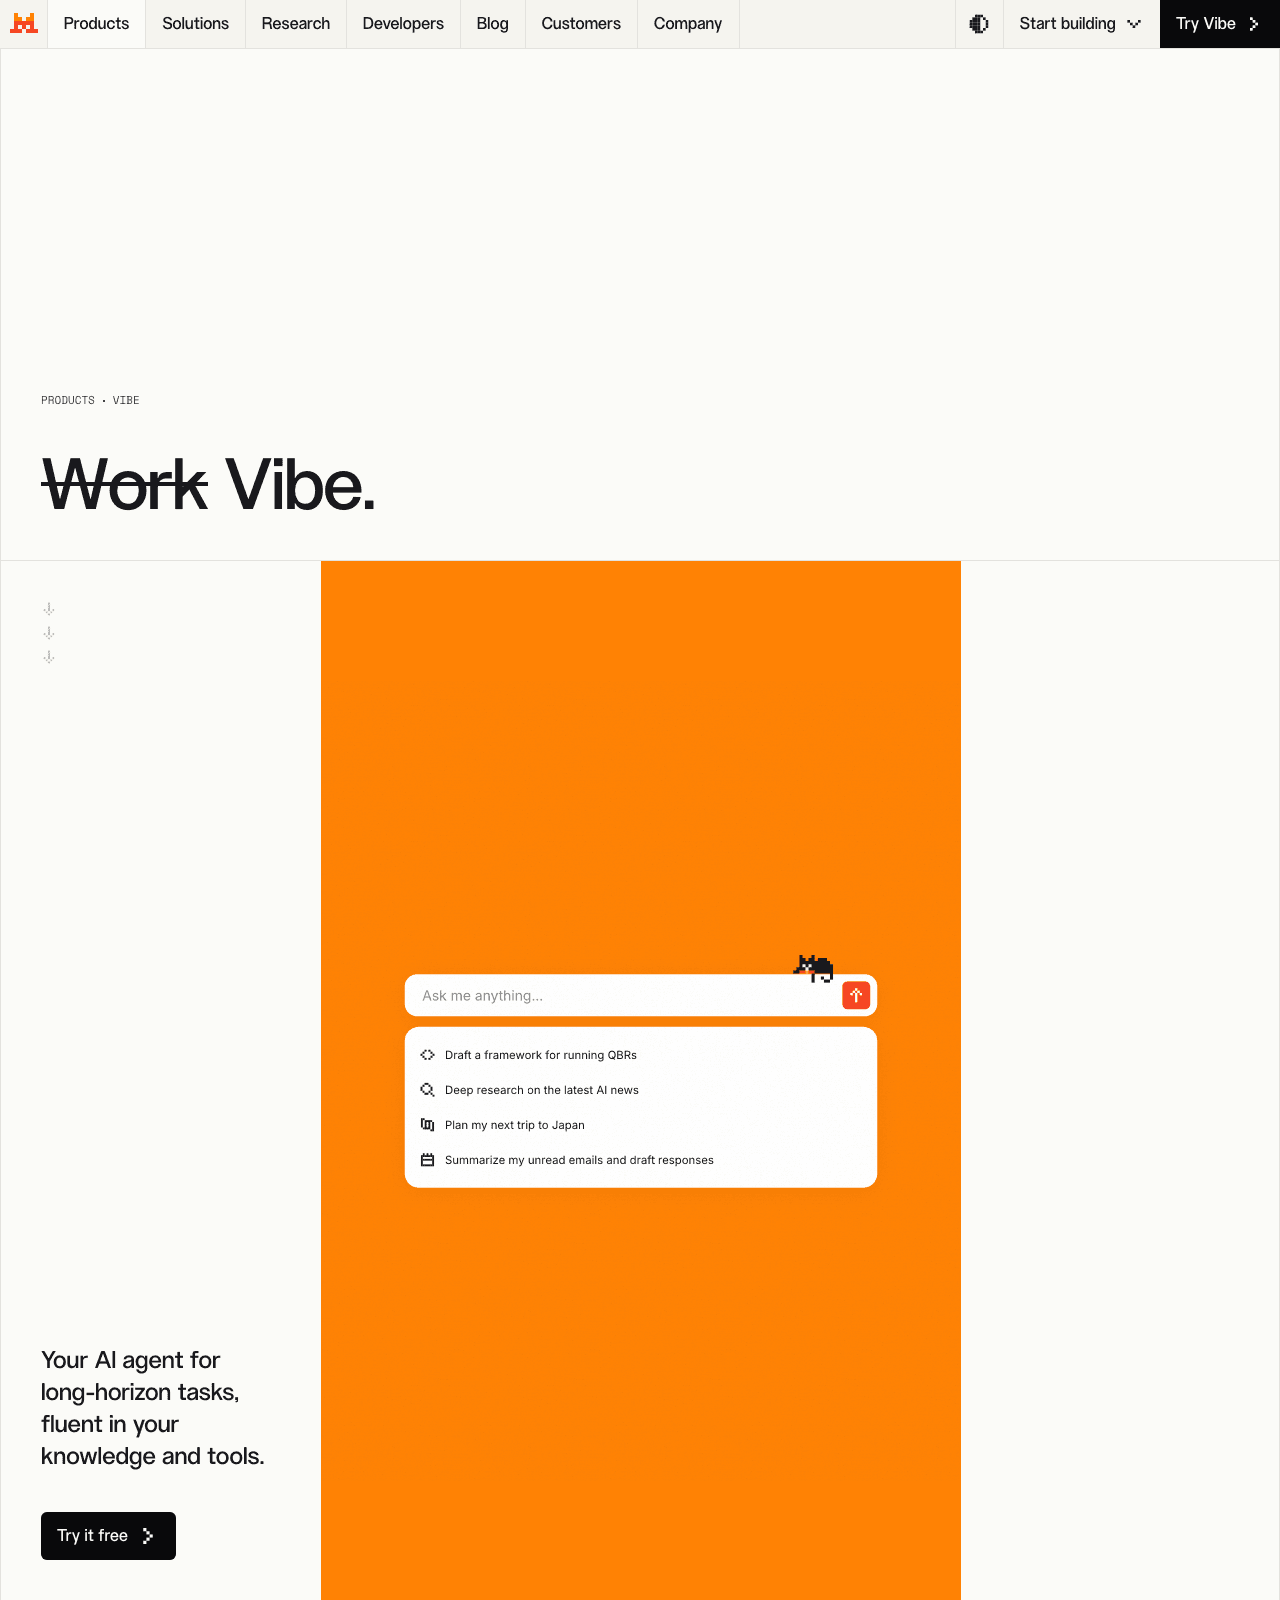
AI agent for long-horizon work — Plain-language reading: An agent aimed at multi-step, extended tasks; Source (checked 2026-08-13): mistral.ai/pricing
Coding agents in the terminal, IDE, and background — Plain-language reading: Coding help across three environments; Source (checked 2026-08-13): mistral.ai/pricing
Model customization — Plain-language reading: Adapting models to your data/use; Source (checked 2026-08-13): mistral.ai/pricing
Frontier-scale infrastructure for training and inference — Plain-language reading: Hosted compute for both phases; Source (checked 2026-08-13): mistral.ai/pricing
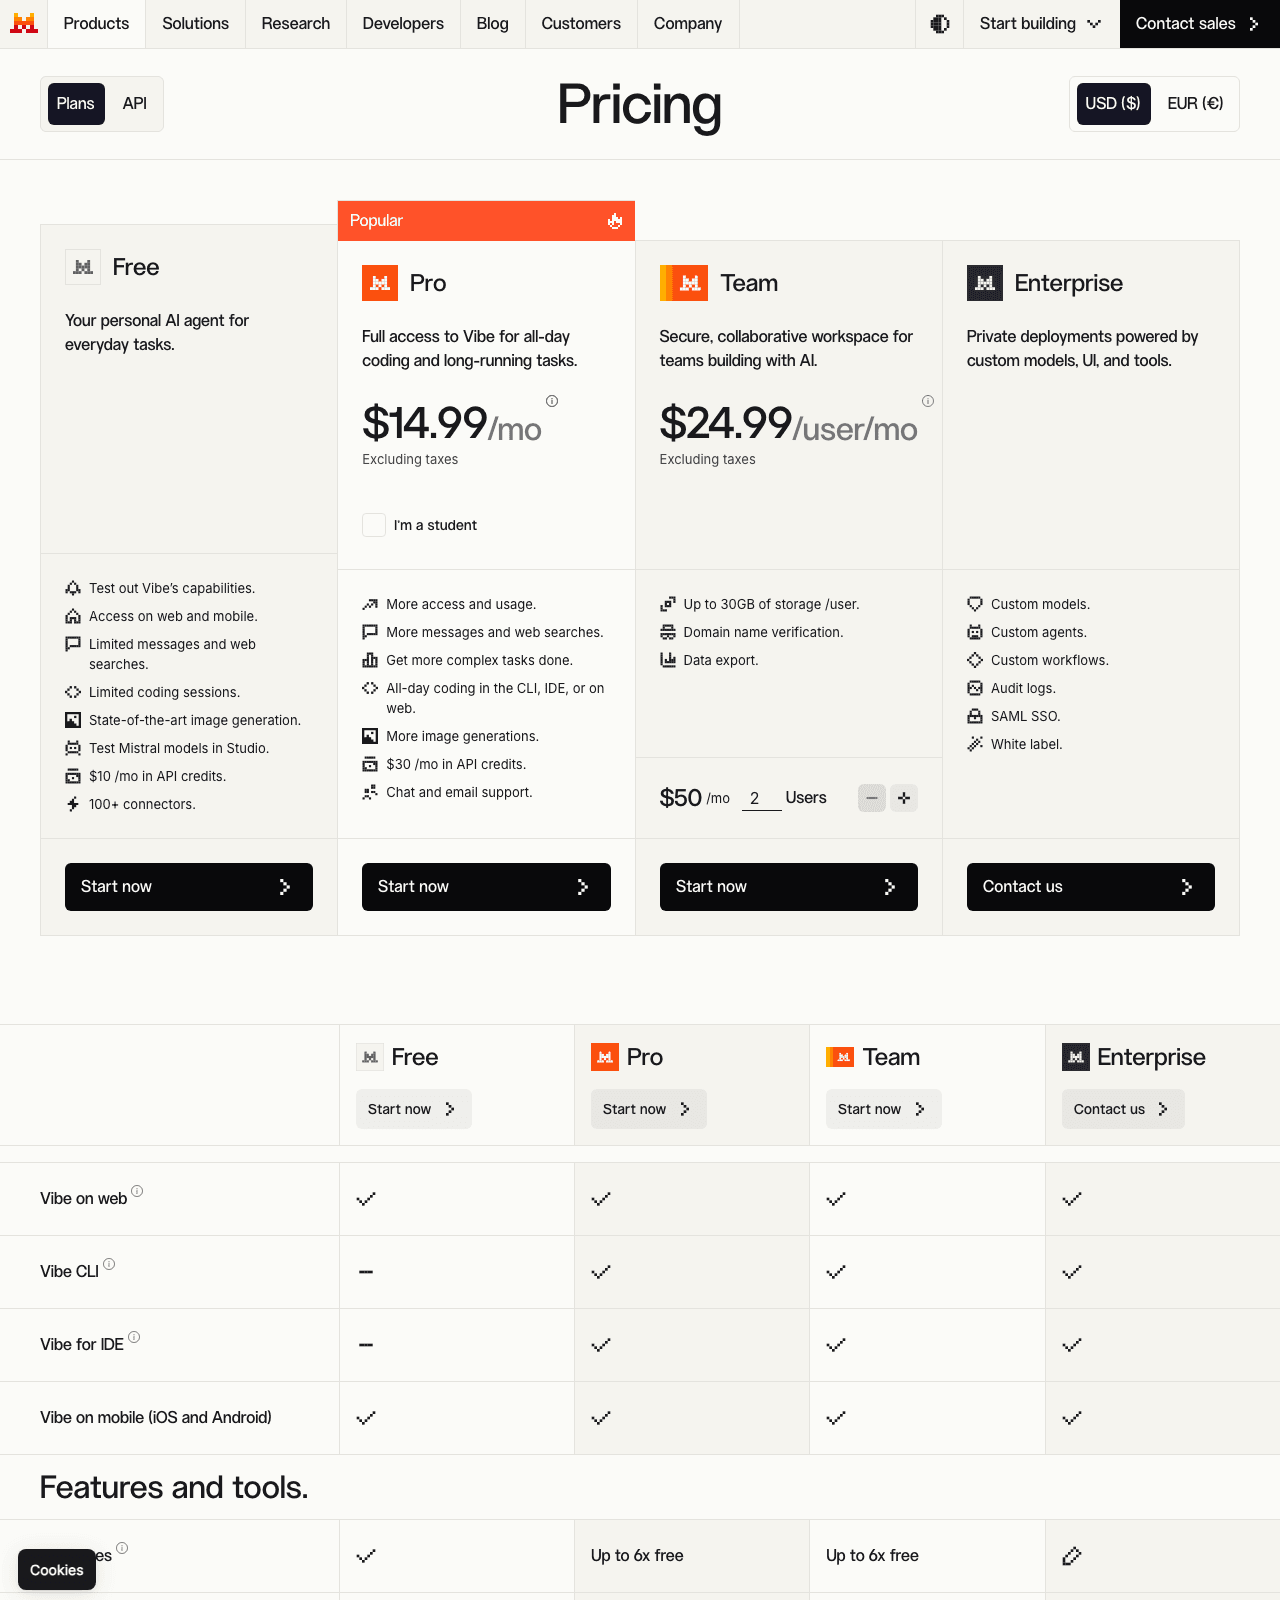
$10/mo (official pricing page, checked 2026-08-13) in API credits — Plain-language reading: A recurring API credit allotment; Source (checked 2026-08-13): mistral.ai/pricing
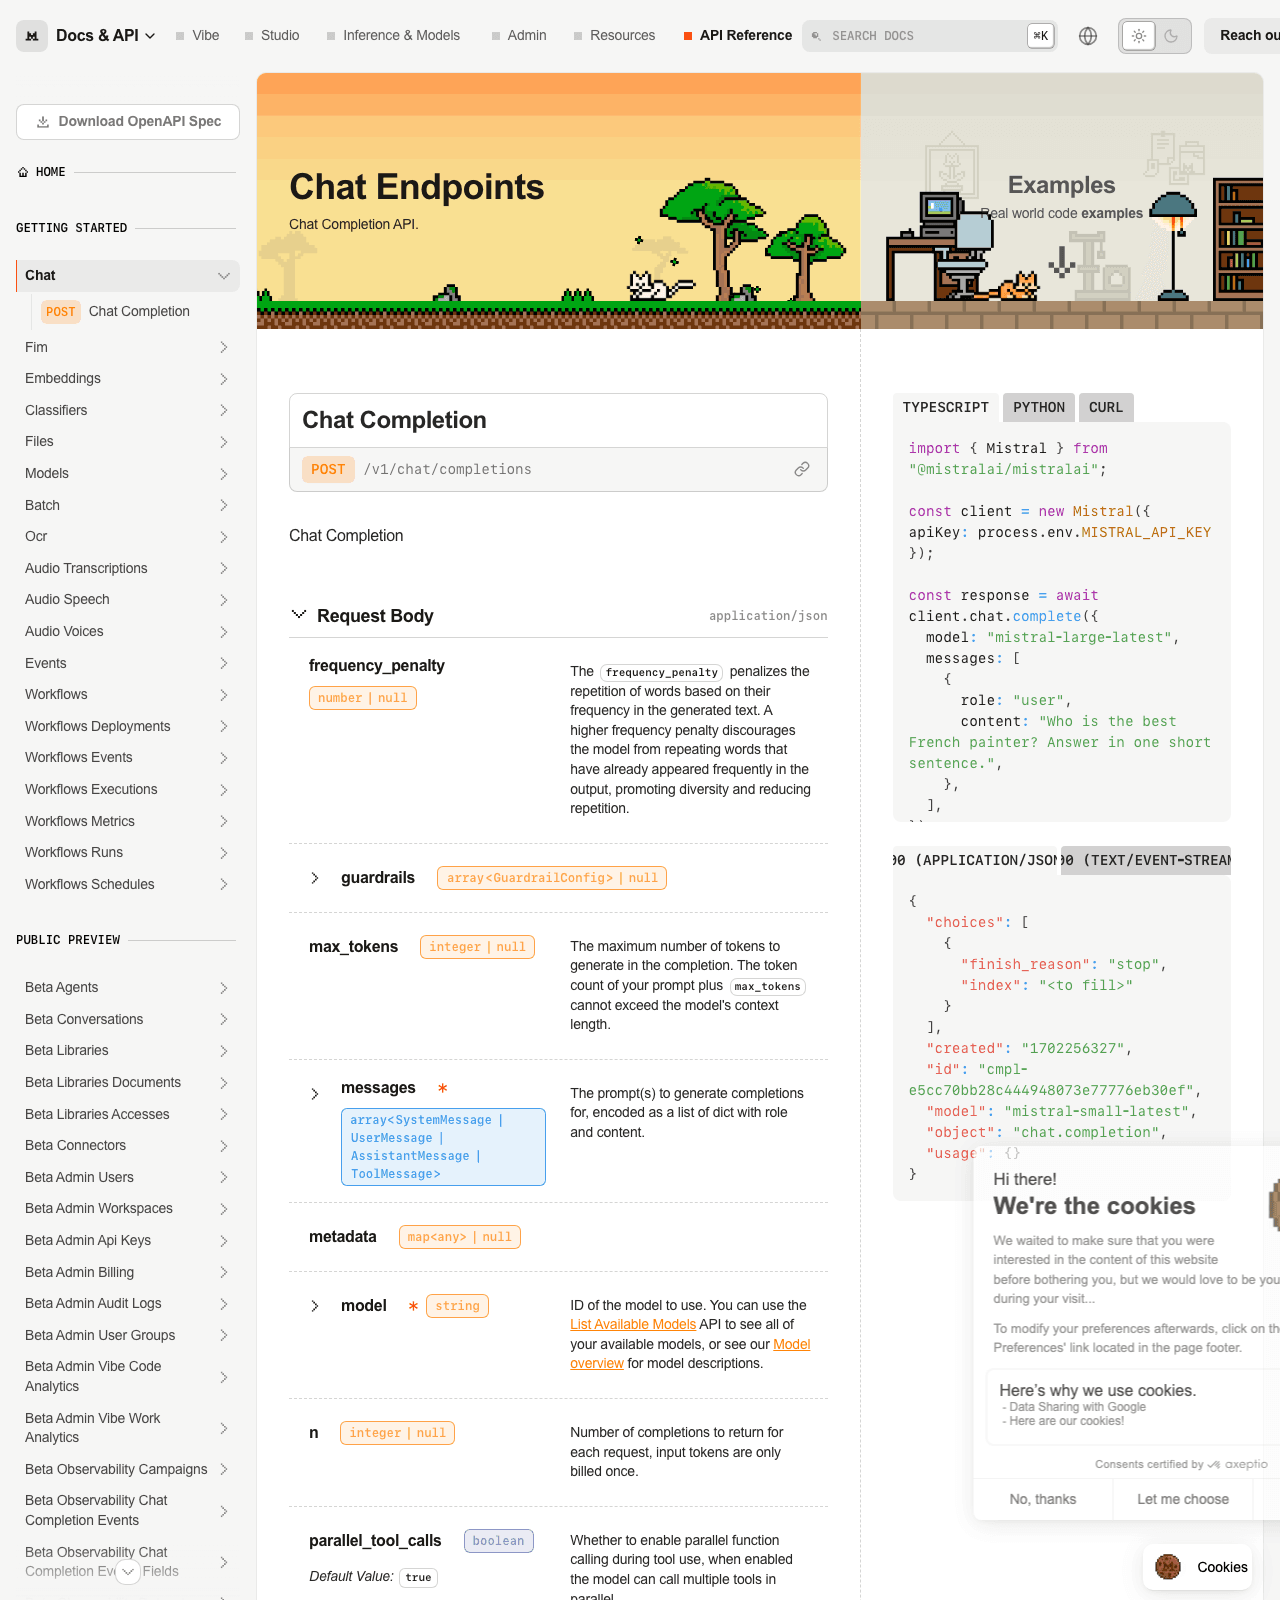
Chat API — Plain-language reading: A documented programmatic chat endpoint; Source (checked 2026-08-13): docs.mistral.ai/api
The middle column is my plain-language gloss, not a vendor claim — it’s just me restating the bullet in everyday words. The left and right columns are the parts you can go verify yourself. Notice what’s not in this table: no speed figures, no accuracy benchmarks, no “better than X” claims. That’s deliberate. The pricing page doesn’t publish those, and I’m not going to invent them. What the page does give you is a map of surface area, and surface area is genuinely useful for deciding whether a tool fits your workflow.
If you’re building agents vs. if you’re customizing models
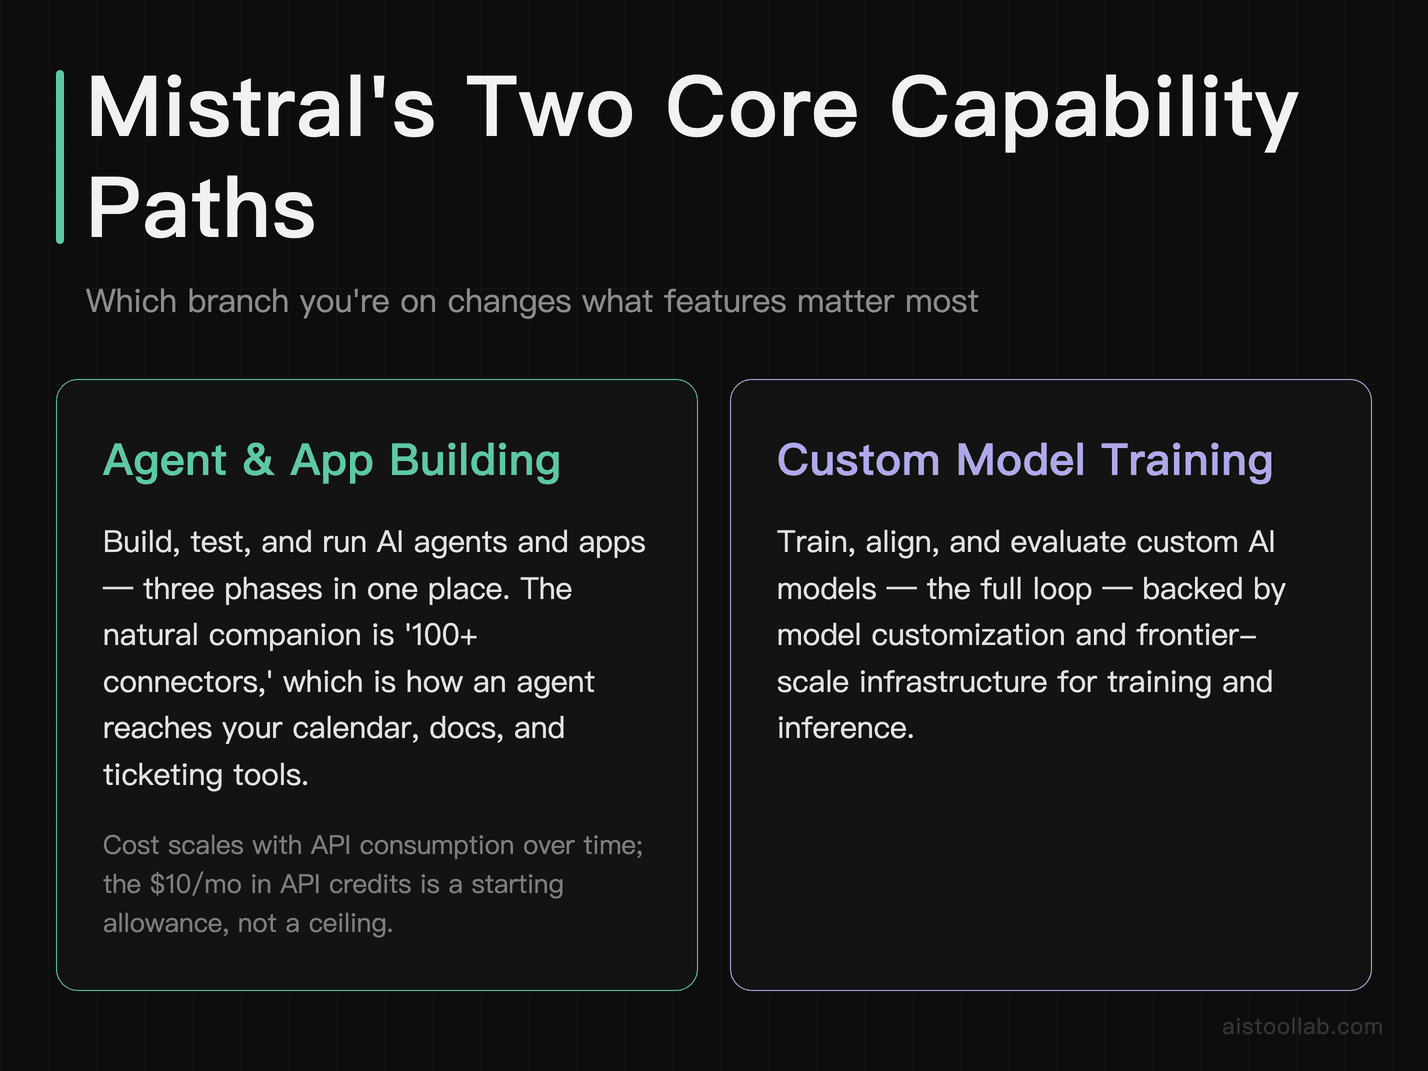
These are the two biggest branches on Mistral’s stated capability tree, and they attract very different users. Let’s separate them, because the money and effort implications diverge sharply.
If you’re building agents and apps, the relevant line is “Build, test, and run AI agents and apps” (per the official pricing page, checked 2026-08-13). Read that as three phases in one place: you assemble the agent, you exercise it against test cases, and you deploy it to run for real. The “100+ connectors” line is the natural companion here — an agent is only as useful as the systems it can reach, and connectors are how it touches your calendar, your docs, your ticketing tool, whatever. If your project is “wire a language model into an existing workflow and let it take actions,” this branch is where you’ll live. The cost question for you is mostly about API consumption over time, and the “$10/mo in API credits” line (same source and date) is a starting allowance, not a ceiling — more on that below.
If you’re customizing models, your line is “Train, align, and evaluate custom AI models,” backed by the separate “Model customization” and “Frontier-scale infrastructure for training and inference” entries. This is a different animal entirely. “Train, align, and evaluate” describes a loop, not a feature: you fine-tune a model on your data, you align its behavior toward what you want, and you evaluate whether it actually improved. The fact that Mistral lists “frontier-scale infrastructure for training and inference” on the same page tells you the vendor intends to host the heavy compute so you don’t stand up a GPU cluster yourself. If you’ve ever priced out doing this on raw infrastructure — the way I discussed in the Replicate API write-up — you know the appeal of a managed path. Whether Mistral’s managed path is cheaper for your workload is not something the pricing page settles, and I won’t pretend to know your token volumes.
Which branch are you on? That’s the first fork in the road. Agent-builders care about connectors and deployment; model-customizers care about training/eval loops and the compute underneath them. A lot of teams eventually want both, but they rarely start there, and starting on the wrong branch is how you overpay for capacity you don’t use yet.
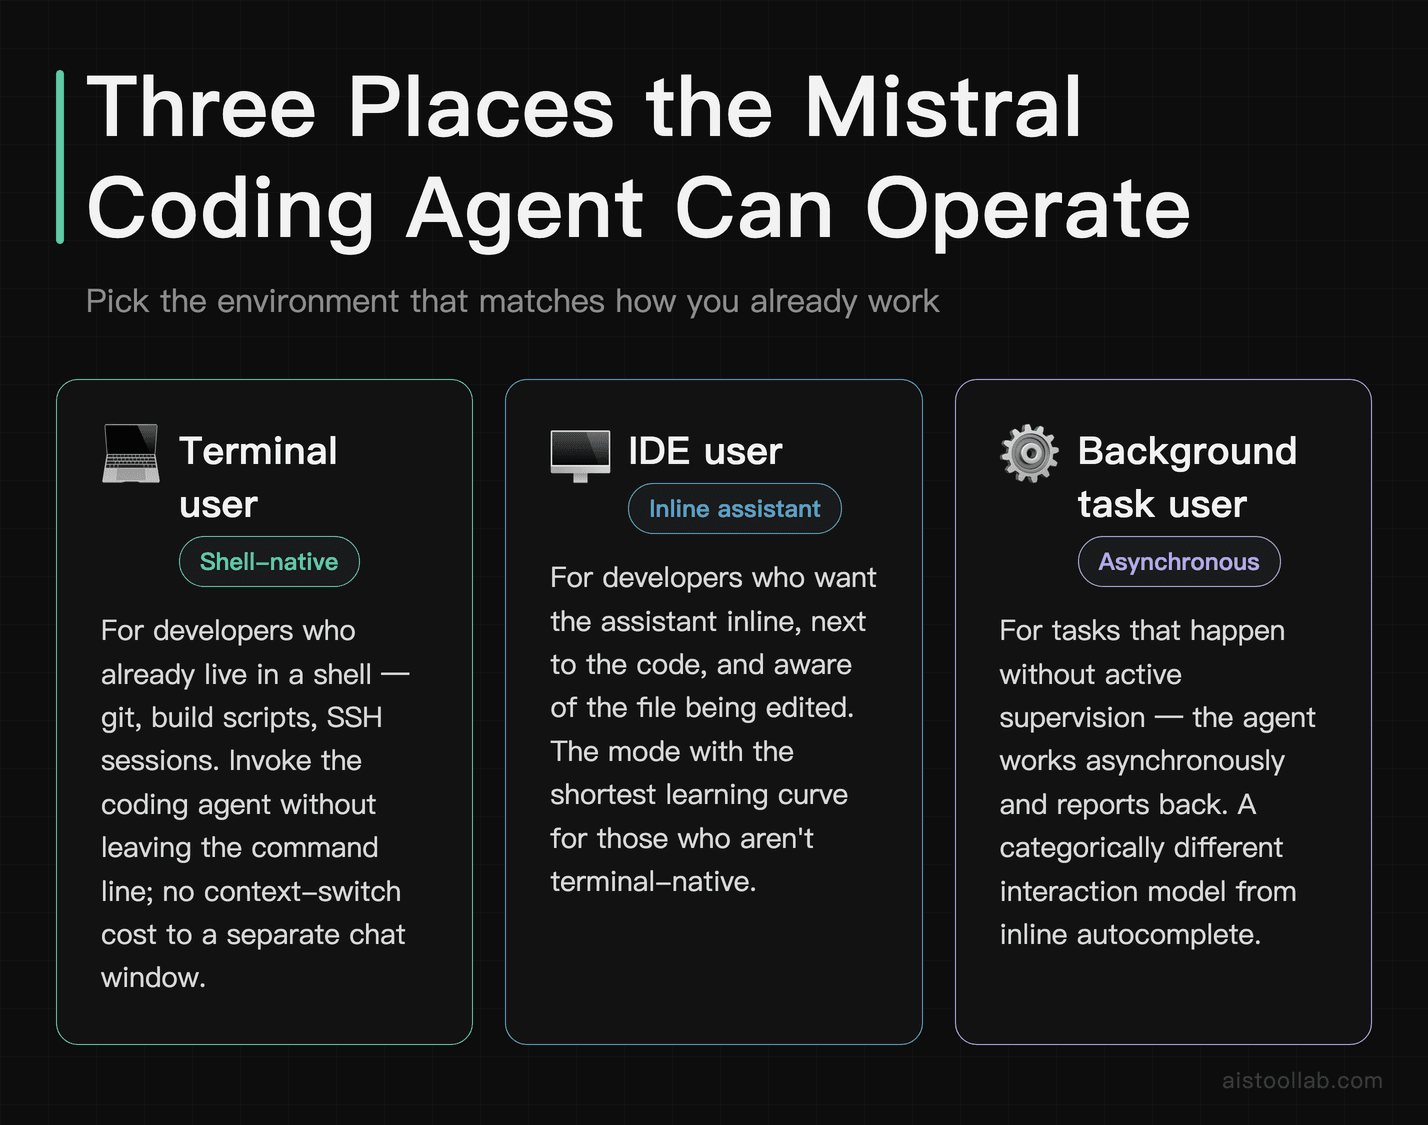
Terminal, IDE, or background: three homes for the coding agent
The line “Coding agents in the terminal, IDE, and background” (official pricing page, checked 2026-08-13) is doing more work than it looks. It names three distinct places a coding assistant can operate, and picking the right one is really a question about how you like to work.
The terminal is for people who already live in a shell. If your day is git, build scripts, and SSH sessions, an agent you can invoke without leaving the command line fits the muscle memory you already have. There’s no context-switch cost — you’re not tabbing over to a chat window and pasting code back and forth.
The IDE is the opposite temperament: you want the assistant inline, next to the code, aware of the file you’re editing. This is the mode most developers picture when they hear “coding assistant,” and it’s the one with the shortest learning curve for people who aren’t terminal-native.
The background is the most interesting of the three because it implies work that happens without you watching. A background coding agent is doing something asynchronous — running while you do other things and reporting back. That’s a categorically different interaction model from inline autocomplete, and it connects directly to the next capability worth its own section.
My honest read: the value of listing all three is optionality, but optionality has a cost in decision fatigue. If you’re evaluating this, don’t try to use all three at once. Pick the one that matches where you already spend your hours — terminal people to the terminal, IDE people to the IDE — and only reach for the background mode when you have a task that genuinely benefits from running unattended.
What “long-horizon work” actually implies
Mistral lists an “AI agent for long-horizon work” (official pricing page, checked 2026-08-13), and that phrase deserves unpacking because it’s the kind of line that sounds impressive and means very little until you translate it.
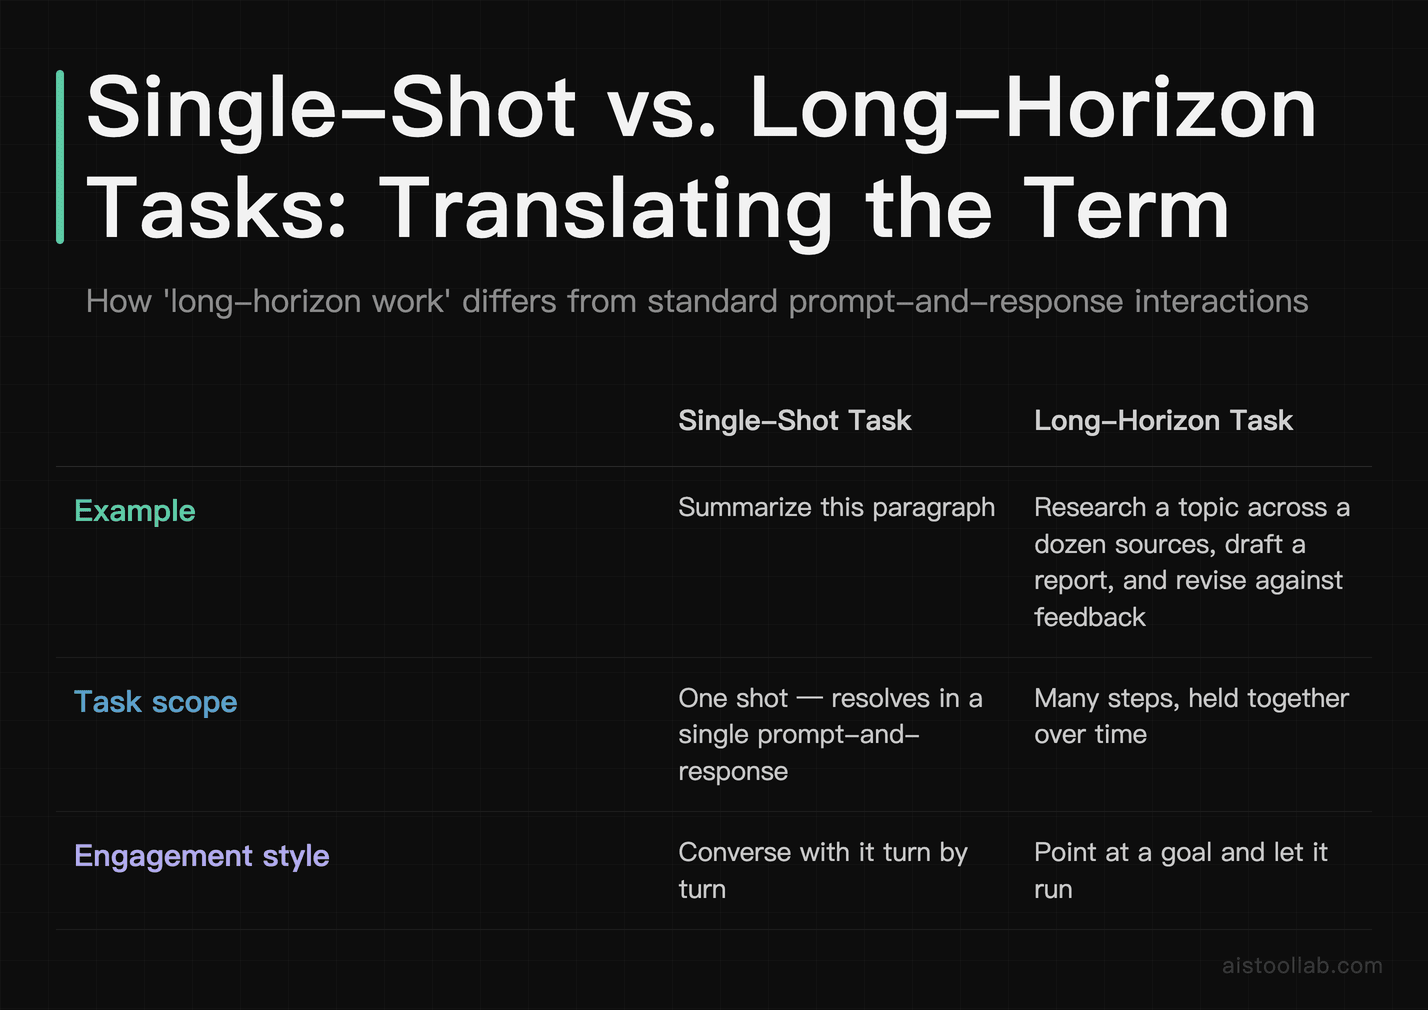
“Long-horizon” is agent-speak for tasks that span many steps and don’t resolve in a single prompt-and-response. Think of the difference between “summarize this paragraph” (one shot) and “research this topic across a dozen sources, draft a report, and revise it against feedback” (many steps, held together over time). Long-horizon agents are the ones you point at a goal and let run, rather than the ones you converse with turn by turn. If you want the broader research context on how these agents plan and pick their steps, I dug into that in How Do AI Agents Choose and Use Tools.
Here’s where I’ll offer a judgment grounded in the documentation rather than a performance claim I can’t back: the presence of a long-horizon agent alongside the background coding agent tells you Mistral is building toward unattended, multi-step automation, not just chat. That’s a coherent product direction, and if your problem is “I need something that grinds through a long task while I’m in meetings,” this is the line to circle. But the pricing page publishes no figures on how reliably it completes those tasks, how long “long” is, or what it costs to run one to completion. So the honest position is: the capability is stated, the fit is plausible for extended-task workflows, and the performance is unproven from public docs alone. If reliability on multi-step work is your deciding factor, you’ll need to trial it against your own tasks — the docs won’t answer that for you.
Reading the $10/mo API credit without kidding yourself
The single number this whole angle keeps circling back to is “$10/mo in API credits” — and it is listed under the Free plan, not a paid tier (per Mistral’s official pricing page, checked 2026-08-13; the Pro plan at $14.99/mo lists “$30 /mo in API credits” instead). It’s the most concrete money figure the page hands you, so it’s worth reading carefully rather than optimistically.
A recurring API credit is not the same as “the platform is free.” It’s a monthly allowance against usage-based billing. The mental model to hold: the meter runs on what you consume through the API, and the credit offsets the first slice of that each month. For light experimentation — poking at the Fireworks AI Pricing-style question of “what does a small workload actually cost” — a monthly credit is genuinely useful, because it lets you build and test without watching a bill accumulate from dollar zero. For anything at production volume, a fixed monthly credit is a rounding error against real throughput, and you should plan on paying beyond it.
What the pricing page does not tell you, and what I therefore won’t invent, is the per-token or per-request rate that the credit is spent against. Without that rate, “$10/mo in API credits” can’t be converted into “X requests per month” — the credit’s real value depends entirely on the underlying pricing, which you should read off the specific plan you’re considering on the day you sign up, because vendor rates change. Treat the credit as a “try before you scale” gesture, not as a budget you can plan a business around.
Where the official docs go quiet
An honest capability review has to name the gaps, and there are a few worth flagging so you don’t walk in expecting answers the documentation doesn’t give.
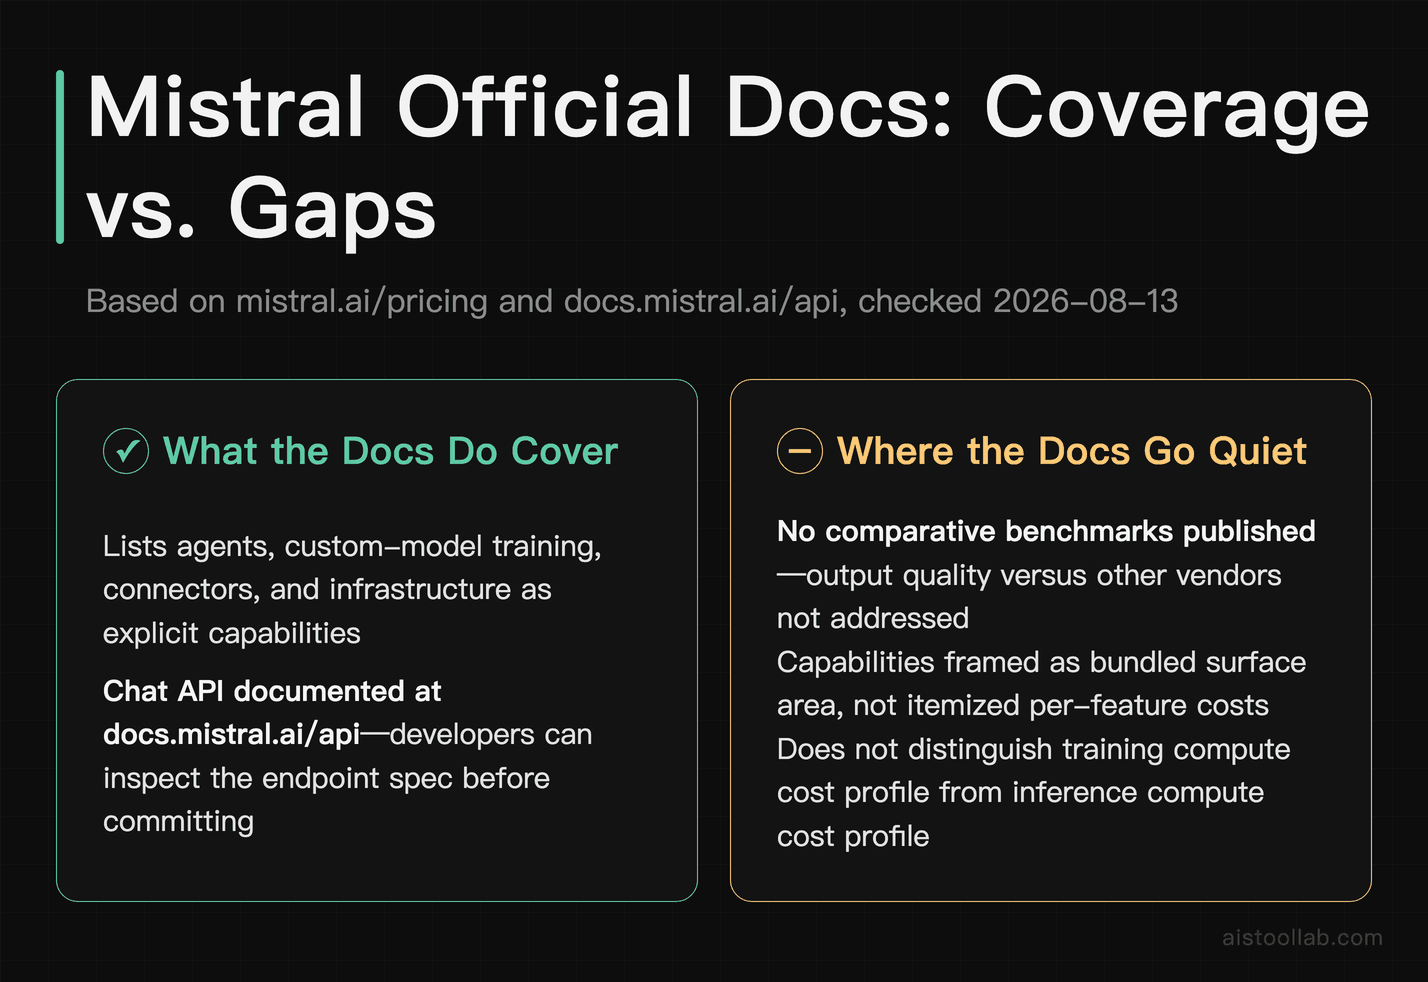
The pricing page is strong on what and weak on how much under load. It lists agents, custom-model training, connectors, and infrastructure, but it doesn’t publish comparative benchmarks, and I’m not going to manufacture them. If your evaluation hinges on “how does its output quality compare to another vendor’s,” the official pages won’t settle that, and neither will I — that’s exactly the kind of claim that needs an independent test, which this article does not have.
The documentation also frames capabilities as bundled surface area rather than clearly itemized line-item costs for each feature. “Frontier-scale infrastructure for training and inference” is a reassuring phrase, but training compute and inference compute have very different cost profiles in practice, and one line can’t tell you which will dominate your bill. The Chat API is documented (docs.mistral.ai/api, checked 2026-08-13), which is the right first stop if you’re a developer who wants to see the actual request shape before committing — reading the endpoint spec beats reading marketing bullets every time. I make that same point in The Documentation Checklist Every AI Tool Needs: the docs quality is itself a signal, and a documented Chat API is a good one.
So my compiled verdict on the gaps: Mistral’s public pages are a solid map of capability breadth, and a poor map of cost-at-scale. That’s not a knock unique to Mistral — most vendors publish it this way — but it means the pricing page is where you start your evaluation, not where you finish it.
Who this capability set is actually written for
Pulling the threads together, here’s how I’d match Mistral’s stated capabilities to the person reading them — bound to what you’re doing, not to an overall crown I have no evidence to award.
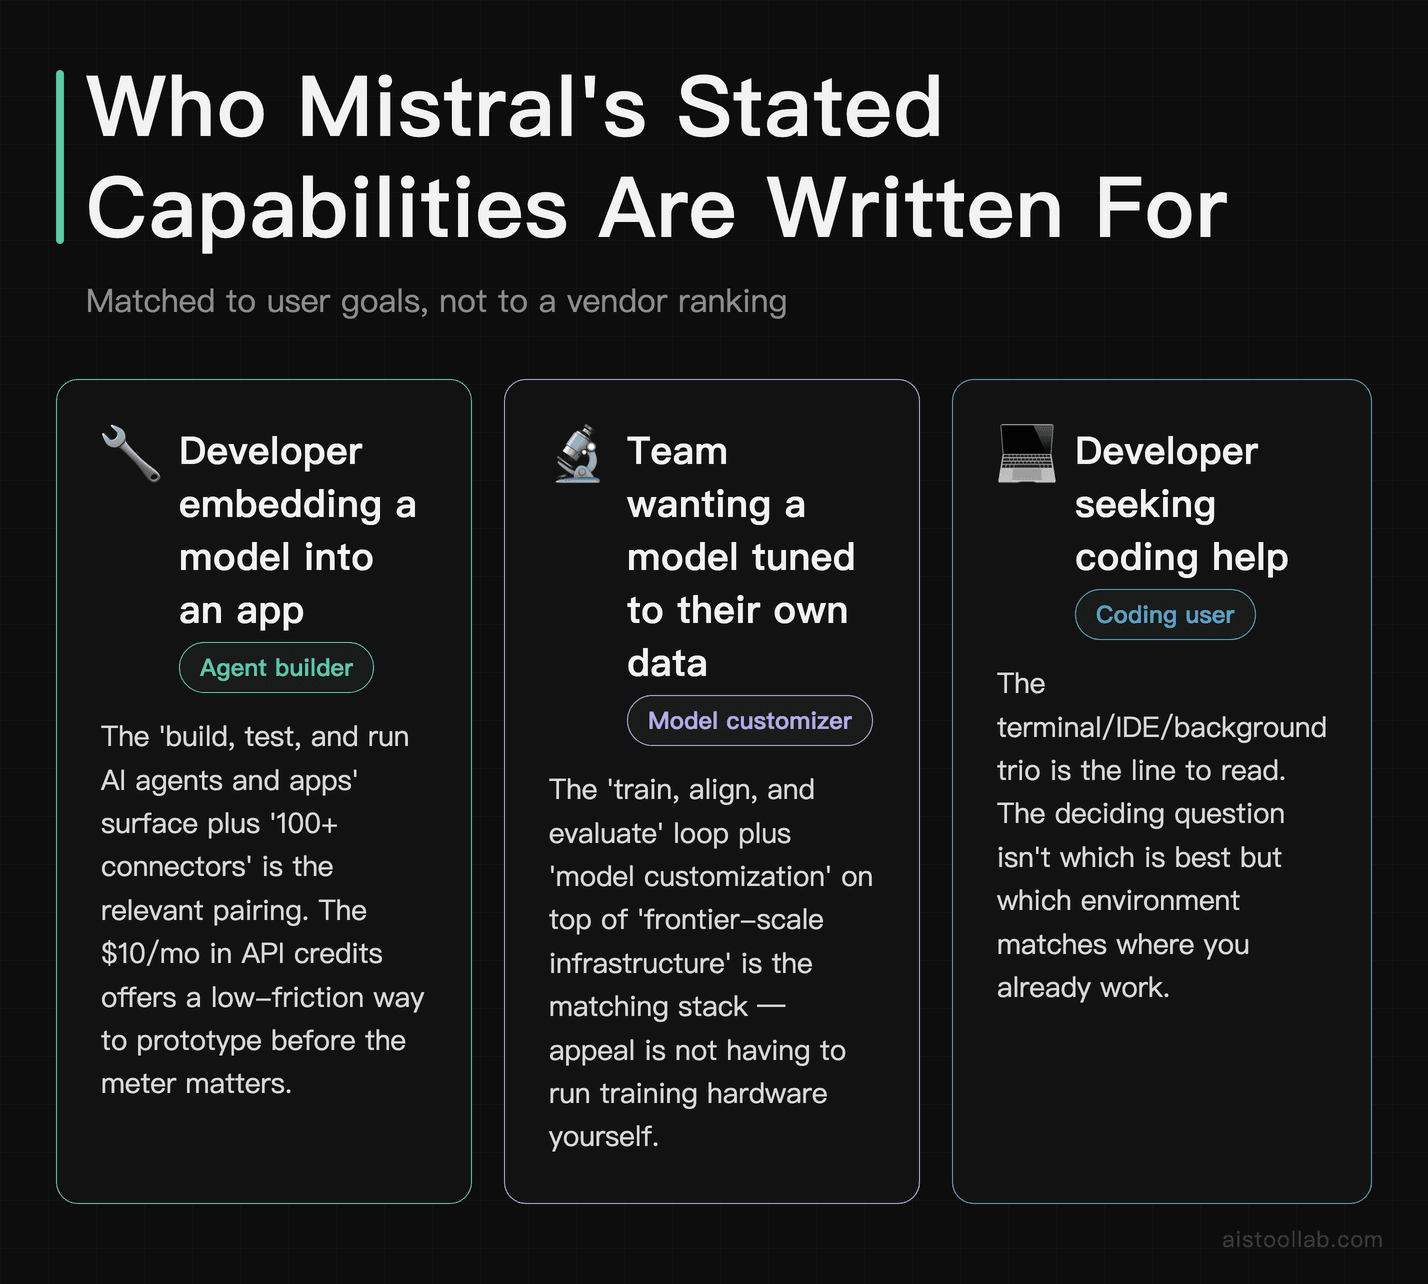
If you’re a developer who wants to embed a model in an app and have it take actions, the “build, test, and run AI agents and apps” surface plus “100+ connectors” is the relevant pairing, and the “$10/mo in API credits” on the Free plan gives you a low-friction way to prototype before the meter matters. On that combination — a development surface plus a starter credit — this is a reasonable place to begin building.
If your goal is a model tuned to your own data, the “train, align, and evaluate” loop plus “model customization” on top of “frontier-scale infrastructure” is the stack that speaks to you, and the appeal is not having to run the training hardware yourself. Whether that’s cheaper than alternatives for your specific volume is a calculation the docs can’t do for you — so trial it against a real workload before you commit budget.
If you mostly want coding help, the terminal/IDE/background trio is the line to read, and the deciding question isn’t “which is best” but “which matches where you already work.” Terminal-natives to the terminal, IDE-first developers to the IDE, and the background mode when a task genuinely benefits from running unattended.
What I won’t do is tell you it’s the strongest option on the market or that it beats a competitor — the public documentation doesn’t support that claim, and inventing it would be dishonest. What I can say from the docs is that the capability breadth is coherent and wide, the starting credit lowers the cost of trying, and the real spending question lives one level below the pricing page, in the per-use rates you should read on the day you sign up. Start with the branch that matches your actual work, use the credit to prototype, and treat everything about cost-at-scale as something you verify yourself rather than something the marketing page has already answered.
Official pricing page, captured 2026-08-13 (public page, not signed in)Official documentation page, captured 2026-08-13 (public page, not signed in)Official product page, captured 2026-08-13 (public page, not signed in)
Frequently Asked Questions
Does the $10/mo API credit mean I can use Mistral for free?
No, and it’s worth being precise about why. Per Mistral’s official pricing page (checked 2026-08-13), one thing you get is “$10/mo in API credits.” A credit is an allowance applied against usage-based billing, not a flat free tier. The mental model that keeps you out of trouble: your API usage accrues cost as you consume it, and the monthly credit offsets the first portion of that cost each month. For low-volume experimentation — building a prototype, testing an agent against a handful of cases — that allowance can genuinely cover you, which is the point of offering it. For sustained or production-level usage, a fixed monthly credit is small relative to real throughput, and you should plan on paying beyond it. Critically, the pricing page doesn’t publish the per-token or per-request rate that the credit is spent against, so I can’t convert “$10/mo” into a specific request count for you, and I won’t guess. Read the exact rate on the plan you’re considering, on the day you sign up, because vendor rates change over time.
Do I need my own GPUs to train a custom model on Mistral?
Based on what the official pricing page states (checked 2026-08-13), the platform lists “frontier-scale infrastructure for training and inference” alongside “train, align, and evaluate custom AI models” and “model customization.” Read together, that framing points to a managed path — the vendor provides the training and inference compute rather than expecting you to stand up your own hardware. So the intent, as documented, is that you don’t bring your own GPU cluster to fine-tune a model. What the documentation does not tell you is the cost of that managed compute for a specific job, and training compute and inference compute have very different cost shapes, so one bundled line can’t predict your bill. If a managed training path is the reason you’re considering Mistral, that’s a legitimate draw, but the deciding factor should be a real cost estimate against your own data volume and how often you’ll retrain — not the reassurance of the phrase “frontier-scale,” which describes capability, not price. The docs give you the capability claim; you supply the workload math.
Say you’ve got a landing page half-built in your head — a portfolio, a product teaser, a “coming soon” for the thing you keep meaning to launch. You open a website builder’s pricing page hoping for a quick yes or no, and instead you get four columns, a credit system you’ve never heard of, and the nagging suspicion that the cheap option is deliberately hobbled.
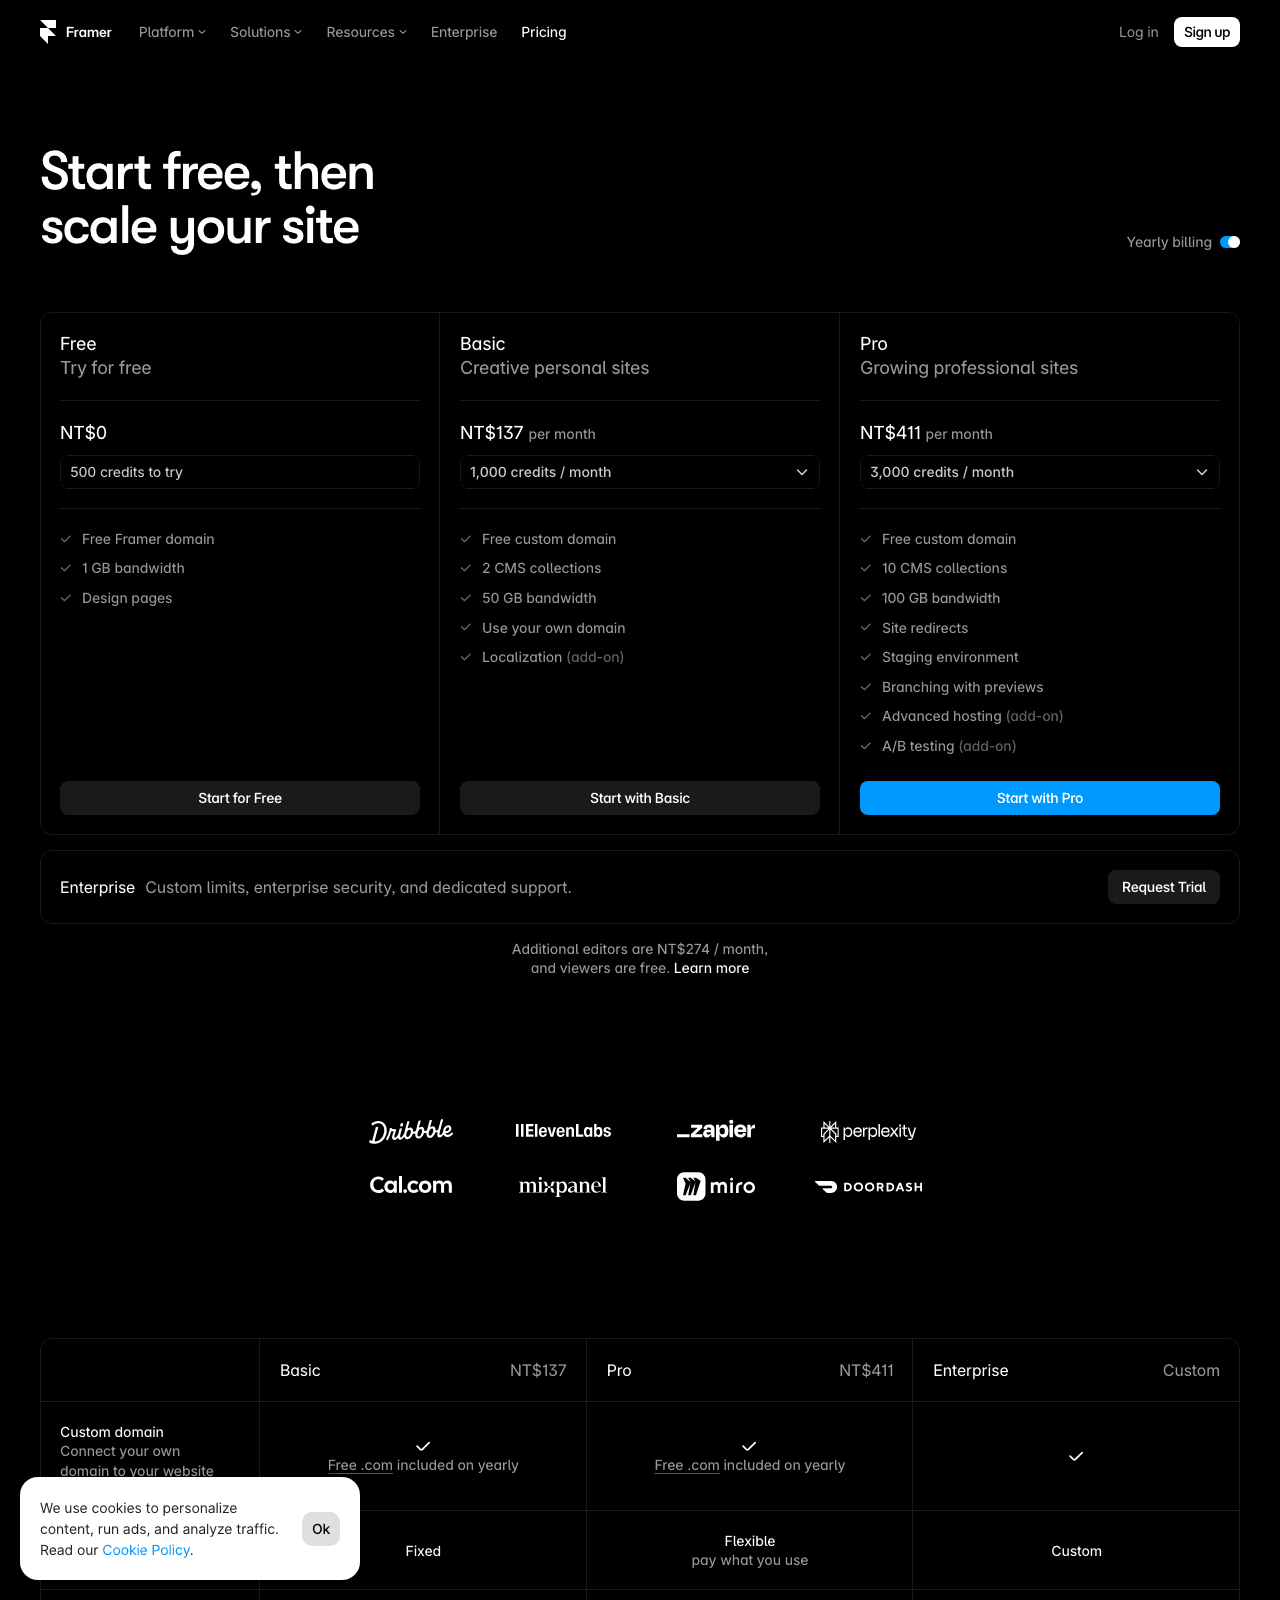
Framer’s pricing page is worth reading slowly for exactly that reason. It reads less like “pick a price” and more like “pick where you are on a ladder.” So rather than re-typing the vendor’s feature list, I want to walk through what the official page actually commits to — and, just as usefully, what it leaves you to confirm for yourself.
Everything below is compiled from Framer’s official pricing page (framer.com/pricing, checked 2026-08-12). I didn’t run the builder for this piece, so you won’t get any “here’s how fast it felt” lines — just what the page states, plus my read on who each tier is realistically for.
The free tier is the pitch, not the bait
Most builders use “free” as a shop window: you can look, you can drag a few boxes around, but the moment you want to publish something real, a paywall drops. It’s easy to assume Framer works the same way. Reading the pricing page, I don’t think that’s the framing they’re going for.
The headline on the page is “Start free, then scale your site” (per Framer’s official pricing page, checked 2026-08-12). That’s a small phrase doing a lot of work. “Start” implies the free plan is a genuine beginning, not a locked demo, and “then scale” implies the paid tiers are steps you take when you outgrow the first one — not a toll you pay just to get through the door.
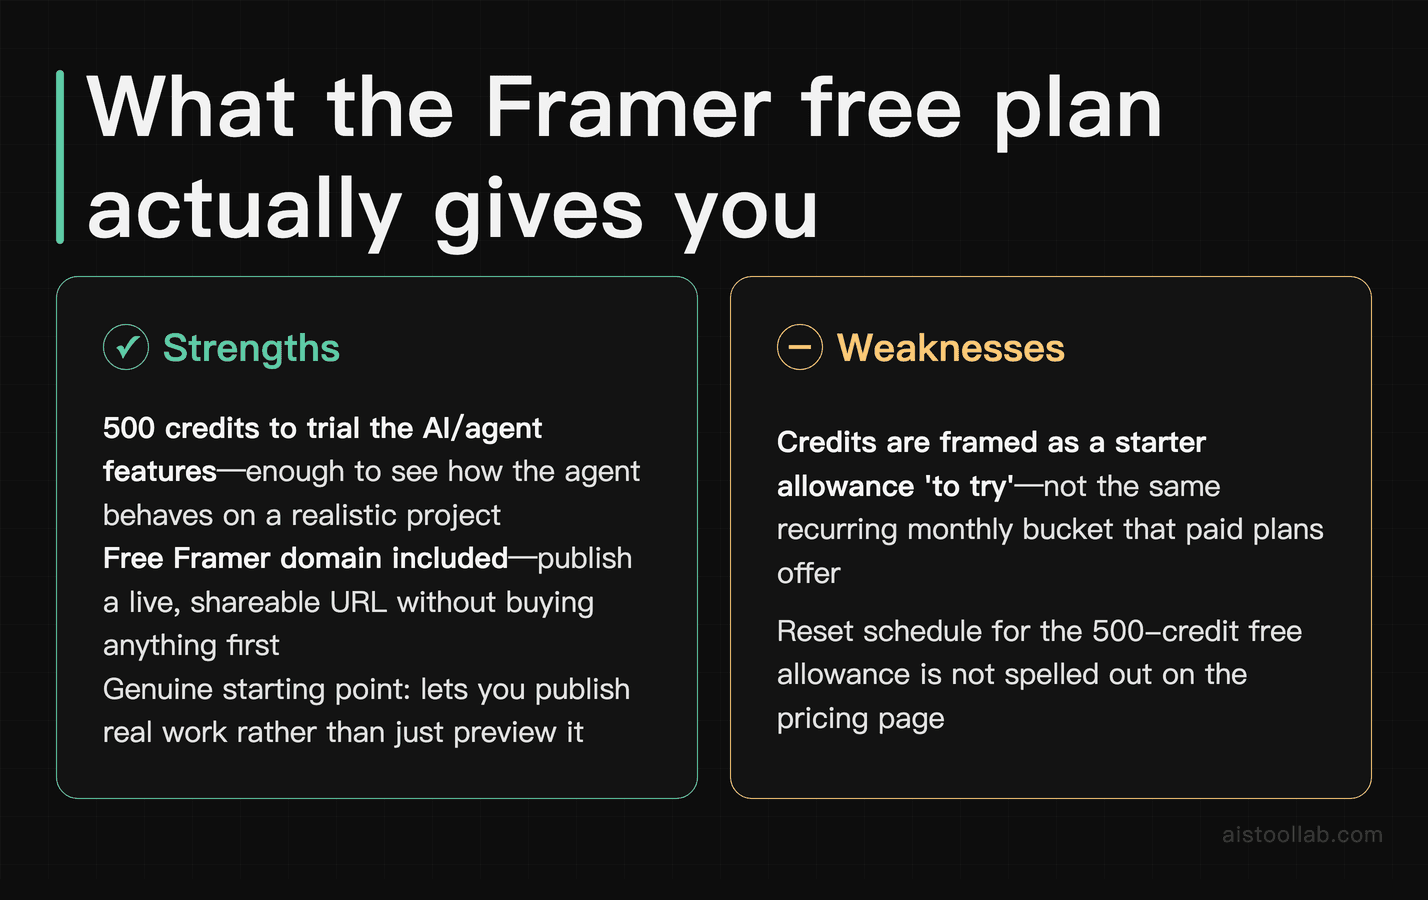
Two concrete things back that reading up. The free plan comes with 500 credits to try, and it includes a free Framer domain (both per the official pricing page, checked 2026-08-12). The credits let you actually use Framer’s AI/agent features rather than just look at them, and the free domain means you can publish and share a live URL without buying anything first. Publishing, not previewing, is the part that matters here — a lot of “free” tiers stop right before you can put your work in front of another human.
Here’s my honest caveat, though: “start free, then scale” is a positioning line, not a promise that you’ll never hit a wall. It tells you the free tier is a real starting point; it does not tell you exactly where the ceiling sits, and the pricing page frames the paid tiers as the place you go when you need more. So treat free as a legitimate on-ramp for trying the builder and shipping a first site — just don’t assume it’s an infinite runway. The rest of this piece is really about reading where that runway ends before you commit a card.
Step 1: Read the free plan for exactly what it includes
Before comparing anything, it’s worth pinning down what “free” actually buys you, because the free plan is doing three separate jobs and it’s easy to blur them together.
The 500 credits. Framer’s pricing page lists “500 credits to try” on the free plan (checked 2026-08-12). Credits are Framer’s currency for its AI/agent features — the paid tiers are described in terms of monthly credit allowances, and this free grant is phrased as an amount “to try.” That wording is doing something specific: it reads as a starter allowance to test-drive the AI features, not the same kind of recurring monthly bucket that the paid plans advertise. I’d budget your expectations accordingly — 500 credits is enough to see how the agent behaves and whether it fits how you work, not a bottomless supply for daily production. The page doesn’t spell out a reset schedule for that free allowance in the copy I verified, so if the difference between “one-time” and “monthly” matters to your plan, that’s the first thing to confirm directly on the pricing page.
The free Framer domain. This is the underrated one. A free Framer domain (per the official pricing page, checked 2026-08-12) means you can publish a live site on a Framer subdomain without paying for hosting or buying a custom domain to go live. For a portfolio, a personal site, or a quick campaign page, that’s often all you need — a real URL you can drop into a bio, a Slack thread, or an email signature. If and when you want your own yourname.com in front of it, that’s a separate decision, and the excerpts I checked don’t detail custom-domain handling per tier, so I won’t pretend to know where that kicks in.
The permission to start. The third job is the least tangible but arguably the point: the free plan is framed as the beginning of “start free, then scale.” Practically, that means you can build, publish, and get a feel for whether Framer suits your workflow before any money changes hands. If you’ve priced out other credit-based or usage-based tools — I went through a similar exercise reading Fireworks AI Pricing — you’ll recognize the pattern: the free grant exists to let you calibrate your real usage before you pick a paid tier, not to be your permanent home. Use it as a measuring stick. The clearer you are on how many credits your actual projects burn, the less guessing you’ll do when you look at the paid columns.
Step 2: Line the four tiers up side by side
Framer offers four pricing plans: Free, Basic, Pro, and Enterprise (per the official pricing page, checked 2026-08-12). That four-rung structure is the skeleton of the whole page, so it helps to see it laid out plainly.
One thing before the table: I’m orienting this comparison for a solo builder or a small team deciding whether to start on Free or step up to a paid tier — not for an enterprise procurement team weighing custom contracts. Where the official page states a figure, I’ve cited it; where the page lists details I can’t confidently map to a specific column from the excerpts I verified, I’ve said so rather than guess. If a cell reads “see pricing page,” that’s me refusing to invent a number, not the vendor hiding one.
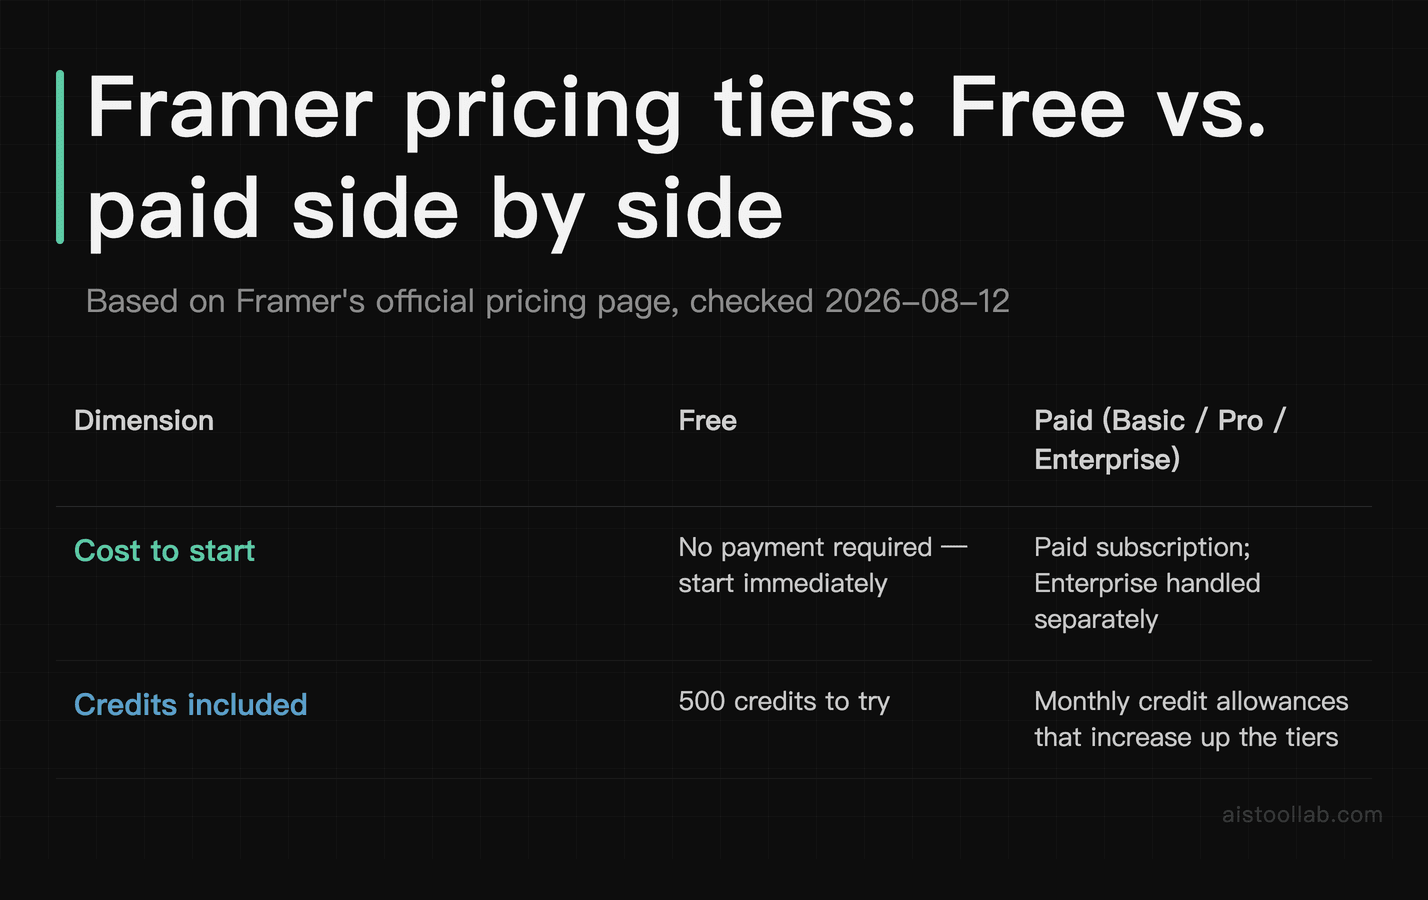
Cost to start — Free: Start free — no payment to begin (official pricing page, checked 2026-08-12); Paid tiers (Basic / Pro / Enterprise): A paid subscription; Enterprise is handled separately — see current figures on the official pricing page (checked 2026-08-12)
Credits included — Free: 500 credits to try (official pricing page, checked 2026-08-12); Paid tiers (Basic / Pro / Enterprise): Monthly credit allowances that increase up the ladder — see pricing page (checked 2026-08-12)
Credit type — Free: A starter allowance “to try”; Paid tiers (Basic / Pro / Enterprise): Recurring monthly credits (per the pricing page’s tier descriptions, checked 2026-08-12)
Framer domain — Free: Free Framer domain included (official pricing page, checked 2026-08-12); Paid tiers (Basic / Pro / Enterprise): Custom-domain handling not detailed in the excerpts I verified — see pricing page (checked 2026-08-12)
Number of named tiers here — Free: One (the entry tier); Paid tiers (Basic / Pro / Enterprise): Three: Basic, Pro, Enterprise (official pricing page, checked 2026-08-12)
Pro Experts agent-credit discount — Free: Not applicable; Paid tiers (Basic / Pro / Enterprise): Pro Experts save 50% on agent credits (official pricing page, checked 2026-08-12)
Intended role — Free: Where you begin; Paid tiers (Basic / Pro / Enterprise): Where you “scale your site” (official pricing page, checked 2026-08-12)
Good starting point for — Free: Trying the builder and shipping a first site on a Framer subdomain (from the 500 credits + free domain above); Paid tiers (Basic / Pro / Enterprise): Ongoing or heavier use where monthly credit volume and scaling matter
The row that deserves a second look is the Pro Experts one. The pricing page states that Pro Experts save 50% on agent credits (checked 2026-08-12). That’s a targeted discount, not a blanket one — it’s tied to Framer’s Experts program rather than to every Pro subscriber automatically. The excerpts I verified don’t define who qualifies as a “Pro Expert,” so I won’t guess at the eligibility bar; if you build sites professionally and expect to lean on the agent features, that 50% is the line item to investigate on the page, because a halved rate on your heaviest cost is exactly where a credit-based plan either works out or doesn’t.
Notice how few hard numbers I’ve been able to responsibly put in that table. That’s the nature of a credit-and-tier model: the pricing page carries the specifics, and those specifics move. Which is precisely why I’d resist choosing a paid tier on paper. Start on free, watch how many credits your real projects consume, and let that number pick the tier for you.
Step 3: Match a tier to what you’re actually shipping
Plans only mean something against a project. Here are three situations where the choice is fairly clear-cut, framed as “if this is you.” None of these are real named users — they’re hypotheticals to think through your own case.
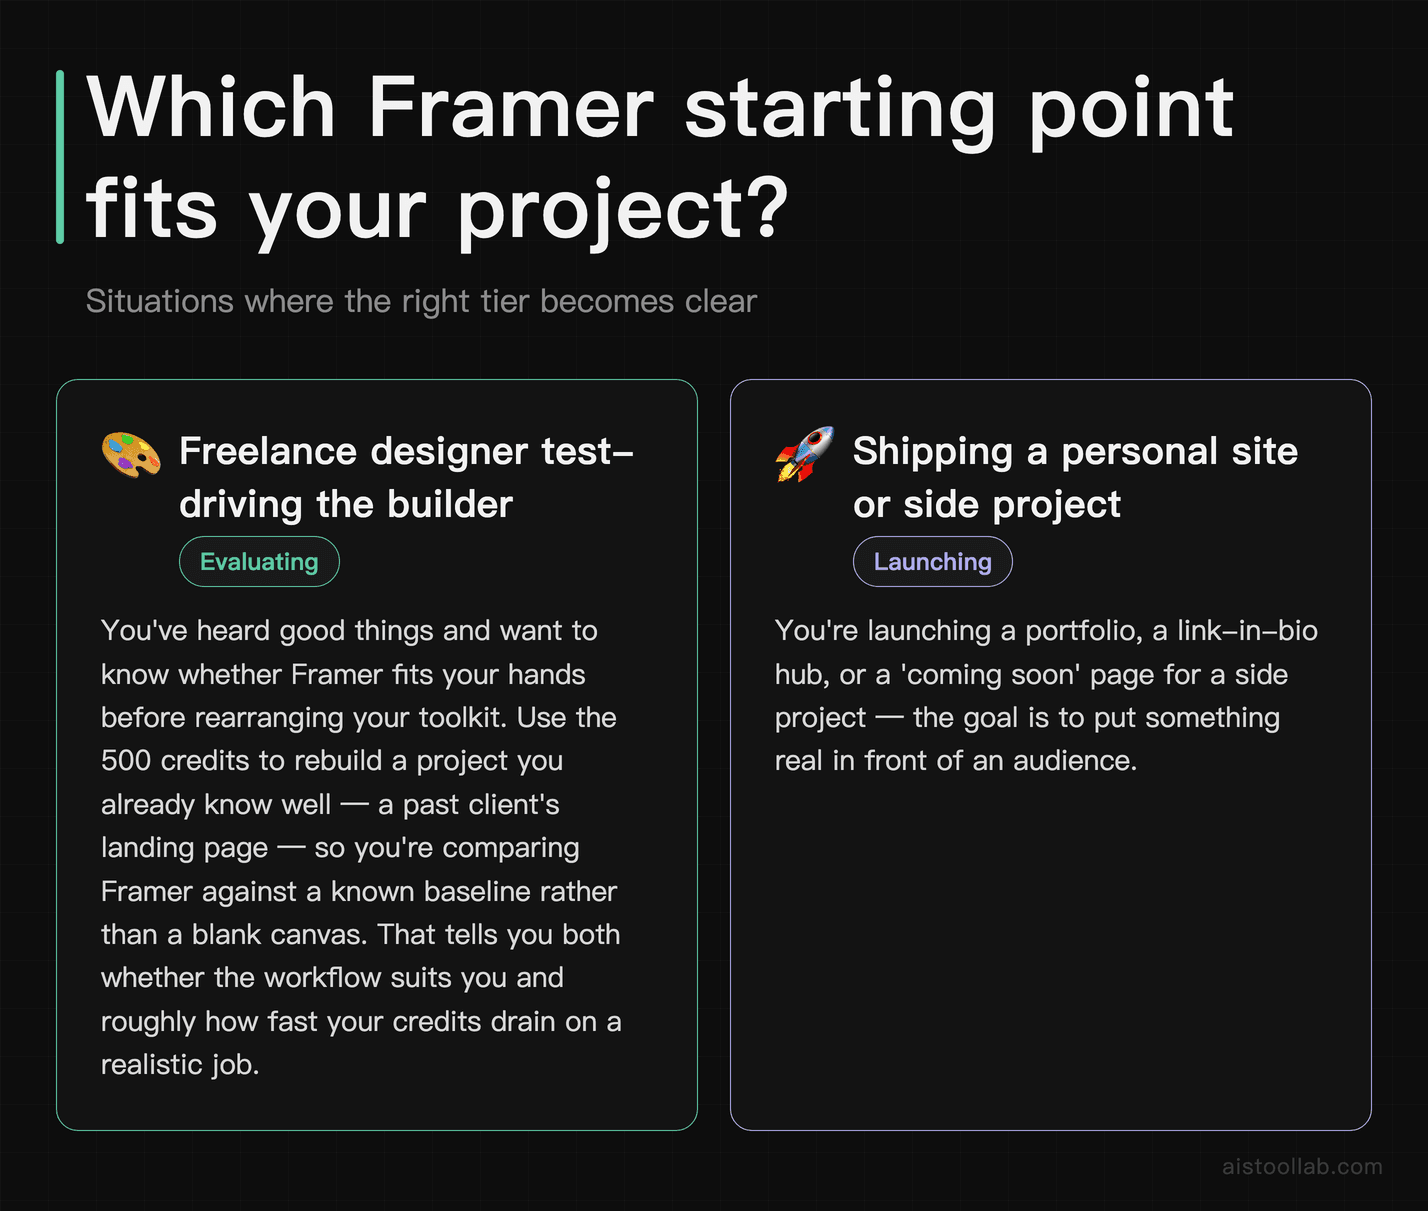
If you’re a freelance designer test-driving the builder
Say you’ve heard good things and you want to know whether Framer fits your hands before you rearrange your toolkit. The free plan is built for exactly this moment. You get 500 credits to try the AI/agent features and a free Framer domain to publish something real (both per the official pricing page, checked 2026-08-12). My advice: don’t spend the whole allowance on one over-ambitious page. Rebuild a project you already know well — a past client’s landing page, say — so you’re comparing Framer against a known baseline rather than a blank canvas. That tells you two things at once: whether the workflow suits you, and roughly how fast your credits drain on a realistic job. Both are the inputs you’ll want before you look at any paid column.
If you’re shipping a personal site or side project
Imagine you’re launching a portfolio, a link-in-bio hub, or a “coming soon” page for the side project you keep talking about. The free Framer domain matters more than it looks here — it means you can go live and share a working URL today, without buying hosting or a domain to prove the idea to a few people first. The pricing page’s whole framing, “start free, then scale your site” (checked 2026-08-12), fits this arc: publish on the free tier, see whether the thing gets traction, and step up to a paid plan when you actually need a custom domain, more monthly credits, or whatever the higher tiers unlock. Paying before you’ve validated the project is the trap; the free tier is designed to let you skip it. This “read the official docs first, then commit” habit is the same one I took into Hailuo AI — cheaper to learn the plan than to guess it.
If you build client sites for a living
Now say you run a small studio or you’re an independent who ships sites for paying clients month after month. Your usage profile is the opposite of the two above: steady, repeated, and credit-hungry, because you’re leaning on the tooling every week rather than kicking the tires once. This is where the Pro Experts 50% saving on agent credits (per the official pricing page, checked 2026-08-12) becomes the deciding factor rather than a footnote. If agent credits are a recurring line in your cost of doing business, cutting that rate in half changes the math on whether Framer pencils out as a production tool versus an occasional one. What I can’t tell you from the pricing page alone is whether you qualify for the Experts program or how much you’d actually save at your volume — that depends on the eligibility terms and your real monthly credit burn, both of which you’ll need to check directly. But if you’re in this bucket, that discount is the number I’d chase down before comparing anything else.
Across all three, the through-line is the same: the free plan is the measuring instrument, and your own credit consumption is the reading. Framer’s page even nods at fit with positioning language like “Creative personal sites” (official pricing page, checked 2026-08-12) — a hint at the kind of work the lower end is aimed at. Let your project, not the pricing table, tell you when it’s time to climb the ladder.
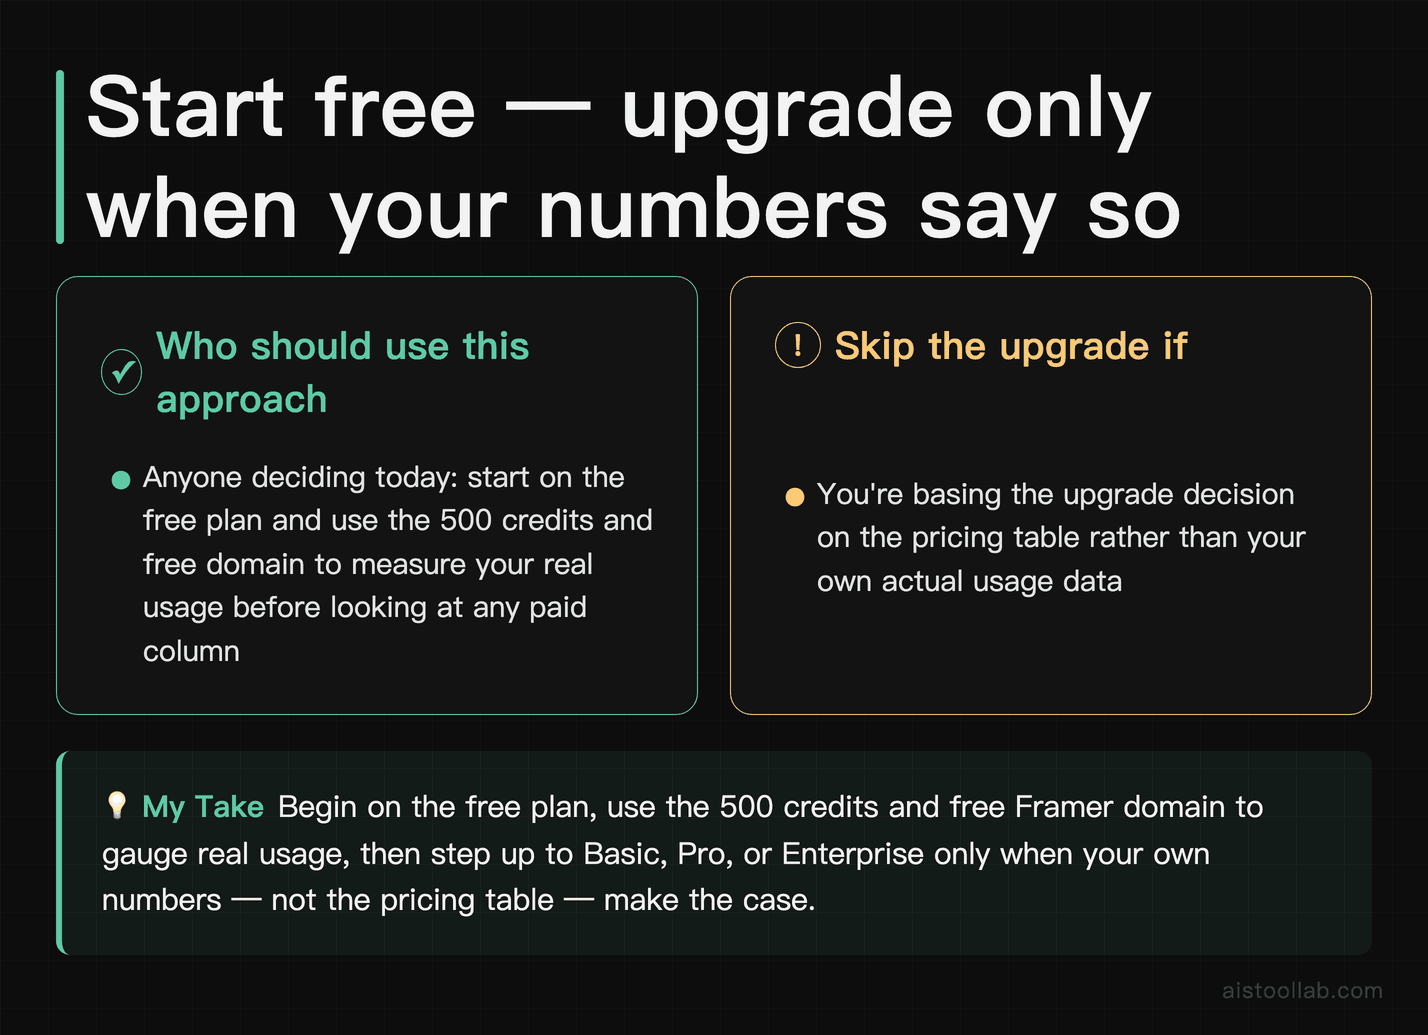
Click “Start free” first, then let the ceiling tell you when to pay
If you’re deciding today: begin on the free plan, use the 500 credits and free Framer domain to measure your real usage, and only climb the tiers — Basic, Pro, or the Pro Experts discount — when your own numbers, not the pricing table, say it’s time.
Official pricing page, captured 2026-08-12 (public page, not signed in)Official documentation page, captured 2026-08-12 (public page, not signed in)
Frequently Asked Questions
Do the 500 free credits reset every month, or is it a one-time allowance?
The pricing page phrases it as “500 credits to try” (Framer’s official pricing page, checked 2026-08-12), and that wording is the whole answer to how much you can lean on it. “To try” reads as a starter allowance for kicking the tires, in contrast to the paid tiers, which the same page describes in terms of monthly credit allowances. So my honest read is that the free grant is best treated as a one-time-ish trial budget rather than a recurring monthly bucket — but I want to be straight with you: the exact reset behavior for the free allowance isn’t spelled out in the excerpts I verified. If the difference between “renews each month” and “spend it once” changes your decision — and for anyone planning steady use, it should — that’s the single detail I’d confirm on the pricing page itself before you build a workflow around it. Don’t design a monthly process on the assumption that 500 credits keep coming back; verify it first.
Can I stay on the free plan indefinitely, or is it a countdown trial?
Framer frames the free plan as the start of a path — “Start free, then scale your site” (official pricing page, checked 2026-08-12) — not as a ticking trial that locks you out on day 14. The inclusion of a free Framer domain reinforces that: you can publish a live site and keep it live on a Framer subdomain, which isn’t how disappearing demos behave. So in spirit, free is a genuine tier you can build and ship on, not a countdown. The caveat is that “you can stay” and “you’ll never want to leave” are different things. The whole point of the four-tier ladder is that heavier use — more monthly credits, a custom domain, the Pro Experts discount if you build professionally — sits on the paid rungs. Whether the free tier’s limits eventually nudge you upward depends entirely on your own usage, and those specific limits live on the pricing page, which is where I’d look once you know roughly how much you actually consume.
The interesting thing about a video generator’s landing page is how little it actually commits to. Hailuo AI leads with three phrases — “native multimodal generation, precise multimodal editing, production-ready content creation” — and they read like a spec sheet while telling you almost nothing you could verify on a Tuesday afternoon with your own footage.
That isn’t a knock unique to one vendor. Marketing copy for generative tools tends to describe intent and architecture, not measured quality — so a page can be completely truthful and still leave you guessing about whether the output holds up. This piece does something narrow and, I think, more useful than another “10 features” rundown: it reads Hailuo AI’s official pages closely, separates what the docs genuinely state from what you’d still have to test yourself, and flags where the page simply stays quiet.
To be clear up front: there’s no hands-on here. I didn’t run a single generation. Everything below is compiled from Hailuo AI’s own pages (checked 2026-08-11) plus general background on how systems like this are built. Where the docs don’t say something, I’ll say so rather than fill the gap with a guess.
So what is Hailuo AI once you strip the marketing off?
Start with the plainest fact, because it’s also the most checkable. Hailuo AI describes itself, in its own page title, as a “Video & Image Generator for Creators” (per its official pages, checked 2026-08-11). That’s the category, and it’s worth pinning down because “video generator” and “image generator” are often two separate products from two separate teams. Here the positioning bundles both under one roof, aimed at creators rather than, say, enterprise pipelines or developers wiring things into a backend.
The subscribe page also announces that “MiniMax H3 Is Live” and points to a “MiniMax Design” download, alongside a line inviting new users to claim free credits and “unlock AI video creation” (per the official subscribe page, checked 2026-08-11). So the branding ties Hailuo AI to MiniMax’s H3 release — I’ll come back to that relationship in the FAQ, because it’s the kind of thing the page implies more than it spells out.
The most concrete signal of how you actually use it comes from an example prompt the page shows: “Describe the video content you want to generate, for example, ‘A child flying a kite in the park, golden sunlight, camera pans up.'” (per the official subscribe page, checked 2026-08-11). That one line tells you more than the three headline phrases combined — it confirms a text-prompt input where you describe a scene, lighting, and a camera move, and the system generates video from that description. It’s the difference between reading an adjective and seeing the actual interface expectation.
Here’s my honest read: the category is unambiguous, and the input model is clear enough from that example. What the pages I checked do not publish is the stuff you’d normally want before committing — clip length limits, output resolution, per-generation credit costs, or any independent quality benchmark. That’s not unusual for a consumer creative tool, but it does mean the “spec” you can actually rely on is thinner than the page’s confident phrasing suggests.
What do “native multimodal generation” and “precise multimodal editing” actually mean?
These are the two phrases doing the heaviest lifting on the page, so they deserve a careful translation rather than a nod. Both appear verbatim in Hailuo AI’s own copy — “native multimodal generation, precise multimodal editing, production-ready content creation” (per the official subscribe page, checked 2026-08-11) — and each describes a design intent, not a test result.
Native multimodal generation. In general terms, “native multimodal” usually points to a model built to handle more than one type of data — text, images, video — inside a single system, rather than stitching separate specialist models together with glue code. The claimed upside of that approach is that a prompt combining, say, a reference image and a text instruction can be understood as one coherent request instead of being handed off between tools. That’s the concept. What Hailuo AI’s page asserts is that its generation is native multimodal; what it does not do on the pages I read is demonstrate the difference in output, so treat the phrase as a description of how the system is positioned to work, not proof that it works better than a bolted-together alternative.
Precise multimodal editing. This one signals that you’re not limited to a single roll-of-the-dice generation — the tool is positioned to let you edit, guided by text and/or image input, and “precise” implies targeted changes rather than regenerating the whole thing from scratch. But “precise” is exactly the kind of word that only means something once you’ve watched it fail or succeed on a real edit. The docs claim the capability; they don’t quantify how precise, so I’m reporting the claim, not endorsing the adjective.
Production-ready content creation. The third phrase is a claim about the output’s intended use — that what comes out is meant to be usable without a heavy post-production pass. If you’re deciding whether Hailuo AI output is ready to drop straight into a client deliverable, the word “production-ready” is a starting hypothesis to test, not a verdict you can lean on.
If this seems like I’m being pedantic about three phrases, that’s the whole point of a spec-angle read. The words describe an architecture and an ambition. Whether the result clears your bar is a question the official copy structurally cannot answer — and pretending otherwise is how people end up disappointed. For a wider sense of what solid docs should actually disclose before you trust them, I’ve written about that in our documentation checklist.
Is a free trial with 3000 credits enough to know if it’s worth it?
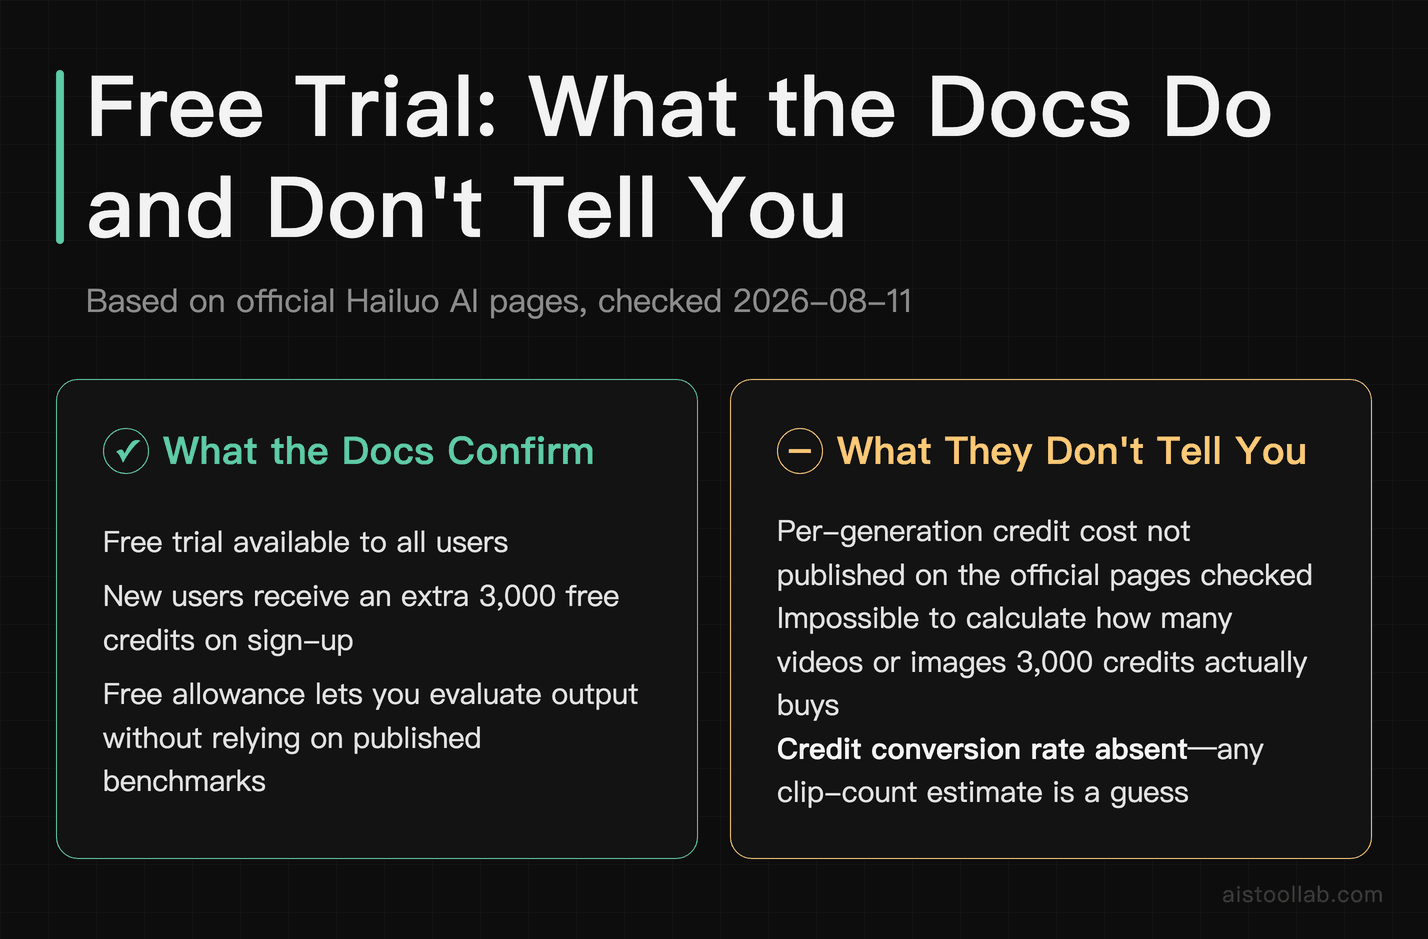
Here’s where the docs are, refreshingly, specific. Hailuo AI states that all users can try it free, and that new users get an additional 3000 free credits — the page’s own wording is that MiniMax H3 is live, “all users can experience it free, and new users get an extra 3000 free credits” (per the official subscribe page, checked 2026-08-11). A separate line confirms new users “receive free credits and unlock AI video creation.” So two things are established: a free trial exists for everyone, and a 3000-credit welcome allowance exists for new accounts.
What the pages I checked do not state is how many credits a single generation actually costs. Without that number I can’t honestly tell you how many videos or images 3000 credits buys — anyone who gives you a clip count is guessing, because the conversion rate isn’t published where I looked. If that figure matters to your decision (and for video generation it usually does, since longer or higher-quality clips tend to cost more), that’s a question to answer inside the product with your own account, not from the marketing page.
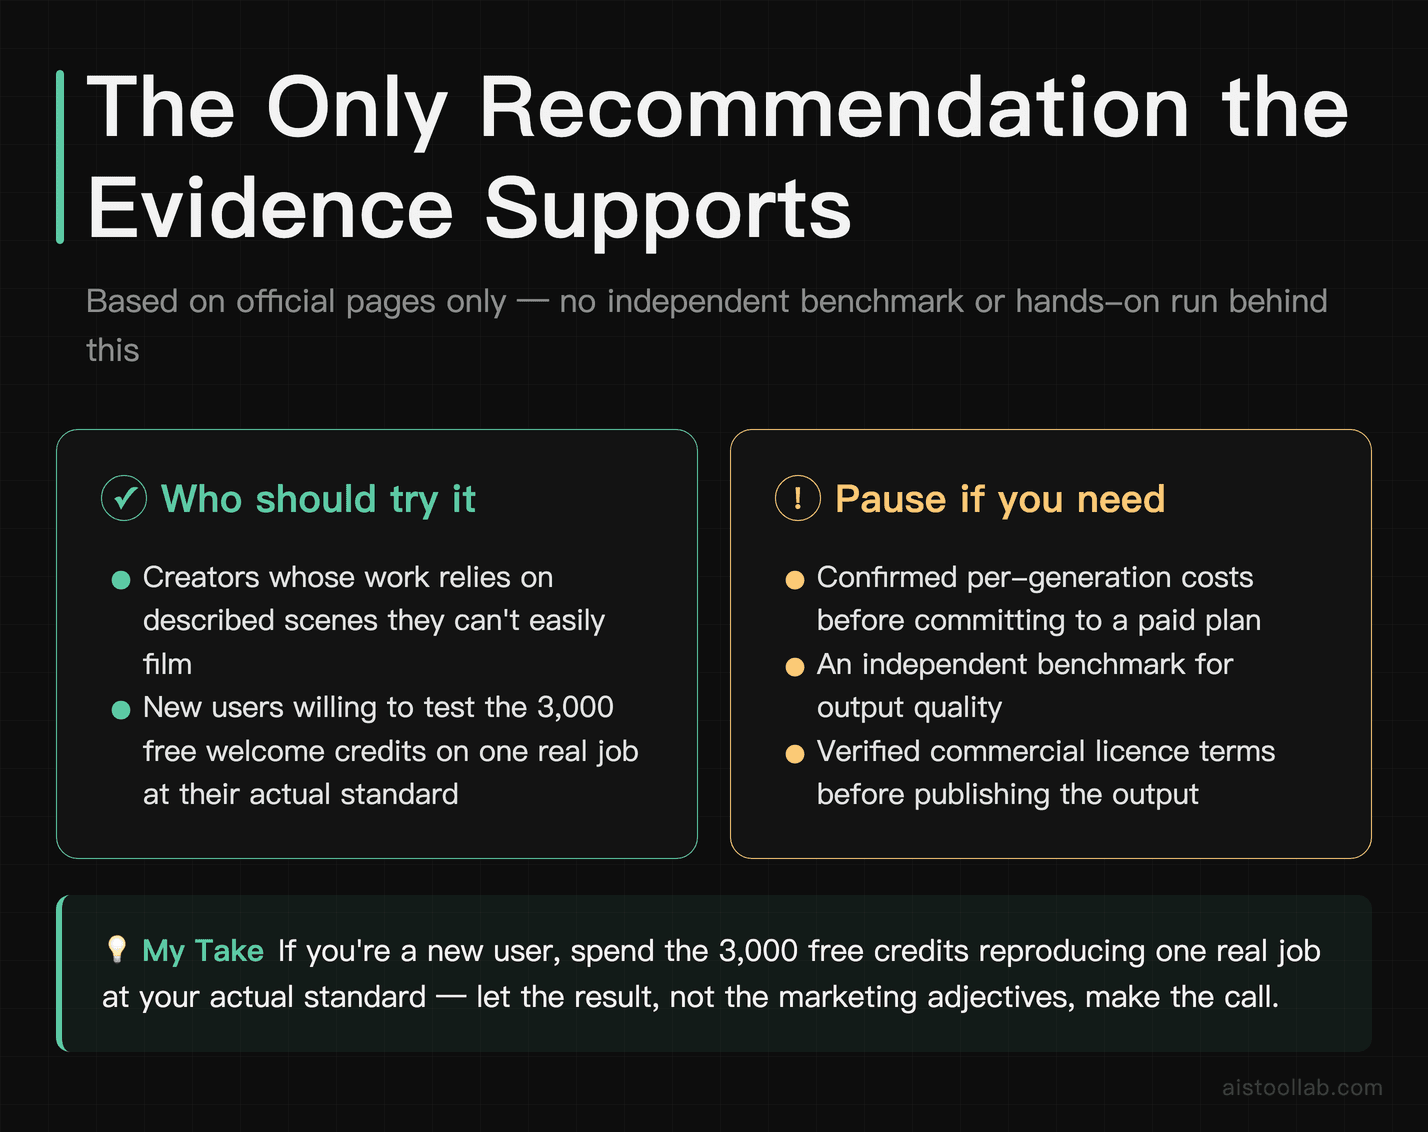
Still, a free allowance is the honest evaluator’s best friend, precisely because the docs don’t publish benchmarks. The most useful thing you can do with 3000 free credits isn’t to make a pretty demo — it’s to reproduce a real job. Feed it the actual prompt from a project you’d otherwise shoot or license, using the kind of scene description the page itself models (“a child flying a kite… golden sunlight… camera pans up”), and judge the result against the standard your work already has to meet. That converts three unverifiable adjectives into a yes/no you can actually act on. A free trial won’t tell you the tool is the best on the market; it will tell you whether it clears your bar, which is the only comparison that pays your bills.
Three creators who’d sensibly spend their free credits here
Because the docs are thin on numbers, the smartest way to think about fit is by situation rather than by score. These are illustrative personas — step into whichever one resembles you.
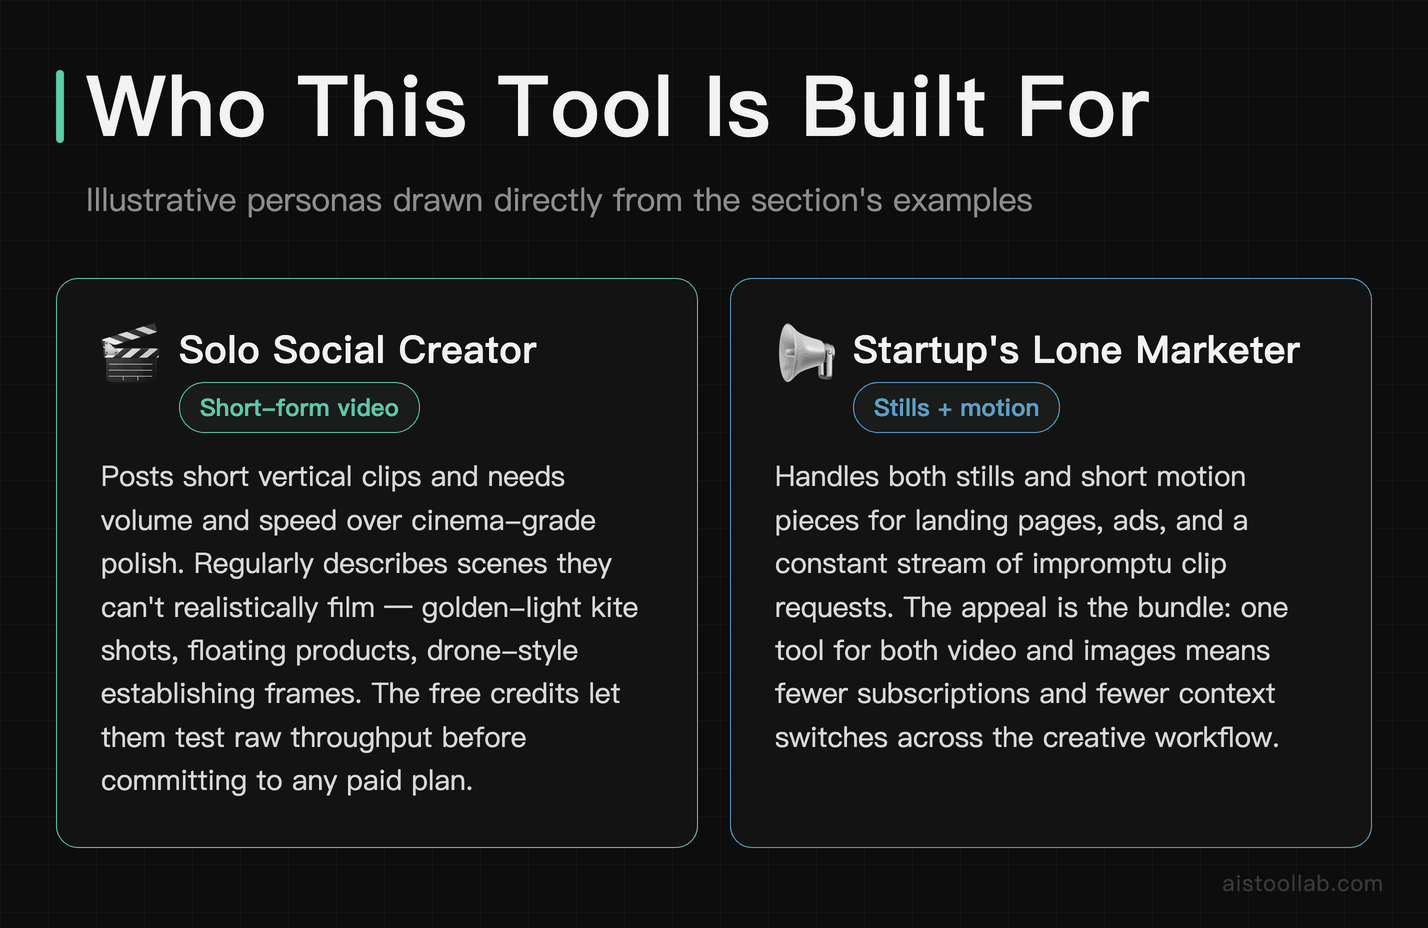
Say you’re a solo social creator posting short vertical clips. You need volume and speed more than cinema-grade polish, and you’re constantly describing scenes you can’t realistically film — a kite in golden light, a product floating in mid-air, an establishing shot you have no drone for. A text-to-video tool that takes a scene description and a camera move is squarely aimed at that job, and the free credits let you find out whether the output survives being posted before you commit to a paid plan. If your channel lives on quantity, the “native multimodal generation” claim matters less to you than raw throughput, which is exactly what a free allowance lets you probe.
Imagine you’re the only marketer at a small SaaS startup. You’re generating both stills and short motion pieces for landing pages, ads, and a Slack-thread’s worth of “can you make a quick clip for this?” requests. The appeal here is the bundle — one tool positioned for both video and images means fewer subscriptions and fewer context switches. The claim to test with your free credits is “production-ready”: can the output go straight into a campaign, or does everything need a rescue pass in another editor? That answer decides whether this saves you time or just adds a step.
Or picture an indie designer prototyping concepts for clients. You’re not shipping the generated frames as finals; you’re using them to sell an idea in a pitch deck before anyone greenlights a real shoot. “Precise multimodal editing” is the feature you’d lean on most, because pitches are iterative — the client wants the same scene but warmer, or the same character but seated. If it can’t hold a scene steady across edits, you’ll want to know before a client is watching your screen.
Reading the claims against what’s actually verifiable
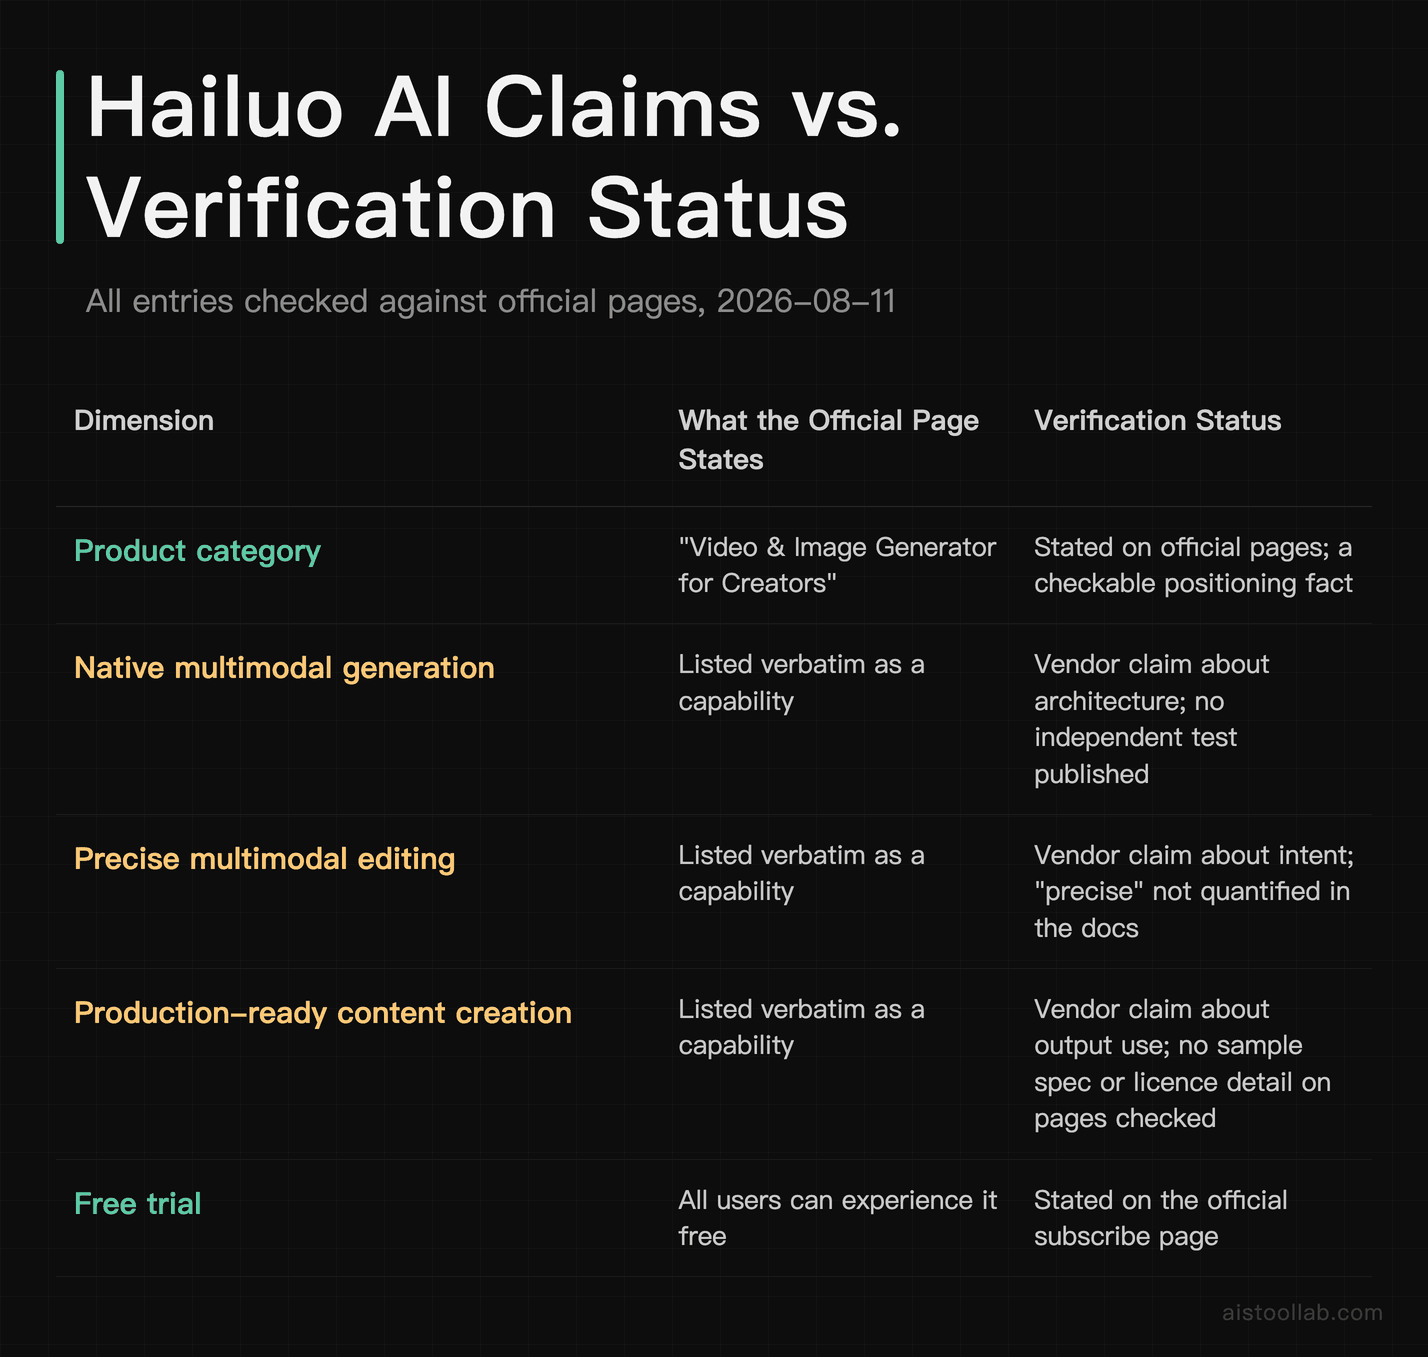
Because there’s no independent benchmark to hand and no hands-on run behind this article, a normal tool-versus-tool scorecard would mean inventing numbers I can’t source — so I’m not going to. Instead, here’s the more honest table for a spec-angle piece: every headline claim on the page, exactly what the docs state, and where verification currently stops. This isn’t a ranking and there’s no winner column; it’s a map of what you can rely on today versus what you’d still have to test. All entries are as of the 2026-08-11 check.
Notice the shape of that table: the top half is genuinely useful and checkable, the middle three rows are vendor claims you’ll want to test, and the bottom row is a straight blank the docs don’t fill. That’s not a criticism of the writing on Hailuo AI’s page — it’s the normal state of a consumer generative tool’s marketing surface, and it’s exactly why the free allowance carries so much weight in the decision.
When the docs alone aren’t enough to decide
Pull it all together and the picture is clear about what it’s clear about. Those are facts you can act on. The three headline phrases — native multimodal generation, precise multimodal editing, production-ready content creation — are the vendor’s description of intent and architecture, and they’re honest as positioning even though they can’t, by their nature, tell you whether the output clears your particular bar. The pages don’t publish per-generation costs, hard limits, an independent benchmark, or a full commercial licence, and I’d rather flag those gaps than paper over them.
So here’s the only recommendation the evidence actually supports: if you’re a creator whose work leans on described scenes you can’t easily film, spend the 3000 free credits reproducing one real job — same prompt, same standard you’re already held to — and let the result, not the adjectives, make the call. That’s a free way to convert three unverifiable claims into a decision you can defend, and it beats trusting any spec sheet, including this reading of one.
Official product page, captured 2026-08-11 (public page, not signed in)Official templates gallery, captured 2026-08-13 (public page, not signed in). The interface renders in Traditional Chinese: requesting the /en/ path redirects to the zh-Hant version. Note: the /subscribe pricing page redirects signed-out visitors back to the home page, so no public pricing screenshot is available.
Frequently Asked Questions
Is Hailuo AI the same thing as MiniMax, or a separate product?
The pages I checked don’t lay out a formal corporate structure, so I’ll stick to what’s actually visible. Hailuo AI’s subscribe page announces that “MiniMax H3 Is Live,” points users to a “MiniMax Design” download, and threads MiniMax branding through the H3 launch messaging (per the official subscribe page, checked 2026-08-11). Read plainly, that ties Hailuo AI to MiniMax’s H3 model release rather than presenting it as an unrelated third-party product. What I can’t responsibly do is detail the exact relationship — which is the brand, which is the model, which is the company — from these pages alone, because that specific breakdown isn’t spelled out where I looked. If the corporate lineage matters for a procurement or legal reason, treat the branding as a strong signal and confirm the specifics against Hailuo AI’s own terms and about pages rather than my inference. For general context on how model providers get consumed downstream by front-end tools, our write-up on Pika AI covers similar territory in the video-generation space.
Does “production-ready” mean I can use the output commercially?
Not automatically, and this is worth slowing down on. “Production-ready content creation” is a claim about output quality and intended use, not a licence grant, and the two are separate questions. The page does carry a usage note that content is AI-generated and asks users to “use this feature lawfully and in a friendly way” (per the official subscribe page, checked 2026-08-11), which tells you the vendor is flagging responsible use — but it isn’t a full commercial-rights statement. The pages I checked don’t publish a complete licence covering ownership, resale, or client deliverables. So if your plan is to drop generated frames into a paid campaign or a client project, don’t infer permission from the word “production-ready” — read Hailuo AI’s actual terms of service, which is where rights and restrictions actually live. My general rule for any generative tool: a marketing adjective describes what the output looks like; only the terms describe what you’re allowed to do with it, and mixing those two up is how people end up in a takedown they didn’t see coming.
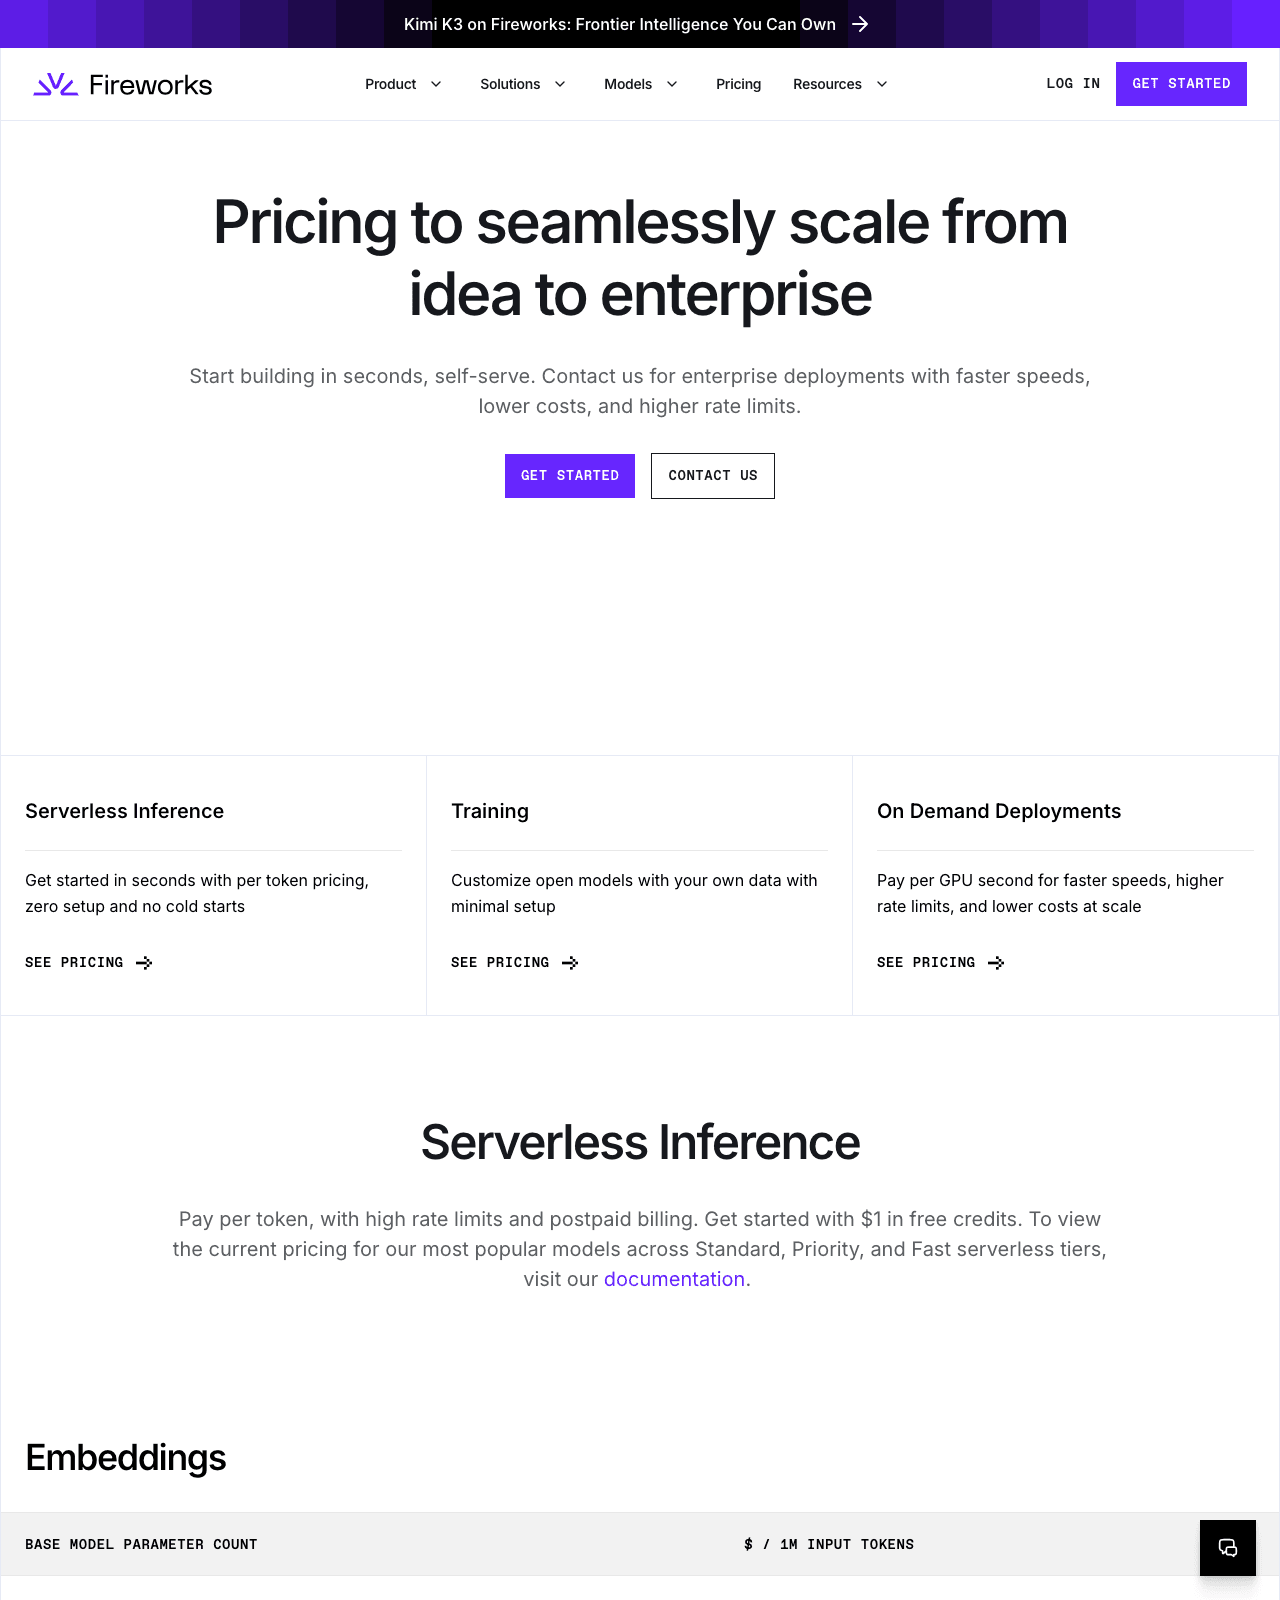
1. The $1 (official pricing page, checked 2026-08-10) free credit is the least useful number on the whole pricing page
{{AFFILIATE:Fireworks AI}} opens its pricing page with a friendly line: get started with $1 in free credits (per Fireworks AI’s official pricing page, checked 2026-08-10). It’s a nice gesture, and it’s also the number you should spend the least time on. A single dollar of inference credit tells you almost nothing about what a real workload will cost, because Fireworks doesn’t sell you a plan — it sells you tokens, and it bills you after you’ve spent them.
That distinction is the whole article, so it’s worth slowing down on. Most SaaS pricing pages hand you a ladder of monthly tiers and make your job “guess which one you’ll outgrow.” Fireworks flips that around. There’s no seat price to choose, no monthly minimum sitting at the top of the page. The cost lives in two moving parts instead: how many tokens your application pushes through, and which size of model does the pushing. The free dollar is just enough runway to fire off a handful of test prompts before either of those variables starts to matter.
So if you came looking for “the price of Fireworks AI,” the honest answer is that there isn’t one figure to quote. There’s a billing model (pay per token, postpaid), a set of serverless tiers (Standard, Priority, and Fast), and a size-banded rate table where the Standard tier starts at $0.50 (official pricing page, checked 2026-08-10) for the smallest models and steps up from there (all per the official pricing page, checked 2026-08-10). The three sections below walk the decisions that genuinely move your bill, in the order you’ll hit them — and none of them is the $1 free credit.
2. Step 1: What “pay per token, postpaid” actually signs you up for
Fireworks describes its billing in one compact sentence: “Pay per token, with high rate limits and postpaid billing” (per the official pricing page, checked 2026-08-10). Three phrases, and each one changes how you should plan.
Pay per token means your cost scales with usage, not with a subscription. A token is a chunk of text — roughly a word or a piece of one — and both the text you send in and the text the model generates back count toward what you’re charged. There’s no flat monthly fee buying you a bucket of capacity; a quiet week costs you almost nothing, and a viral week costs you a lot. That’s ideal when your traffic is spiky or you genuinely don’t know your volume yet, which describes most projects before they ship.
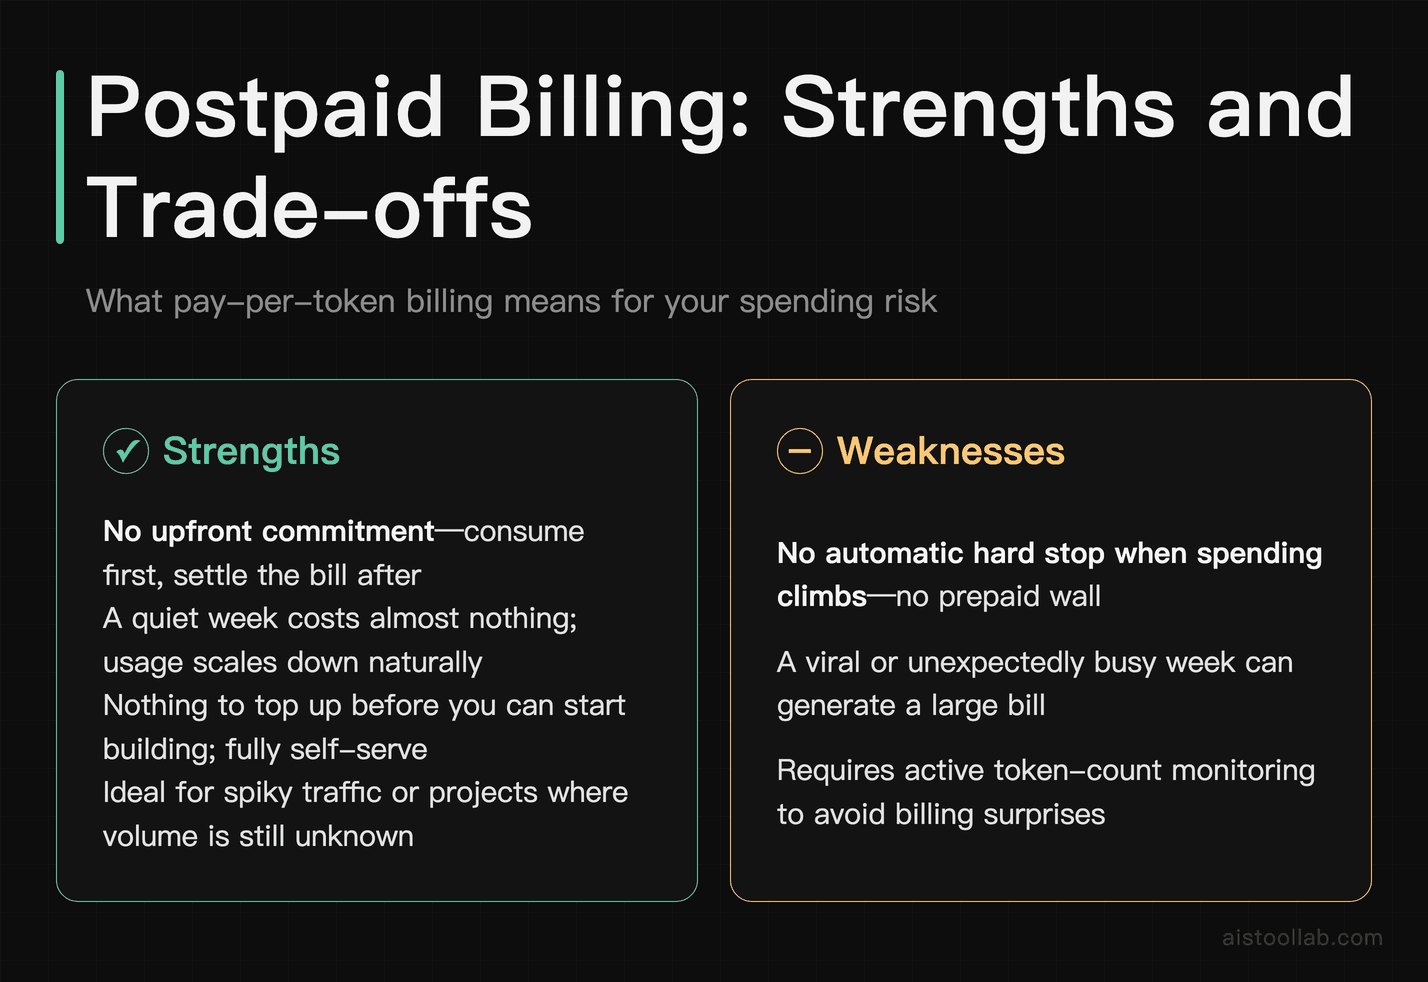
Postpaid billing is the part people skim past and shouldn’t. Prepaid platforms make you buy credit up front, and when the balance hits zero, the service simply stops — an annoying but effective spending cap. Postpaid works the opposite way: you consume first and settle the bill afterwards, the way a utility meter runs. The upside is obvious — no upfront commitment, nothing to top up before you can build. The trade-off is just as real: there’s no prepaid wall automatically stopping a runaway loop or a misconfigured batch job. The platform isn’t going to save you from your own usage, so if you’re wiring Fireworks into anything that calls models repeatedly, you want your own logging and alerts in place from day one. If you’re building an agent that calls a model in a loop, those per-call token costs compound quickly — I got into how agents plan and select their calls in {{INTERNAL_LINK:AI agents}}.
High rate limits, the third phrase, is Fireworks’ way of saying you’re less likely to get throttled during a burst than on a platform with tight caps. That’s genuinely useful for production traffic. But read it alongside the first two phrases and the implication is clear: high limits plus pay-per-token plus postpaid means the meter can run fast, freely, and out of sight. The billing model is friendly to developers who want to move quickly and hate commitment — which is a fair description of most of us — but it hands you the responsibility of watching the dial. That’s not a criticism of Fireworks so much as the natural shape of metered infrastructure. If you’ve priced any usage-based cloud service, this will feel familiar; if you’re coming from flat-fee AI subscriptions, it’s a different mental model to adopt.
3. Step 2: The Standard-tier table, and why model size is the lever that actually moves money
Serverless on Fireworks isn’t a single price. It’s split into three tiers — Standard, Priority, and Fast (per the official pricing page, checked 2026-08-10) — and within a tier, the rate you pay depends on how large the model is, measured in parameters. That second axis is the one most people underestimate.
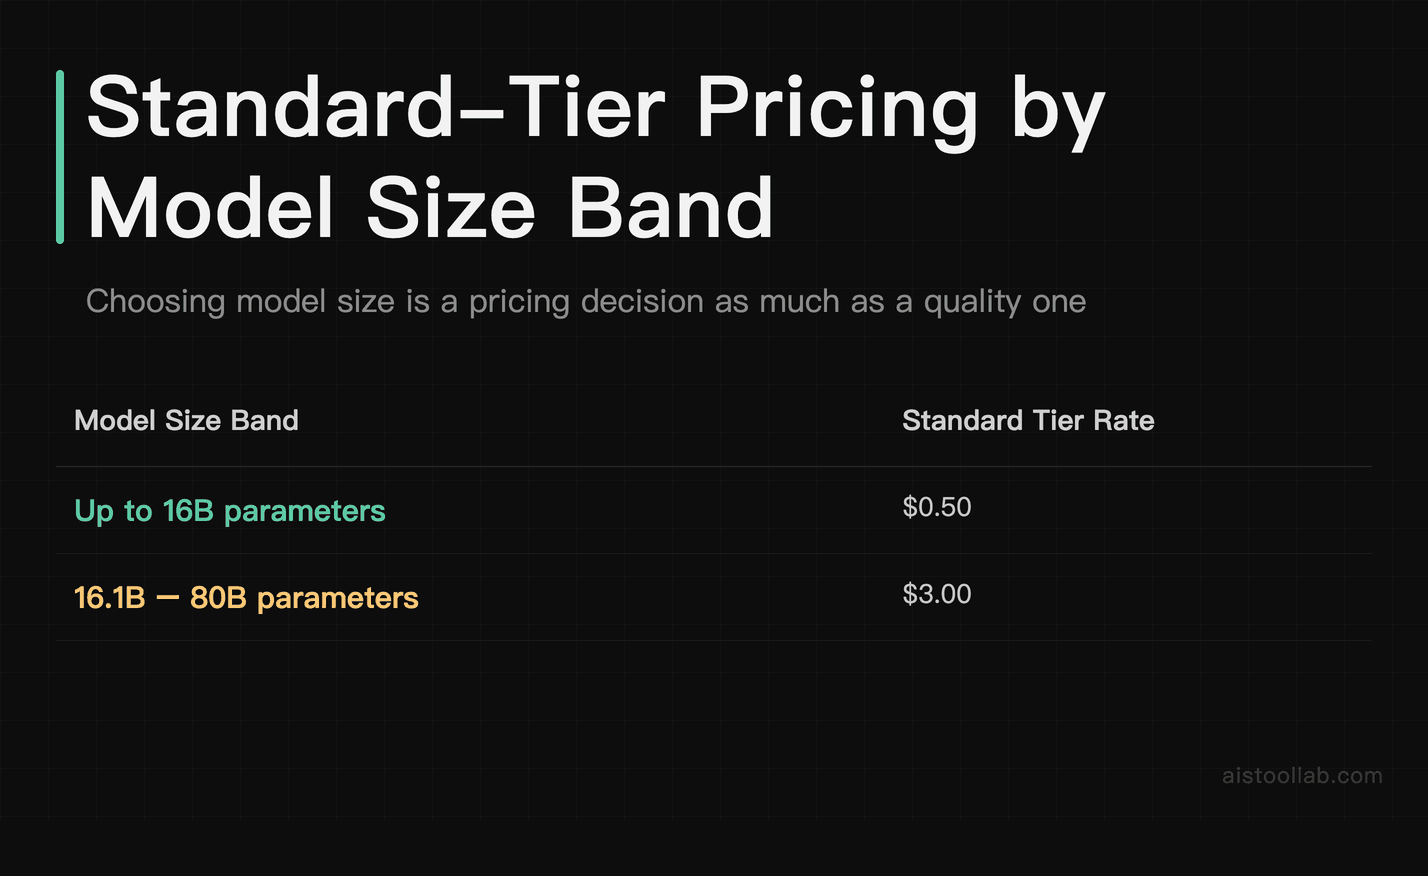
Here’s the concrete part. On the Standard tier, the pricing table lists $0.50 for models up to 16B parameters, and $3.00 (official pricing page, checked 2026-08-10) for models in the 16.1B–80B band (per the official pricing page, checked 2026-08-10). Billing is per token, as covered above. Sit with the gap for a second: the mid-size band is priced six times higher than the small band on the very same tier. That means the single biggest cost decision you make often isn’t which tier or how many tokens — it’s which model you point your app at. Swapping a mid-size model for a small one that’s good enough for your task can reshape your unit economics before you’ve optimised a single prompt. Model selection on Fireworks is a pricing decision as much as a quality one, and treating it as purely a quality decision is how bills surprise people.
The “best suited for” row is my read based on the billing facts in the rows above it — it’s a judgement, not a measured performance ranking, and it’s not claiming any tier beats another on speed.
Billing model — Standard: Pay per token; Priority: Pay per token; Fast: Pay per token; Enterprise: Custom — contact sales
Credit to start — Standard: $1 in free credits, applied at the account level; Priority: Contact sales
Rate: models up to 16B — Standard: $0.50; Priority: Published in the docs; Fast: Published in the docs; Enterprise: Lower costs (official) — contact sales
Rate: models 16.1B–80B — Standard: $3.00; Priority: Published in the docs; Fast: Published in the docs; Enterprise: Lower costs (official) — contact sales
Provisioning — Standard: Self-serve, in seconds; Priority: Self-serve; Fast: Self-serve; Enterprise: Contact us
Vendor positioning — Standard: Standard tier; Priority: Priority tier; Fast: Fast tier; Enterprise: Faster speeds (official)
Best suited for (my read, condition-bound) — Standard: Getting started and lower-volume workloads where the lowest listed serverless rate matters; Priority: Workloads that outgrow the Standard tier’s limits; Fast: Workloads that outgrow the Standard tier’s limits; Enterprise: Teams at volume who want the lower per-token cost and higher limits Fireworks offers on a contract
Two things to note about the table. First, the specific per-model rates for the Priority and Fast tiers aren’t printed on the pricing page itself — Fireworks points you to its documentation for “the current pricing for our most popular models across Standard, Priority, and Fast serverless tiers” (per the official pricing page, checked 2026-08-10). So I’ve left those cells pointing at the source rather than guessing. Second, the $0.50 and $3.00 figures are keyed to parameter-size bands, not to a named model, so the practical move is to look up the exact model you intend to run in the docs, then map it back to its band to sanity-check the rate. The size band tells you the ballpark; the docs tell you the number.
4. Step 3: Three situations, three different right answers
Because the price isn’t a single tier, “which Fireworks plan is right” only makes sense once you know what you’re building. Here are three common shapes, in the second person, and where each one lands.
Say you’re a solo developer prototyping on a weekend
You want to see whether an idea works before you commit to anything. This is exactly what the billing model is built for. The $1 free credit gets you sending prompts immediately, self-serve, with no card-first ceremony to negotiate before you can test (Fireworks’ pricing page frames the whole entry point as “Start building in seconds, self-serve,” checked 2026-08-10). Point your prototype at a model in the up-to-16B band so you’re on the up-to-16B band’s Standard rate while you experiment, and because billing is postpaid, you’re not pre-buying capacity you might never use. The one habit to adopt even at this stage: log your token counts. It costs nothing to instrument now and saves a confusing bill later.
Say you’re the only engineer at a small SaaS shipping an AI feature
Now the stakes shift from “does it work” to “what will it cost per user.” Standard-tier serverless keeps your setup simple — pay per token, no dedicated infrastructure to babysit — but the model-size decision from Step 2 becomes a business decision. If a small-band model does the job, you stay in the smaller band; reach for a 16.1B–80B model and you move into the larger band, so check that model’s current rate before estimating per-user cost, which multiplies against every request your users make. Because there’s no prepaid wall, wire up usage alerts before you launch, not after. This is the profile where postpaid billing is most comfortable and most dangerous at once: comfortable because you never front cash, dangerous because a popular launch day meters faster than you’ll notice by refreshing a dashboard.
Say you’re scaling a live product and per-token serverless is starting to sting
At real volume, metered serverless pricing can add up past the point where a dedicated arrangement makes sense. This is where Fireworks’ other track comes in. Alongside self-serve serverless, it offers self-serve dedicated deployment and enterprise deployments, and it describes the enterprise route as “faster speeds, lower costs, and higher rate limits” (per the official pricing page, checked 2026-08-10) — that’s the vendor’s own claim, not something I’ve benchmarked. The logic to weigh is straightforward: serverless is priced for flexibility, and flexibility has a per-token premium; once your traffic is high and predictable, a contracted deployment is where “lower costs” and “higher rate limits” start to pay for the conversation with sales. If you’re comparing this crossover against other inference platforms, I walked through a similar serverless-versus-managed-infrastructure trade-off in {{INTERNAL_LINK:Replicate API}}. The short version: the moment your volume is steady enough to forecast, it’s worth pricing the dedicated route against your serverless bill rather than assuming pay-per-token stays cheapest forever.
The thread running through all three: the “right” Fireworks setup isn’t a tier you pick once. It moves as you move — from a free-dollar prototype, to a Standard-tier feature where model size is your main lever, to a contract you negotiate when volume makes the per-token premium the expensive part.
6. So: price your own tokens, then let the free dollar be a bonus, not a plan
Work out your model size and your token volume first; the $1 credit is a nice on-ramp, not the number your decision hangs on.
5. Frequently Asked Questions
The pricing page only shows size bands — where’s the exact price for the specific model I want?
That’s a fair frustration, because the public pricing page prices by parameter band (up to 16B, 16.1B–80B, and so on) rather than by model name. The per-model rates across the Standard, Priority, and Fast serverless tiers live in Fireworks’ documentation — the pricing page explicitly says to “visit our documentation” for “the current pricing for our most popular models” (per the official pricing page, checked 2026-08-10). So the workflow is two steps: find the model you intend to run in the docs to get its exact rate, then map it back to its parameter band on the pricing page to sanity-check that the number looks right for its size. Doing both is worth the extra minute, because a model that sits near a band boundary can be priced quite differently from what you’d assume by eyeballing its name. The size band gives you the ballpark before you commit; the documentation gives you the figure you’ll actually be billed against.
If billing is postpaid, what actually stops a runaway bill?
Structurally, less than a prepaid balance would. Prepaid platforms give you an automatic hard stop — when your bought credit runs out, requests fail and spending ends. Fireworks’ model is postpaid: you consume first and settle afterwards, so there’s no built-in zero-balance wall doing that job for you (per the official pricing page’s “postpaid billing” description, checked 2026-08-10). Fireworks does advertise “high rate limits,” but rate limits govern how fast you can call the service, not how much you’re allowed to spend — they’re a throughput control, not a budget control, and I couldn’t find a published spend-cap figure on the pricing page to point you to. Practically, that means the guardrails are on your side of the fence: instrument your token usage, set alerts on your own metrics, and put sane limits around anything that calls models in a loop or batch. The billing model rewards you for moving fast and commits you to nothing up front, but it assumes you’re watching the meter, because it isn’t going to flip off on your behalf.
Official pricing page, captured 2026-08-10 (public page, not signed in)Official documentation page, captured 2026-08-10 (public page, not signed in)
Here’s a myth worth killing early: a “smooth” AI video is not just a video with more frames crammed into it. You can push the frame count up and still end up with something that behaves like a flipbook drawn by three different people — a coffee mug that changes shape mid-pour, a shadow that jumps sides between shots, a face that quietly rearranges itself while nobody’s watching.
Smoothness in generated video is really two problems wearing the same coat. One is motion: how naturally things travel from one instant to the next. The other is consistency: whether the objects, the lighting, and the space stay believably the same while all that movement happens. Nail the first and miss the second and you get gliding blobs. Nail the second and miss the first and you get a stiff slideshow with good production values.
Pika AI sits right in the middle of this problem, and its public materials describe an approach built to handle both sides at once. What follows is a breakdown of that approach — motion prediction, scene understanding, the output settings that decide how a clip fits your platform, and the credit economics that quietly govern how much you can afford to experiment. Everything here is compiled from Pika’s official pages (checked 2026-08-09), not from hands-on testing.
Understanding Why AI Video Stutters — and What Pika Tackles First
In a still image, the model only has to be right once. In a video, it has to be right dozens of times per second and keep every one of those moments agreeing with the ones on either side. A frame that looks gorgeous on its own is worthless if the next frame decides the sofa should be a slightly different colour.
Two general techniques from the wider world of video processing are worth knowing here, because they explain what “smooth” even means. Motion interpolation is the practice of generating plausible in-between states so movement reads as continuous rather than as a series of jumps — it’s the same family of idea that TVs use to smooth fast sport, and that editors use for slow motion. Frame blending is the cruder cousin: mixing adjacent frames together to soften transitions, which reduces obvious stutter but can introduce ghosting if it’s leaned on too hard. Neither is unique to Pika; they’re the vocabulary the whole field shares.
Where Pika’s own description comes in is the architecture layer. Pika’s approach, as the company frames it, addresses temporal consistency by combining motion prediction at the pixel level with higher-level scene understanding that maintains object and environmental coherence. That combination is the interesting part. Pixel-level motion prediction is about the tiny stuff — how each patch of the image should shift frame to frame. Scene understanding is about the big stuff — knowing that the thing moving is a dog, and dogs don’t suddenly grow a second tail halfway across the yard. Solving only the pixel problem gives you motion without meaning; solving only the scene problem gives you meaning without movement. Pika’s stated design tries to run both together so they check each other.
Where Scene Understanding Earns Its Keep
If motion prediction is what makes a clip move, scene understanding is what stops it from falling apart while it does. Pika applies computer vision models to track objects, lighting, and spatial relationships throughout generation, with the goal of preventing the object deformation or sudden appearance changes that break immersion. In plain terms: the system is trying to remember what’s in the shot and where it belongs, frame after frame.
This matters more than it sounds. The failures that make AI video look “off” are rarely about a single ugly frame — they’re about continuity. A jacket that shifts from denim to leather over two seconds. A window that drifts across a wall. A light source that can’t decide which side of a face it’s on. Those are all consistency failures, and they’re exactly what an object-and-lighting tracking system is built to suppress. When the model holds spatial relationships steady, movement can happen inside a stable world instead of dragging the whole world along with it.
It’s worth being honest about the limits of this framing, though. Tracking objects and lighting is the stated intent of the design; it is not a guarantee that every clip comes out flawless, and I’ve seen no independent benchmark in the material I checked that measures how often Pika holds consistency versus how often it slips. Treat scene understanding as the mechanism Pika is betting on, not as a promise of perfection. The mechanism is sound and well-motivated; the per-clip result still depends on your prompt, your subject, and a fair amount of luck — as it does with any generator in this class, including the image tools you might already use like Midjourney.
The Moving Parts, Side by Side
Before the scenario-by-scenario advice, here’s a map of what actually contributes to “smooth” output and where each piece comes from. The two rightmost columns separate a general video-processing concept from something Pika specifically publishes, so you can see which is which. Cells I couldn’t confirm from an official page are marked as such rather than guessed.
Temporal consistency — Why it matters: Frames must agree with their neighbours or the clip flickers; What kind of claim this is: Named as the challenge Pika’s architecture targets; Source: Pika, subject to check on official materials (2026-08-09)
Pixel-level motion prediction — Why it matters: Governs how each region shifts frame to frame; What kind of claim this is: Part of Pika’s stated architecture; Source: Pika (2026-08-09)
Scene / object tracking — Why it matters: Stops objects deforming or vanishing mid-shot; What kind of claim this is: Pika applies computer vision for this; Source: Pika (2026-08-09)
Lighting & spatial coherence — Why it matters: Keeps light direction and layout believable; What kind of claim this is: Part of the same scene-understanding claim; Source: Pika (2026-08-09)
Motion interpolation — Why it matters: Fills plausible in-between states for continuous movement; What kind of claim this is: General video-processing concept, not a Pika-specific published spec; Source: General field knowledge
Frame blending — Why it matters: Softens transitions; risks ghosting if overused; What kind of claim this is: General video-processing concept, not a Pika-specific published spec; Source: General field knowledge
Output resolution & aspect ratio — Why it matters: Decides whether a clip fits vertical or horizontal placement; What kind of claim this is: Pika offers configurable resolutions and aspect ratios; Source: Pika (2026-08-09)
Model / mode choice — Why it matters: Which model you run affects cost and behaviour; What kind of claim this is: Pika 2.5, Turbo model, and Pika Agent exist; Source: pika.art & pika.art/pricing (2026-08-09)
Read the table as a checklist for what to look for in your own output rather than as a scoreboard. The first four rows are the pieces Pika describes as its own; the two “general field knowledge” rows are concepts you’ll hear cited across the whole category, so don’t assume a specific implementation of them just because the words appear in the title.
If You’re Cutting Vertical Shorts vs. Building Widescreen Explainers
Say you run a short-form account and everything you post lives in a phone-shaped frame. That sounds mundane next to motion prediction, but it’s the setting that decides whether your clip gets cropped into oblivion or drops in clean.
The distinction matters because smoothness and framing interact. If you’re producing vertical, prioritise clips with one clear subject and simple motion;
Either way, pick your aspect ratio before you fall in love with a generation, not after. Regenerating a clip in a new format costs credits, and reframing a horizontal render into a vertical slot by cropping throws away exactly the compositional headroom you paid for. This is the sort of workflow discipline that also pays off if you’re stitching Pika clips into a longer edit in a tool like Descript — matching your source format to your timeline up front saves a round of rework.
If You’re Iterating Cheaply vs. Committing to a Final Cut
Generation isn’t free, and the credit system is where the “how smooth can I make this” ambition meets the “how many tries can I afford” reality. Pika’s paid tiers publish their monthly video credits: one tier includes 80 monthly video credits, another 700, and another 2,300 (per Pika’s official pricing page, checked 2026-08-09). Those are credit allowances, not dollar figures — I’m deliberately not quoting a price here, because the pricing page’s monetary amounts weren’t part of what I could confirm cleanly, and a stale or guessed number is worse than none.
What you can reason about is throughput, because Pika also publishes a per-video cost for one mode: the Turbo model — used with Pikascenes, Pikadditions, or Pikaswaps — runs at 10 credits per video (per pika.art/pricing, checked 2026-08-09). That single rate lets you do the arithmetic yourself. Divide the credits by 10 and, at the Turbo rate, 80 credits works out to 8 videos, 700 to 70, and 2,300 to 230 in a month. Other models or settings may cost differently — Pika doesn’t publish a single flat rate for everything — so treat those figures strictly as “Turbo-rate ceilings,” not a promise about every generation you’ll run.
The strategic point: iteration and finishing are different spending modes. Early on you’re hunting — running many cheap variations to find a motion and a look that hold together. That’s a job for the lowest-cost mode you have, because most of those attempts are throwaways. Later you’re finishing — spending confidently on the handful of clips you actually intend to publish. If you treat every generation like a final render, you’ll burn a month’s credits chasing a look; if you treat the cheap mode as your sketchpad and reserve the rest for keepers, the same allowance stretches a lot further.
If You’d Rather Direct It Yourself vs. Hand It to an Agent
Pika’s interface currently centres on the Pika 2.5 model (per pika.art, checked 2026-08-09), which is the engine most creators will actually be driving. But the more interesting fork in the road is how you drive it. Pika offers Pika Agent, described as a way to collaborate on your project with an AI — the framing on Pika’s site is that the models are all there and you just have a conversation with it (per pika.art, checked 2026-08-09).
Those are two genuinely different working styles, and neither is automatically better. Directing it yourself — writing prompts, choosing the model, setting resolution and aspect ratio, deciding which of Pikascenes, Pikadditions, or Pikaswaps fits the shot — gives you fine control and a clear mental model of why a clip came out the way it did. That’s the mode I’d lean toward if you already know the language of video and want to steer motion and framing deliberately, because you’re not handing off the decisions that most affect consistency.
If you’re less sure what settings you even want, describing the outcome in conversation and letting the agent assemble the pieces is a gentler on-ramp — you’re outsourcing the “which knob does what” problem. Pick the mode that matches how much you want to understand your own output.
When Pika’s Smoothing Isn’t the Right Tool for the Job
A deep feature breakdown owes you the honest ceiling as well as the sales pitch. A few things I could not confirm from the pages I checked, and which you should verify for yourself rather than assume: whether Pika exposes a manual keyframe interface for you to pin specific motion states, what frame-rate options it offers, and how consistency holds up under long or complex shots. Those weren’t available at the time of checking. If any of them is a hard requirement for your work, treat it as an open question to test before you commit, not a settled capability.
There’s also a category-wide limit worth naming. Scene-understanding and motion-prediction architectures are built to reduce the failures that break immersion, not to eliminate them — and no independent benchmark in my source material measures how reliably Pika does so across varied subjects. If your project cannot tolerate the occasional deformation or continuity slip — think a client deliverable with zero margin for a melting logo, or a shot where a specific object must stay pixel-perfect — you’ll want a review pass on every generation regardless of how good the architecture sounds on paper. The strength here is a coherent, well-motivated approach to smoothness; the responsibility for catching the misses stays with you.
For most creators the trade is a reasonable one. If your work demands guaranteed consistency on named objects, treat that requirement as unmet until you’ve tested it — and keep a human in the loop either way.
Official product page, captured 2026-08-09 (public page, not signed in)Official pricing page, captured 2026-08-09 (public page, not signed in)Official model catalogue page (dev.pika.art/models), captured 2026-08-14 (public page, not signed in): the Pika section of the catalogue, showing Pika 2.5 in image-to-video and text-to-video modes at a listed rate of $0.04 per second, with other providers’ models below it.
Frequently Asked Questions
Do more monthly credits make my videos look smoother?
No — and it’s an easy thing to misread. The 80, 700, and 2,300 monthly video credit tiers (per Pika’s official pricing page, checked 2026-08-09) all decide how many generations you can run in a month, not how good any single one turns out. Smoothness comes from the model and the architecture — the pixel-level motion prediction and scene understanding described above — plus your prompt and settings, none of which change because you bought a bigger allowance. What extra credits genuinely buy you is more attempts, and that’s not nothing: because generation is partly a numbers game, being able to run more variations does raise your odds of landing a clip that holds together. So a larger tier can indirectly help you find a smooth result faster, but it doesn’t make the underlying generation any better.
Can I set my own keyframes in Pika to control the motion directly?
This is the question the title practically begs, so here’s the straight answer: I could not confirm a manual keyframe interface in the official material I checked (2026-08-09), so I’m not going to claim one exists or describe how it would work. What Pika does publicly document is the Pika 2.5 model, the conversational Pika Agent, and the Turbo model used with Pikascenes, Pikadditions, or Pikaswaps at 10 credits per video (per pika.art and pika.art/pricing, checked 2026-08-09). Those are the controls I can actually point at. The architecture-level description talks about motion prediction and scene understanding happening inside the generation process, which is a different thing from you hand-placing keyframes on a timeline. If keyframe control specifically is a dealbreaker for your workflow, don’t take my silence as either a yes or a no — check Pika’s current interface and documentation directly, because interface features change faster than any article can track, and this is exactly the kind of detail worth confirming with your own eyes before you subscribe.
Which credit tier makes sense if I mostly want to experiment?
The 80-credit tier, at the published Turbo rate of 10 credits per video (per Pika’s official pricing page, checked 2026-08-09), gives you 8 Turbo generations a month — 80 divided by 10. That’s enough to run several genuine experiments, test how the format options and scene consistency behave on your kind of subject, and decide whether the output is worth scaling. My reasoning is purely about scope-matching: for an experimentation phase you want the smallest commitment that still lets you learn something, and 8 tries clears that bar without over-buying. Only step up to the 700- or 2,300-credit tiers once you actually know you’ll use them — for example when you’ve confirmed a repeatable look and you’re generating regularly. Note that non-Turbo models or heavier settings may cost more per video, so treat “8 videos” as the Turbo-rate ceiling, not a fixed guarantee for every generation you run.
The model was never the hard part — the GPU under it was
Here’s an assumption worth poking at: that the difficult bit of shipping an AI feature is the machine learning. Picking the model, tuning the prompt, wrangling the outputs. For a lot of developers, that part is genuinely the fun part. The wall shows up later, and it’s made of infrastructure — provisioning a GPU box, keeping drivers and CUDA versions in sync, handling a traffic spike at 2am, and paying for a card that sits warm and idle between requests.
That gap is exactly where a lot of promising side projects quietly die. You get a demo working on your laptop, and then the road from “runs locally” to “runs for other people, reliably, at scale” turns out to be paved with DevOps you never signed up for. Replicate is built around removing that specific wall — not by making the model smarter, but by taking the servers off your plate entirely.
So this piece is a feature-level breakdown of what Replicate actually does, compiled from its official documentation and pricing page (checked 2026-08-07). By handling the infrastructure layer, it removes a friction point that previously kept solo developers and small teams from deploying AI tools at production scale: you don’t have to become a platform engineer to ship an AI service. Whether that trade is right for your project is a judgement I’ll get to — but let’s start with what happens when you actually call it.
Step 1: What one API call actually sets in motion
The headline mechanic is simple to state and does a lot of work: you make an API call that references a model, and inference runs on Replicate’s serverless GPU infrastructure. You didn’t spin up a server. You didn’t reserve a GPU. You sent a request, a machine somewhere ran the model, and you got a result back. The provisioning, the scaling, the teardown — that’s the platform’s job, not yours.
Per Replicate’s official docs (checked 2026-08-07), you can call models from more than one environment: run a model from Python, run a model from Node.js, and work from Google Colab if you’re prototyping in a notebook. That coverage matters because it maps to how people actually build. A backend engineer wiring inference into a Node service, a data person poking at a model in Colab, and a Python script batch-processing a folder of images are all hitting the same platform through the tooling they already use.
Replicate also documents deploying custom models — you’re not limited to a fixed catalogue of hosted options. And its docs describe scaffolding a full web app with a serverless backend and a React frontend in under 60 seconds (per Replicate’s official docs, checked 2026-08-07; that’s the vendor’s own description of the flow, not a figure I timed independently). If you want to put a real interface in front of that inference call rather than exposing a raw endpoint, that’s the same territory as building a shareable demo with Gradio — you’re wrapping the model in something a non-developer can click.
The practical upshot: the distance between “I found a model” and “I can call it from my app” collapses to roughly the length of one HTTP request.
Replicate versus rolling your own GPU stack
This table is descriptive, not a scorecard — I’m not rating one approach as the winner, just laying out who handles what. The self-hosted column reflects the definitional reality of running your own infrastructure; the Replicate column is sourced to its official pages.
Read it the way you’d read a “who owns which chore” list. Everything in the “you” column is work you can do — plenty of teams do — but it’s work. Replicate’s pitch is that most of those chores stop being your problem. Whether that’s a good deal depends entirely on how much you value owning that stack versus offloading it.
Step 2: Bringing your own model without a DevOps team
A hosted-inference platform is only interesting if it runs the model you care about, not just a fixed menu. This is where Replicate’s design gets more flexible than “pick from a list.”
Its API accepts model references from major open-source repositories — Hugging Face and GitHub — as well as custom Docker containers. That last part removes a decision that usually forces a hard choice: do I use a hosted model I don’t control, or do I self-host something bespoke? Here you don’t have to pick a lane. A public open-source model and a container you built yourself both live on the same platform and get called the same way.
To define how your model behaves, Replicate gives you two on-ramps: its Cog framework — an open-source tool that uses an optional configuration file to package a model — or standard Docker if that’s what you already know. Cog is the smoother path if you want the platform’s conventions handled for you; Docker is the escape hatch if you’d rather bring your own container and not learn a new abstraction. You describe the environment and the inputs, and the thing becomes callable.
This matters most for people who are shipping something novel. If you’ve fine-tuned a model, stitched together a pipeline, or built something that doesn’t exist as an off-the-shelf endpoint, deploying custom models is a first-class feature, not a workaround. The same mechanism that runs a popular open-source image model runs your weird one-off — which is the whole reason it’s useful for real products rather than just demos. It’s also the layer that makes model orchestration realistic for small teams: if you’re building something where AI agents call out to several specialised models, having them all reachable through one consistent API is a meaningful simplification.
Step 3: What it costs, and where it actually fits
Replicate bills for compute time rather than for a machine you rent by the month, and the unit is the second. Per its official pricing page (checked 2026-08-08), the per-second rate is set by the hardware your run lands on:
Nvidia T4 GPU (gpu-t4): $0.000225 per second, listed as $0.81 per hour
Nvidia L40S GPU (gpu-l40s): $0.000975 per second, listed as $3.51 per hour
Nvidia A100 (80GB) GPU (gpu-a100-large): $0.001400 per second, listed as $5.04 per hour
Nvidia H100 GPU (gpu-h100): $0.001525 per second, listed as $5.49 per hour
Hardware rate section of the official pricing page, captured 2026-08-08 (public page, not signed in)
Two details decide whether that model is cheap or expensive for you, and both are on the same page. For public models, you pay only for the time it takes to process your request. For private models — your own, deployed with Cog or Docker — most of them also bill the time the model spends booting and sitting idle; the exception is what the page calls fast-booting fine-tunes, which are labelled as such in a model’s version list. If your traffic is bursty and your model is private and slow to boot, the idle time is the line item that will surprise you.
A separate thing worth getting right, because the earlier version of this article got it wrong: some popular public models are listed with their own per-token or per-image prices instead of a per-second rate. The pricing page shows $3.00 per million input tokens and $0.015 per thousand output tokens for a language model listed under anthropic, and $0.04 per output image for flux-1.1-pro from Black Forest Labs (both checked 2026-08-08). Those are prices for those specific models — not a platform-wide rate card. Check the model page for the one you actually intend to call.
Official pricing page, captured 2026-08-08 (public page, not signed in)
That structure is why usage-based inference tends to suit variable workloads. If your traffic is spiky or unpredictable, paying per unit of work maps cleanly to demand. If your traffic is enormous and constant, the maths can tip the other way — at true scale, owning your own hardware is a calculation worth running, and Replicate doesn’t publish a break-even figure, so you’d have to model it against your own volume. The honest version: the pricing is attractive for the “I’m not sure how much traffic this’ll get” phase, and worth re-checking once you do know.
One more thing the pricing page tells you that is easy to miss: you do not have to guess any of this before you commit. It states that you will find an estimate of what a given model costs on that model’s own page, which means the cost question is answerable per model, up front, without writing a line of code or entering a card. It also draws the line between what is on offer — thousands of open-source models contributed by the community, with more added continuously, alongside hosted proprietary models — so the catalogue you are pricing against is not fixed. Check the estimate on the specific model page you intend to call, on the day you intend to call it, rather than budgeting from a rate you read in an article, including this one.
What per-second billing does to the arithmetic
Take the published A100 (80GB) rate of $0.001400 per second. A run that takes five seconds costs $0.007; a thousand of those runs costs $7. Leave the same class of machine running continuously for thirty days at the listed hourly rate of $5.04 and you are at $3,628.80. That is straightforward arithmetic on Replicate’s own numbers, not a benchmark or a quote from another provider — but it is the whole argument for per-second billing in one line: it favours workloads that are spiky and idle most of the time, and it stops favouring you the moment your GPU is busy around the clock.
Which is also the honest limit of this pricing model. If you reach steady, high utilisation, per-second billing on someone else’s hardware is no longer obviously the cheap option, and the comparison you should be running is against a reserved instance rather than against the pain of setting one up. The case for a hosted platform at that point is operational, not financial.
Two practical questions come up often enough to answer here rather than at the bottom of the page. First, what you can point it at: per Replicate’s official docs (checked 2026-08-08), the API accepts model references from Hugging Face and GitHub as well as custom Docker containers, so deploying something you trained yourself is a documented path rather than a workaround. Second, whether it is only an API: the docs describe scaffolding a web app with a serverless backend and a React frontend in under sixty seconds — that is the vendor’s description of its own tooling, not something measured here — so an interface in front of the endpoint is a starting template away, though most teams will still wire the API into an app they already have.
The short version, for your stack
If your blocker has ever been the GPU rather than the model — you had something working locally and stalled at “now host it reliably” — that’s precisely the gap Replicate is built to close, and for a solo dev or small team with variable traffic, it’s worth wiring a test call into your project (per the official docs and pricing above) before you assume you need to run servers at all.
Frequently Asked Questions
What programming languages can I call Replicate from?
Per Replicate’s official documentation (checked 2026-08-07), you can run a model from Python and from Node.js, and you can also work from Google Colab if you’re prototyping in a notebook environment. Those three cover a big slice of how AI features actually get built: Python for scripts, data pipelines, and ML-adjacent work; Node.js for web and API backends; and Colab for quick experimentation before you commit to anything. Because inference is exposed as an HTTP API underneath, the practical reality is that you’re calling a web endpoint — so even outside those documented paths, anything that can make an HTTP request can talk to it, though the officially supported and documented routes are the ones above. If you’re a backend engineer, you’ll likely wire it into your existing Node or Python service; if you’re exploring, Colab lets you poke at a model with almost no setup before deciding whether it belongs in your stack.
What is Cog, and do I have to use it?
Cog is Replicate’s open-source framework for packaging a machine learning model so it can run as a reproducible, callable service. It uses a configuration file to describe the environment and the model’s inputs and outputs, and it handles a lot of the containerisation boilerplate for you. The short answer to “do I have to use it” is no — Replicate’s documentation lists Cog’s configuration file as optional, and you can bring a standard Docker container instead (per Replicate’s official docs, checked 2026-08-07). The trade-off is roughly this: Cog is the smoother, more opinionated path that handles conventions for you, which is handy if you’d rather not think about the packaging layer. Plain Docker is the escape hatch if you already have a container and would prefer to control it yourself without learning a new abstraction. Either way, the goal is the same — turning a model into something deployable without a platform-engineering project attached.
A voice can pass every lab test and still sound fake to your ear
It’s tempting to assume the math has this figured out. Feed an AI voice into a scoring tool, get a high number back, and surely that means the voice sounds human — right? That’s the assumption a lot of product pages quietly lean on when they wave a “studio-quality” or “near-human” score at you.
The problem is that PESQ and MOS — two numbers this field leans on — were built to answer different questions, and neither of them was designed to tell you “does this synthetic voice sound like a real person reading your script.” One measures how badly a signal got mangled on its way through a network. The other is a crowd of humans averaging their gut reactions. When a voice tool leans on the wrong one, you end up with clips that look great on a spreadsheet and still make listeners squirm three sentences in.
So here’s the honest version of how voice quality actually gets measured in 2026 — what PESQ and MOS really capture, how listening tests handle messy things like accent and emotion, which datasets the models get validated against, and why the gap between a lab score and your actual ear is baked into the metrics themselves.
Step 1: What PESQ really measures — and the three things it can’t see
PESQ stands for Perceptual Evaluation of Speech Quality, and it’s standardized as ITU-T Recommendation P.862. The key word most people skip is Perceptual — it tries to model how a human would perceive degradation, but it does it entirely with math, no humans in the loop. It’s what engineers call a full-reference (or intrusive) metric: you feed it a clean reference recording and a degraded version, it aligns them, and it scores how far the degraded one drifted from the original.
That design tells you exactly what PESQ is good at and what it’s blind to. It was built for the telephony and VoIP world — to catch what happens to speech after it’s squeezed through a codec, dropped a few packets, or picked up line noise. In that context it’s genuinely useful. But three things fall straight through the cracks:
There’s no clean reference for a synthetic voice. When an AI generates speech from text, there’s no “original human recording” to compare against. PESQ literally needs both signals to work, so it can’t score a from-scratch TTS clip the way it scores a phone call.
It scores signal fidelity, not naturalness. A voice can be crystal-clear and perfectly intelligible while still landing every emphasis in the wrong place. PESQ doesn’t have an opinion about awkward prosody.
It was tuned for narrower audio than modern voices use. P.862 grew up in the narrowband/wideband telephony era; the successor standard, ITU-T P.863 (POLQA), was introduced to handle wider bandwidths, and Google’s open-source ViSQOL took another crack at the same objective-scoring problem.
Here’s how the main players in speech-quality scoring actually differ — this is a map of methodology, not a leaderboard:
One useful thing to take from that table: PESQ and its objective cousins live in the “how much did a real recording degrade” column, and human MOS lives in the “how good does this sound to a person” column. A voice tool that quotes PESQ at you for its synthetic output is quoting a metric that was never built to answer the question you’re asking.
Step 2: MOS, listening tests, and how researchers score accent and emotion
MOS — Mean Opinion Score — is the number many teams report, and it’s refreshingly simple in concept: play a clip to a panel of listeners, ask them to rate it 1 (Bad) to 5 (Excellent), and average the scores. The protocol behind it is ITU-T P.800, which describes the Absolute Category Rating (ACR) method most naturalness tests still use. Because it’s humans doing the rating, MOS reflects subjective judgments that automated metrics are not designed to score — that a voice sounds “off,” that the intonation feels flat, that an otherwise clean clip has a weirdly robotic cadence.
But “ask some people” hides a lot of methodology. A few of the protocols that shape those scores:
ACR (P.800) plays each clip on its own and asks for an absolute rating. It’s a common way to report a single naturalness MOS.
MUSHRA (ITU-R BS.1534) plays several versions side by side with a hidden reference and a deliberately degraded “anchor,” and asks listeners to rate them on a 0–100 scale. It’s often used when two systems are close and you need to tease apart small differences.
Crowdsourced ACR (ITU-T P.808) moves the whole thing online so researchers can gather more ratings than a lab room allows. Microsoft released an open-source P.808 toolkit for this approach to TTS work.
The genuinely hard part is everything beyond “clean vs. clean.” Naturalness and intelligibility are not the same axis — a heavily accented voice can be perfectly natural and slightly harder to parse, or crisp and intelligible while sounding synthetic. Good listening-test design controls for this by separating the questions: rate naturalness here, transcribe what you heard there (intelligibility is often measured by word-error rate on human transcriptions rather than a 1–5 opinion).
Accent, emotion, and context each break the simple single-number model in their own way. Accent introduces listener bias — a panel recruited in one region may rate an unfamiliar accent lower on “naturalness” for reasons that have nothing to do with synthesis quality, so serious studies balance their panels and report demographics. Emotion is judged less by “is this good” and more by “did the intended emotion come across,” which is a recognition task, not a quality rating. And context matters enormously: a voice rated 4.5 on isolated ten-second clips can fall apart across a two-minute paragraph, because listeners start noticing repetition, breath timing, and prosodic monotony that never showed up in a short sample. This is exactly why community events like the Blizzard Challenge and the VoiceMOS Challenge exist — to evaluate TTS systems on shared material under controlled listening protocols rather than trusting each vendor’s own demo reel.
Step 3: The datasets, ITU-T standards, and the lab-to-living-room gap
Models don’t get validated on vibes. There’s a fairly standard toolkit of public corpora and reference standards that voice research leans on, and knowing the names helps you read a technical claim critically.
The corpora models are trained and tested against
A handful of open datasets show up again and again: the CSTR VCTK corpus (many English speakers with varied accents, from the University of Edinburgh), LibriSpeech (read English derived from public-domain audiobooks), and LJSpeech (a single-speaker English set) are common training and benchmarking material. For quality modelling specifically, there are datasets built to predict human ratings — NISQA, a non-intrusive (no-reference) speech-quality model and dataset from work at TU Berlin, is one example of the push to score quality without needing a clean reference, precisely because synthetic speech doesn’t come with one.
The standards that make numbers comparable
On the reference-signal and methodology side, ITU-T recommendations do the standardizing work: P.800 for subjective MOS methods, P.808 for crowdsourced MOS, P.862/P.863 for the objective PESQ/POLQA algorithms, and test-signal specs like ITU-T P.501 that define the reference material used in intrusive testing. When a paper says “MOS was collected per ITU-T P.808,” that’s a real, checkable claim about how the scores were gathered — unlike a bare “4.7 MOS” floating free of any protocol.
Why a high score can still sound artificial
Here’s a gap that’s easy to overlook: every one of these metrics compresses a rich, time-varying experience into a scalar, and scalars lose information. A voice can top the charts on short-clip MOS and still feel artificial in the wild for reasons the test never sampled — prosody that’s correct on average but wrong on your specific sentence, a “uncanny valley” smoothness where the absence of small human imperfections reads as eerie, listener fatigue over long-form content, and mismatch between the test material and your actual use case. A model benchmarked on calm read-aloud audiobook sentences can score beautifully and then stumble on a punchy ad script full of numbers, brand names, and exclamation points. The score was real; it just answered a question about a different kind of speech than the one you’re about to publish.
Who actually needs to read these scores
This isn’t only an academic concern. A few concrete situations where the metric behind a number changes your decision:
Say you’re a solo podcaster choosing a TTS voice for intros and ad reads. A vendor’s MOS on ten-second clips measures short-clip quality, not how the voice holds up across a three-minute segment. The move is to generate your own longest realistic script and listen to the whole thing — fatigue and prosody problems can surface over longer stretches. If you’re already editing audio by text, the workflow around this is close to what I covered in the Descript Free Plan Review.
Imagine you’re a product engineer shipping voice inside an app. If your audio travels over a call or a compressed stream, then PESQ/POLQA-style objective metrics genuinely apply to the delivery path — but they still won’t tell you whether the underlying synthetic voice sounds human. You’re measuring two different things and need both.
If you’re an accessibility lead evaluating a screen-reader or IVR voice, intelligibility outranks naturalness, and accent coverage matters more than a headline MOS. Here you’d weight word-error-rate-style measures and test with the accents your actual users speak, not the panel the vendor happened to recruit.
In every case the pattern is the same: figure out which question the published number actually answers, then run the one test the number skipped. If you’re comparing commercial options, the free tiers are usually enough to do exactly that — the Murf AI Review walks through where one such plan’s limits kick in. And if you’re curious how researchers formalize this kind of “which metric fits which task” reasoning at scale, the same evidence-first mindset shows up in How Do AI Agents Choose and Use Tools.
Read the score, then listen anyway
Metrics tell you which question a number answered; your own ears, on your own longest script, tell you whether the voice is right for the job — run both.
Frequently Asked Questions
Is a higher MOS score always better?
Higher is generally better on the axis MOS measures, but “better” only means “this panel of listeners, rating these clips, under this protocol, preferred it.” A 4.6 collected on calm, isolated read-aloud sentences is not directly comparable to a 4.2 collected on emotional, long-form, or accented material — the harder test naturally pulls scores down even for a genuinely good voice. Sample size, listener demographics, whether the test was ACR or MUSHRA, and the length of the clips all move the number. That’s why serious papers report the protocol alongside the score and include confidence intervals. My practical rule when I’m reading a claim: treat any MOS quoted without its method as marketing, not data. If two tools quote MOS from different studies, you basically can’t compare them head-to-head — you’d need both voices tested on the same material under the same protocol before the comparison means anything.
Why don’t voice AI companies just use PESQ for their TTS models?
Because of how PESQ is defined, it doesn’t fit the way text-to-speech is generated. It’s a full-reference metric defined in ITU-T P.862 — it requires a clean “original” recording to compare a degraded version against, and it scores how far the degraded signal drifted. When a model generates a voice from text, there is no original human recording of that exact sentence in that exact voice to compare to, so the metric has nothing to anchor on. PESQ also measures signal-level degradation from things like codecs and packet loss, not naturalness or prosody, which are precisely what makes synthetic speech sound off. That mismatch is why the field leans on human MOS (per ITU-T P.800/P.808) for naturalness and increasingly on non-reference models like NISQA that were built to score quality without needing a pristine reference. PESQ still has a legitimate home — evaluating how speech survives a network or a codec — it’s just the wrong instrument for “does this AI voice sound human.”
What’s the difference between MOS and PESQ in plain English?
MOS is people; PESQ is math. MOS — Mean Opinion Score — is literally a room (or an online crowd) of human listeners rating clips 1 to 5 and averaging the result, defined by ITU-T P.800. It captures subjective impressions from human listeners, like “this sounds robotic.” PESQ, defined by ITU-T P.862, is an algorithm that estimates perceived quality by comparing a degraded signal to a clean reference — no humans in the loop at rating time. There’s a middle category worth knowing too: MOS-LQO, which is a MOS-like number predicted by an objective model rather than gathered from people. The short version: use human MOS when you want to know whether a voice sounds natural to a person, and use PESQ/POLQA when you want to know how much a real recording degraded traveling through a system. They’re not competitors; they answer different questions, and confusing the two is how a technically clean voice ends up sounding artificial in production.
Can I run these tests myself without a research lab?
Partly, yes. You can’t easily replicate a controlled listening study — that needs recruited, balanced panels and careful protocol design — but you can borrow the ideas. For subjective evaluation, the ITU-T P.808 approach (crowdsourced ACR) exists precisely to scale MOS collection online, and Microsoft open-sourced a P.808 toolkit that some teams use to gather ratings. For objective scoring on a delivery path, open implementations of PESQ-style metrics and Google’s open-source ViSQOL are available if you have a clean reference to compare against. Honestly, though, one useful “test” for most people isn’t a formal metric at all: generate your own longest, messiest, most realistic script — the one with numbers, names, and emotion — and listen to the whole thing on the device your audience will use. That informal test lets you hear how fatigue and prosody hold up across a full-length script rather than a short clip, and it costs you nothing but a few minutes.
What datasets do AI voice tools train and validate on?
A handful of public corpora recur across the field. For English, the CSTR VCTK corpus (many speakers with varied accents, from the University of Edinburgh), LibriSpeech (read speech derived from public-domain LibriVox audiobooks), and LJSpeech (a single-speaker set) are common training and benchmarking material. For quality prediction specifically, there are purpose-built datasets that pair audio with human ratings so models can learn to predict MOS — NISQA, from work at TU Berlin, is one non-intrusive example. On the evaluation side, shared community events like the Blizzard Challenge and the VoiceMOS Challenge put multiple systems through the same listening protocols on common material, in contrast to each vendor’s self-selected demo. Bear in mind most of these are English-heavy and read-speech-heavy, so a model that shines on them can still wobble on other languages, spontaneous speech, or expressive delivery. When a tool cites a benchmark, it’s worth asking whether that benchmark resembles your actual content.
Why does a voice with a great score still sound artificial to me?
Because a score is a compression, and compression loses detail. Every metric here squeezes a rich, time-varying listening experience into one number, and the things that make a voice feel artificial often live in exactly the parts that got averaged away: prosody that’s fine on average but wrong on your specific sentence, an uncanny smoothness where the absence of tiny human imperfections reads as eerie, and fatigue that only appears over long passages. There’s also test-material mismatch — a voice benchmarked on calm read-aloud sentences can score beautifully and then stumble on a punchy script full of numbers and exclamation points. And there’s you: your ear, your familiarity with the content, your device, your expectations. None of that was in the lab panel. The score wasn’t lying; it answered a question about a certain kind of speech under certain conditions, and your real use case sits somewhere the test never sampled. That gap is structural, not a bug you can benchmark away.
Do PESQ and MOS measure emotion or accent quality?
Not directly, and this trips people up. Standard PESQ doesn’t touch emotion or accent at all — it scores signal degradation against a reference, full stop. Standard naturalness MOS (ACR) asks “how good does this sound,” which can be swayed by emotion and accent but doesn’t isolate them. Measuring those properly needs different task designs. Emotion is usually evaluated as a recognition task — did listeners correctly identify the intended emotion — rather than a 1-to-5 quality rating, because “natural” and “correctly expressive” are separate questions. Accent is even trickier, because it interacts with listener bias: a panel unfamiliar with an accent may rate it lower on naturalness for reasons unrelated to synthesis quality, so careful studies balance their panels and report demographics. If accent coverage or emotional range is what you actually need — say, for a global product or an audiobook — don’t trust a single headline MOS. Test with the accents and emotional scripts your real audience will hear, and evaluate recognition and intelligibility separately from raw naturalness.
We use cookies to keep the site running and, with your consent, to measure traffic and (in future) show ads. You can accept or decline non-essential cookies. Privacy Policy