The web page is the part you never build
Say you’ve just finished training a model. It works in your notebook, the metrics look right, and now someone — a supervisor, a client, a curious friend who “wants to see it” — asks you to show them. Your options a few years ago were grim: screen-share a Jupyter cell, or spend a weekend learning enough React to embed a file uploader you’ll never touch again.
Here’s the part that trips people up when they first meet Gradio: you don’t build the interface. You describe your model’s inputs and outputs in Python, and the browser page — the upload button, the text box, the results panel, the layout — gets generated for you. There’s no HTML file to open, no CSS to fight, no JavaScript bundle to ship. You stay in the one language you already used to build the model.
Gradio is an open-source Python library, now maintained under Hugging Face, for wrapping machine-learning functions in a web UI. This walkthrough is deliberately small: install it, wrap a toy function, swap in a real PyTorch or TensorFlow model, and get a link you can paste into a chat. If you can write a Python function that takes an input and returns an output, you already know most of what you need. I’ll compile the moving parts from Gradio’s official docs and public examples so you can see the whole path before you touch a terminal.
Step 1: Wrap one Python function and watch a UI appear
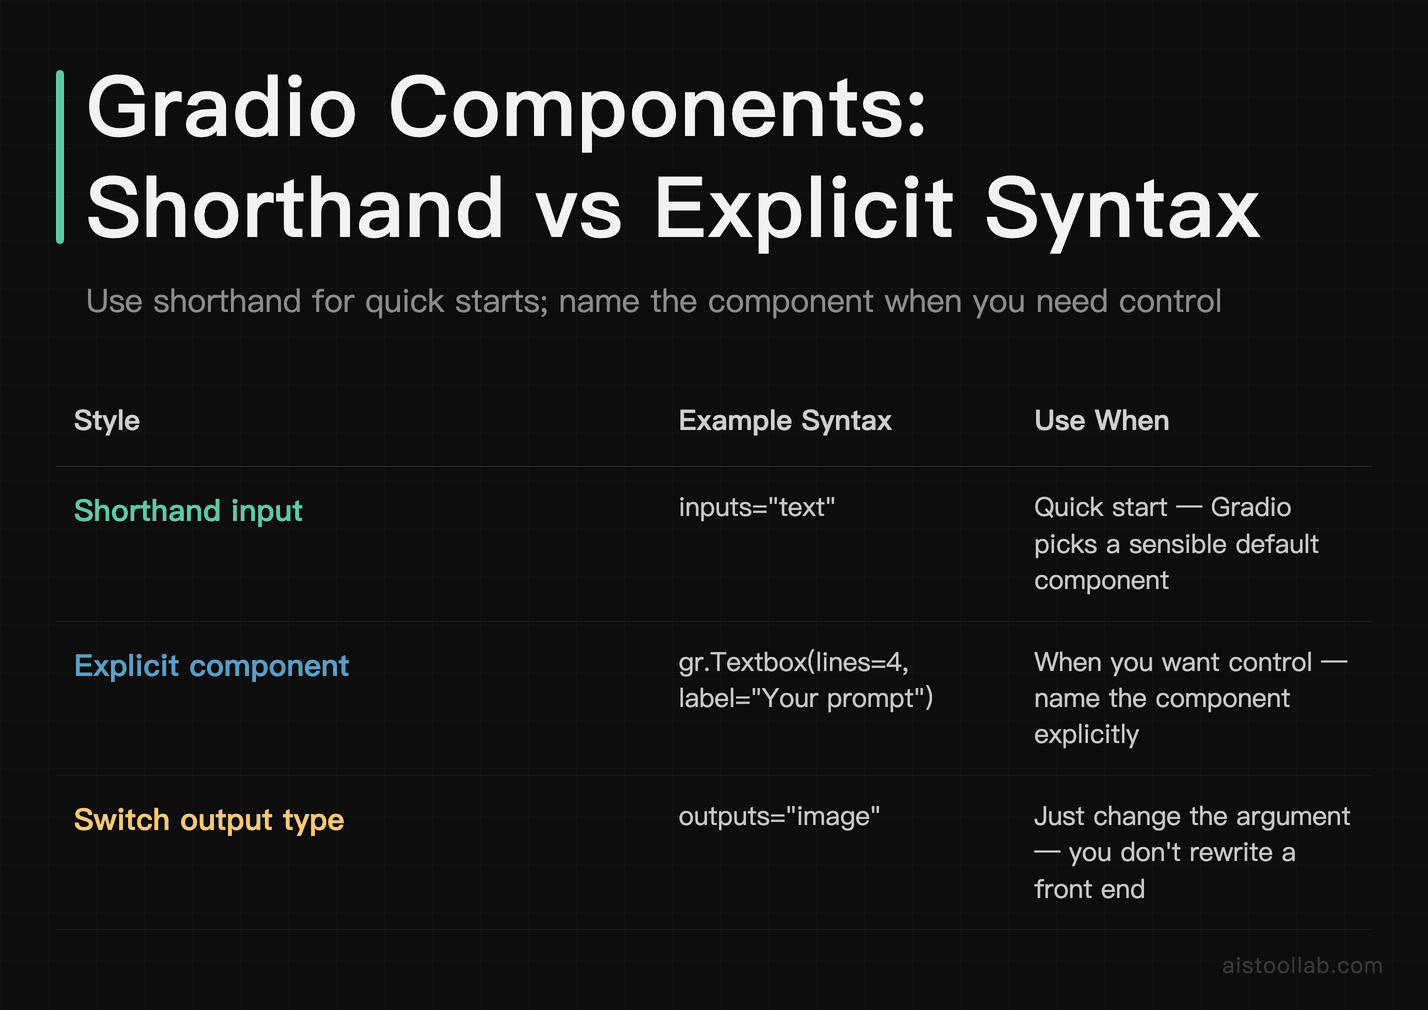
The entire mental model of Gradio is this: a function goes in, an interface comes out. You write a normal function, hand it to gr.Interface along with a description of what the input and output look like, and call launch(). Start with something that has nothing to do with machine learning so the plumbing is obvious.
import gradio as gr

def greet(name):
    return f"Hello {name}, your interface is live."

demo = gr.Interface(
    fn=greet,
    inputs="text",
    outputs="text",
)

demo.launch()
Install first with pip install gradio, then run the script. Gradio starts a local server and prints a URL (by default something on 127.0.0.1:7860). Open it and you’ll see a text box, a submit button, and an output panel — none of which you wrote. That "text" shorthand is Gradio picking a sensible default component; when you want control you name the component explicitly, like gr.Textbox(lines=4, label="Your prompt").
The reason this matters for a beginner is that the interface and the logic never get tangled. If you decide the output should be an image instead of text, you change outputs="text" to outputs="image" and adjust what your function returns — you don’t rewrite a front end. Gradio ships components for the data types ML people actually deal with: gr.Image, gr.Audio, gr.Video, gr.Dataframe, gr.Label for classification scores, and more. When one input and one output isn’t enough, gr.Blocks lets you arrange several components into rows and columns, still in Python.
Step 2: Swap the toy function for a real PyTorch or TensorFlow model
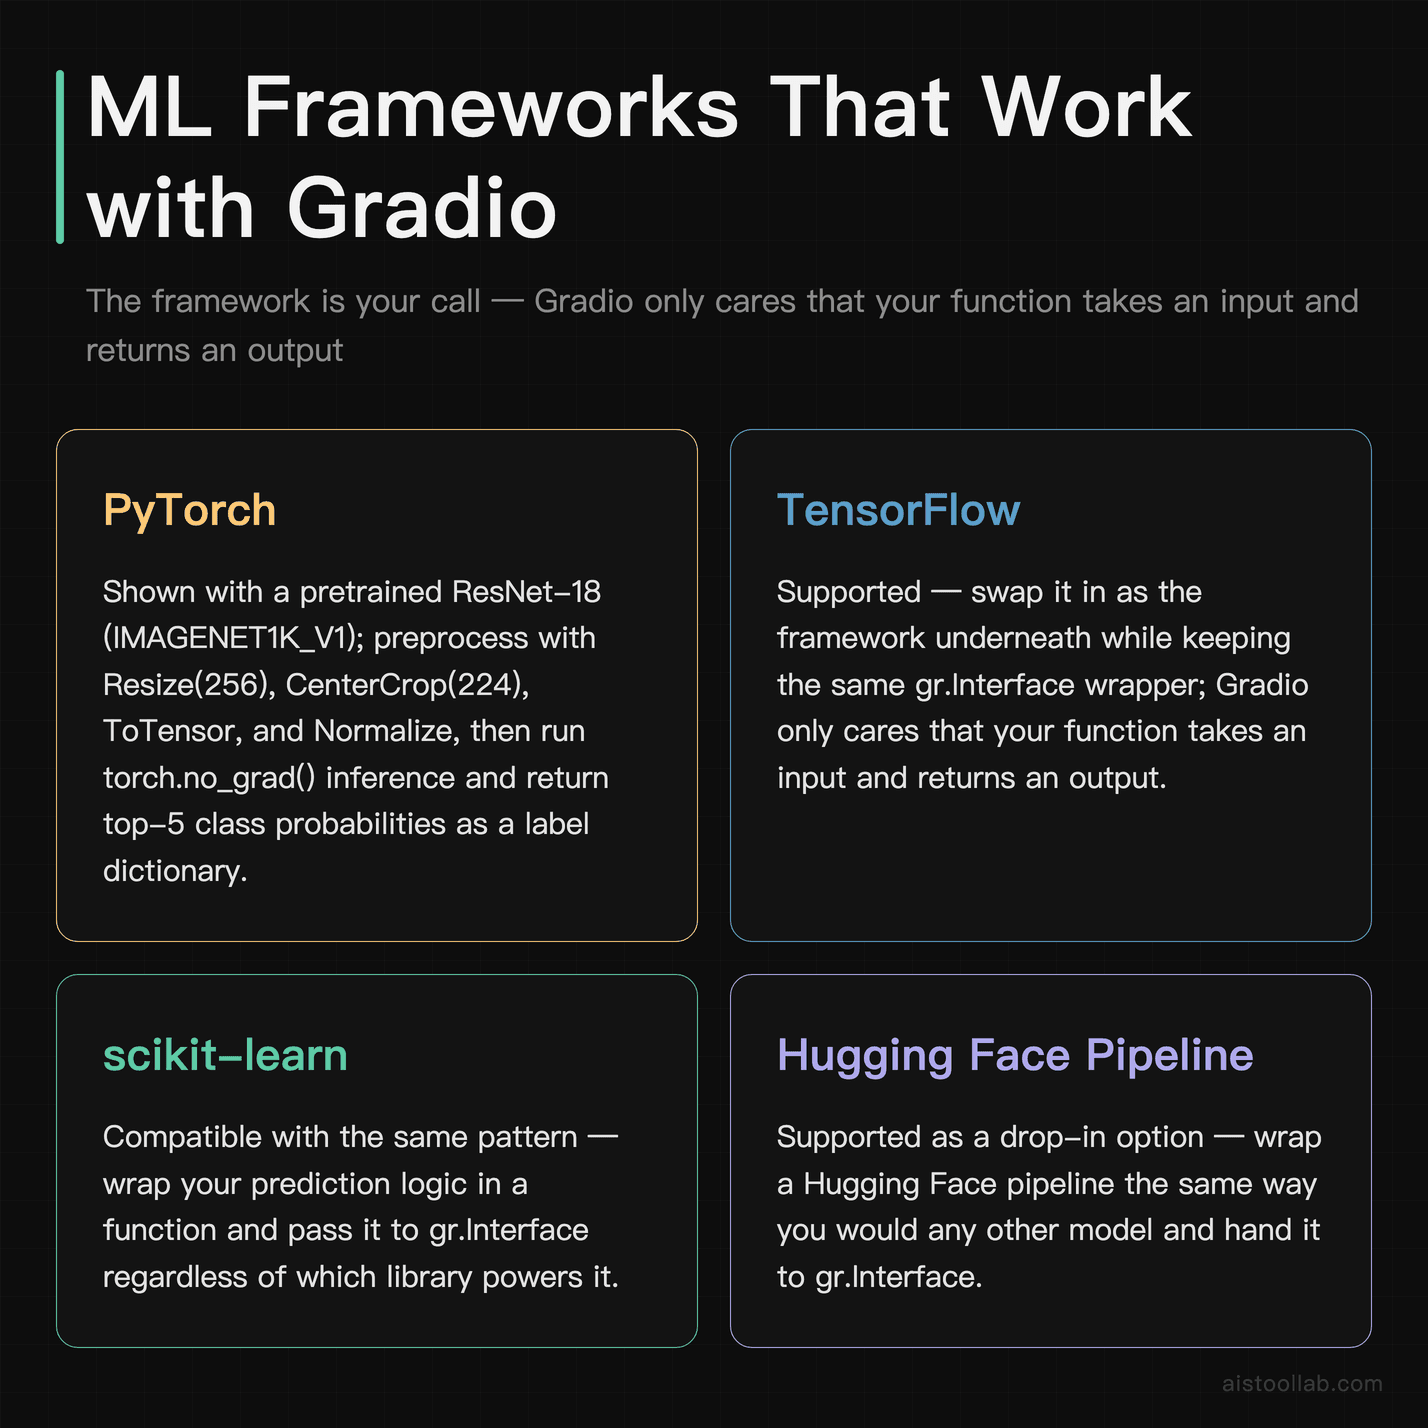
Nothing about Step 1 was machine learning. The upgrade is simply that the function now loads a model and runs inference. Because Gradio only cares that your function takes an input and returns an output, the framework underneath is your call — PyTorch, TensorFlow, scikit-learn, a Hugging Face pipeline, or a hand-rolled model you wrote yourself. Here’s an image classifier using a pretrained PyTorch model, which is a common first “real” demo.
import gradio as gr
import torch
from torchvision import models, transforms

model = models.resnet18(weights="IMAGENET1K_V1")
model.eval()

preprocess = transforms.Compose([
    transforms.Resize(256),
    transforms.CenterCrop(224),
    transforms.ToTensor(),
    transforms.Normalize(
        mean=[0.485, 0.456, 0.406],
        std=[0.229, 0.224, 0.225],
    ),
])

# labels: your list of class names, one per output index
def classify(img):
    tensor = preprocess(img).unsqueeze(0)
    with torch.no_grad():
        logits = model(tensor)
        probs = torch.nn.functional.softmax(logits[0], dim=0)
    top = torch.topk(probs, 5)
    return {labels[i]: float(probs[i]) for i in top.indices}

demo = gr.Interface(
    fn=classify,
    inputs=gr.Image(type="pil"),
    outputs=gr.Label(num_top_classes=5),
)

demo.launch()
The shape is identical to the greeting demo — the only difference is that classify does real work. gr.Image(type="pil") tells Gradio to hand your function a PIL image, and gr.Label renders the returned dictionary as a ranked list of class probabilities. If you’re on TensorFlow, the pattern doesn’t change: load your tf.keras model at the top, call it inside the function, and return whatever your output component expects. For a custom model — a function you wrote from scratch, a scikit-learn estimator, an API call to your own backend — it’s the same story, because Gradio never inspects the model, only the function signature.
Two habits worth adopting early: load the model once at module level (not inside the function, or you’ll reload weights on every request), and keep preprocessing inside the function so the interface stays a thin wrapper. Now, before you deploy, it’s worth seeing how Gradio compares to the other Python tools people reach for when they want a UI without a front-end team.
The table below is judged for one specific situation — a beginner whose goal is shipping a shareable model demo, not building a full production web app. The “design leaning” column is my read of each tool’s focus, and it’s derived from the factual rows above it, not a score I invented.
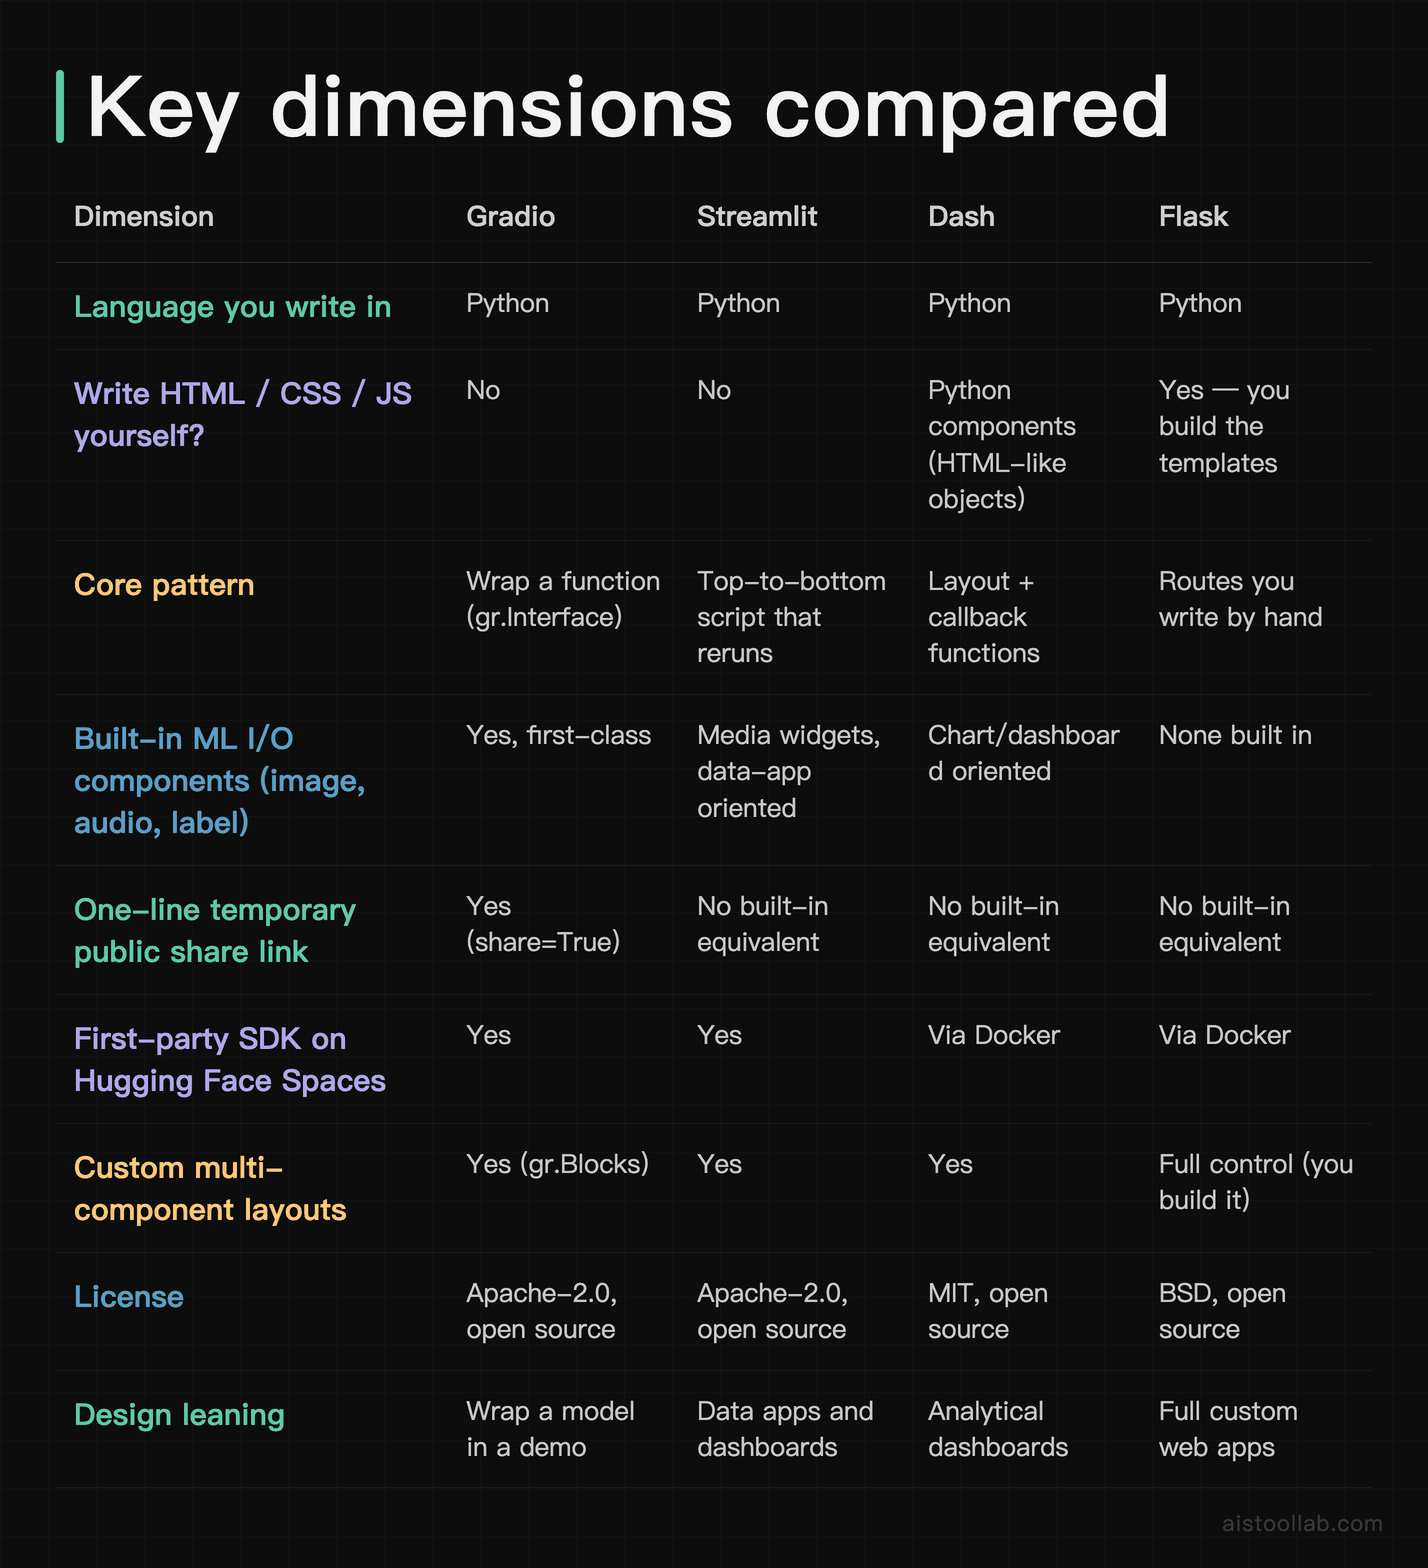
Read it by what you’re actually trying to do. If your goal is a quick, shareable interface around a model and you want a throwaway public link, Gradio’s share=True and native Spaces support line up with that specifically. If you’re building a multi-page data dashboard, Streamlit or Dash lean that way. If you need a full custom web app with your own front end, Flask is the general-purpose tool — but you’ll write the HTML yourself, which is the exact thing this whole exercise avoids.
Step 3: Get it in front of people who aren’t sitting next to you
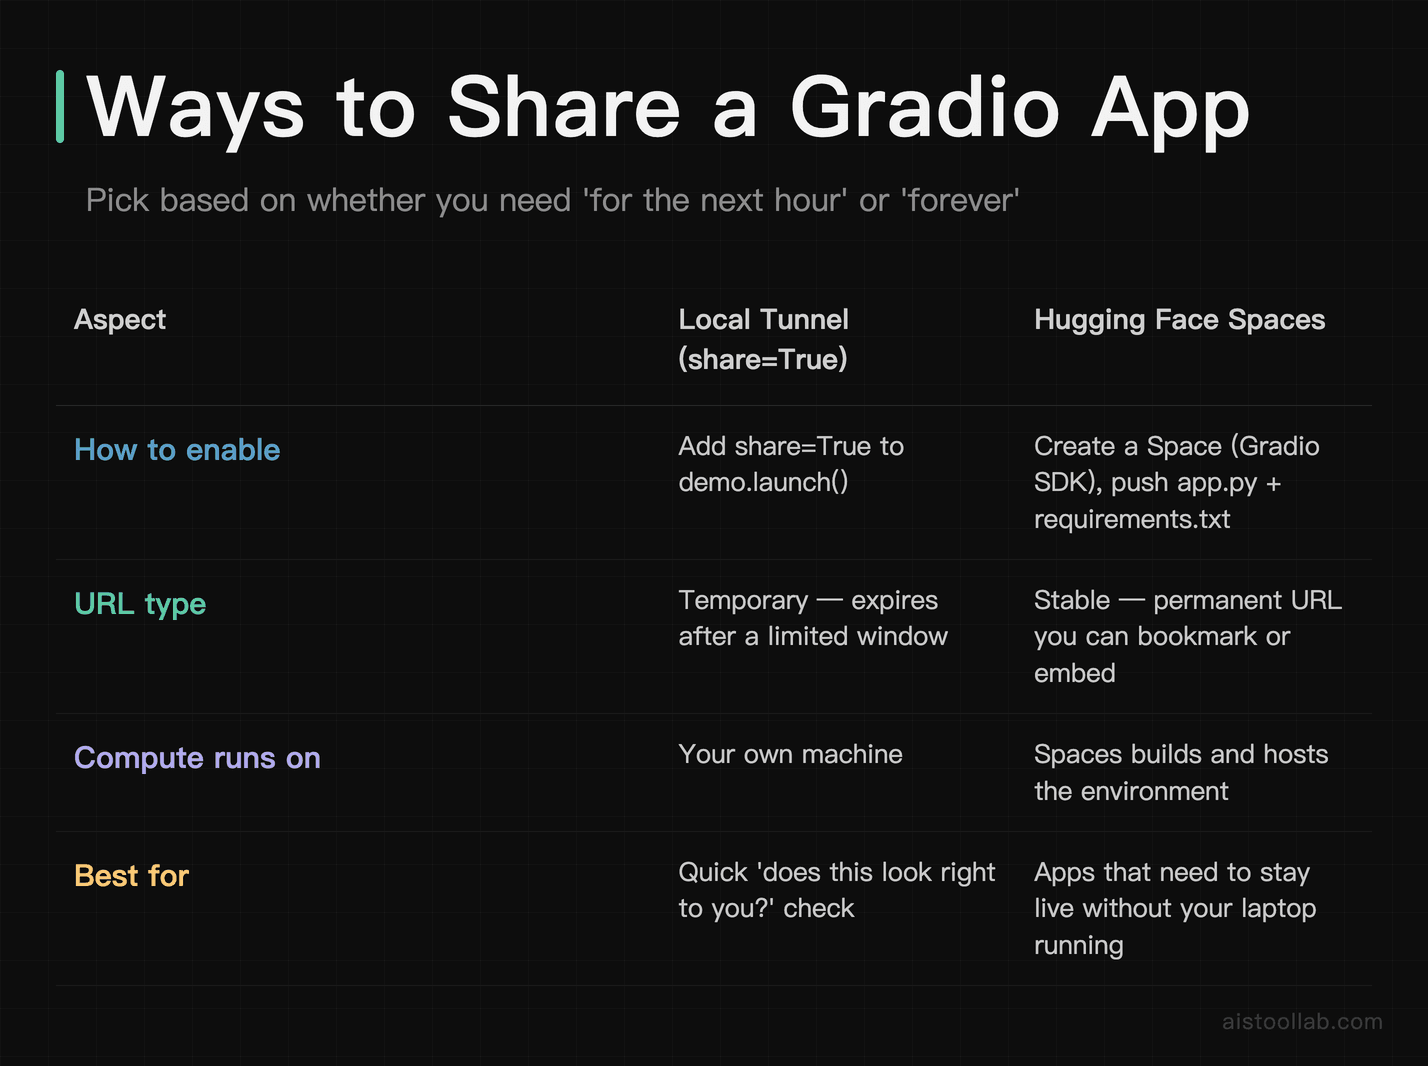
A demo that only runs on 127.0.0.1 helps no one but you. Gradio gives you three escalating ways to share, and the right one depends on whether you need “for the next hour” or “forever.”
The instant tunnel. Change one argument: demo.launch(share=True). Gradio serves your app from your own machine but exposes it through a temporary public URL, so a collaborator can open the link from their laptop while your Python process keeps running. These links are temporary — they expire after a limited window, and Gradio’s “Sharing Your App” documentation lists the current duration, so check there rather than trusting a number that may have changed. Because your machine is still doing the compute, this is perfect for a quick “does this look right to you?” and bad for anything you need to stay up overnight.
Hugging Face Spaces. For a permanent URL that doesn’t depend on your laptop being awake, push the app to a Space. Create a new Space, choose the Gradio SDK, and add two files: your app.py and a requirements.txt listing your dependencies. For the classifier above that’s roughly:
gradio
torch
torchvision
Spaces builds the environment and hosts the app at a stable URL you can bookmark or embed. There’s a free CPU tier for lighter models, plus paid hardware upgrades when you need a GPU — treat the hardware choice as a real cost decision rather than a default. If you’re new to the platform, I walked through the account-and-model basics in the Hugging Face beginner guide, and Spaces slots naturally on top of that.
Standalone hosting. If you’d rather keep everything on your own infrastructure, a Gradio app is just a Python process. Run demo.launch(server_name="0.0.0.0", server_port=7860) on a server, wrap it in Docker, and put it behind your usual reverse proxy. You lose the one-click convenience of Spaces but keep full control over the environment, which matters if the model or its data can’t leave your own servers.
Who this actually saves time for
Say you’re a researcher and reviewers keep asking to “try the model.” Instead of a README that tells them to clone the repo, create a virtual environment, and download weights, you hand them a Spaces link. They interact with your model in a browser; nobody installs anything.
Sanity-checking with non-coders
Imagine you’re one of two ML engineers at a small startup and the product manager wants to see how the model behaves on edge cases. Drop a share=True link into the Slack thread, let them throw weird inputs at it for an afternoon, and collect their reactions — without teaching anyone to run Python. When you close your laptop, the temporary link goes down, which is often exactly what you want for an internal check.
Teaching, portfolios, and public demos
If you’re building a portfolio or teaching a workshop, a Space gives you a permanent, linkable demo that anyone can open. A hiring manager clicking a working interface tends to absorb more than one reading a metrics table. The same setup works for a class: students interact with a concept live instead of watching you narrate a notebook.
Start with the ugliest demo that runs
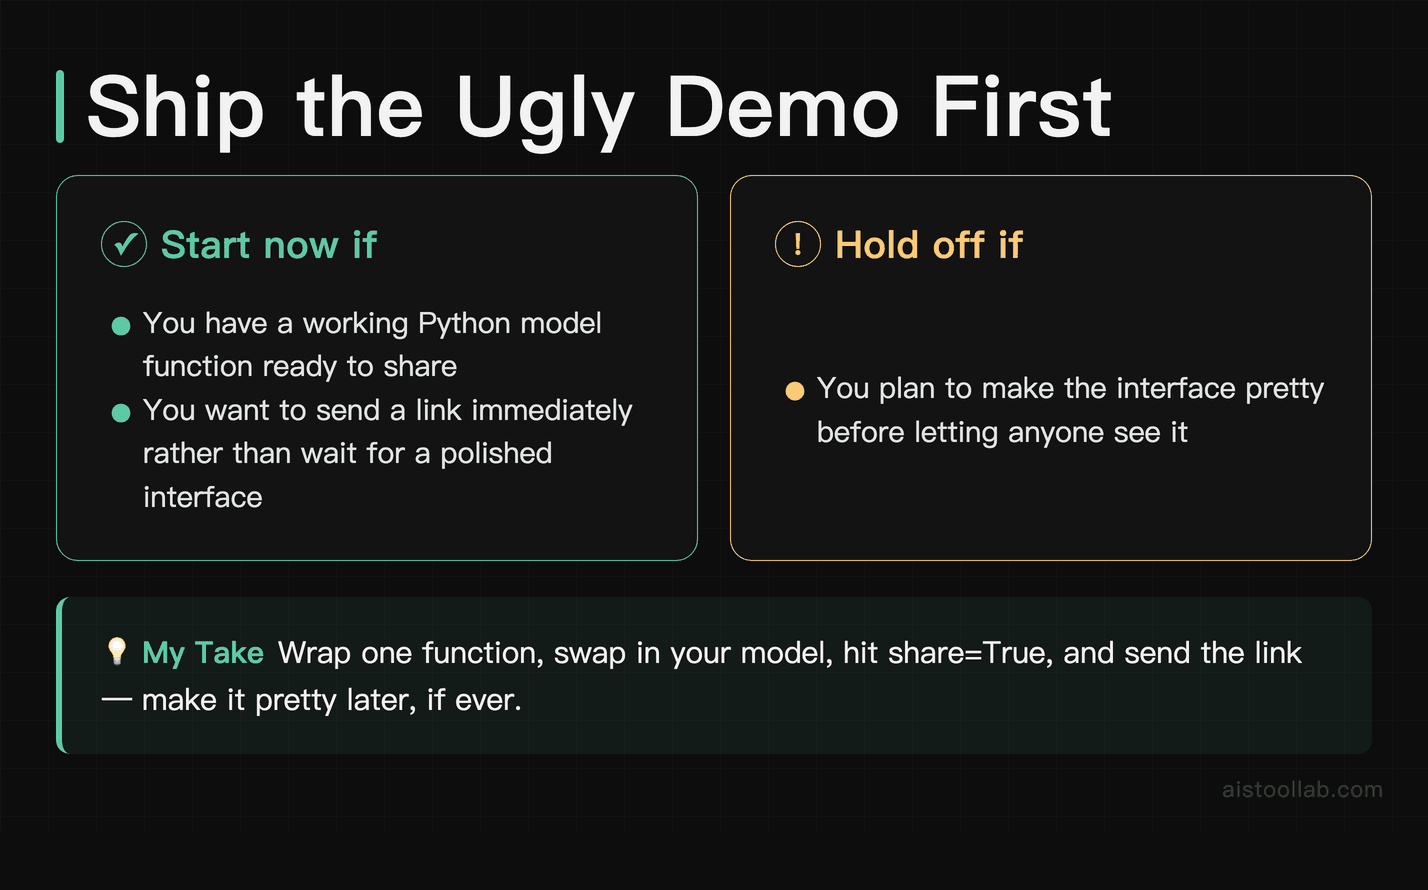
Wrap one function, swap in your model, hit share=True, and send the link — then make it pretty later, if ever.
Frequently Asked Questions
Is Gradio free to use?
The library itself is open-source under the Apache-2.0 license, so installing it with pip install gradio and running apps locally or on your own server costs nothing. Where money can enter is hosting. Hugging Face Spaces, the most common place people deploy Gradio apps, offers a free CPU tier that’s fine for lighter models, plus paid hardware upgrades when you need more memory or a GPU. Standalone hosting on your own cloud server carries whatever that server costs. So the honest answer is: the software is free, and your bill depends entirely on the compute your model needs and where you choose to run it. For a beginner shipping a small demo, you can genuinely get from install to a public link without paying anything — the free local tunnel and the free Spaces CPU tier both exist for exactly that. Just don’t assume a GPU-hungry model will stay free; check Hugging Face’s current Spaces pricing page before you commit to hardware.
Do I really need zero front-end or JavaScript knowledge?
For the standard path, yes — that’s the whole point of the library. You describe inputs and outputs with Gradio components, and it generates the browser interface. You never open an HTML file or write CSS to get a working, decent-looking demo. That said, “zero” has an honest edge: if you want to heavily customize the visual design beyond what Gradio’s theming and gr.Blocks layout options give you, or inject custom CSS, you can — Gradio exposes hooks for that — but you’re then choosing to go beyond the no-front-end path, not being forced onto it. For the beginner goal in this guide — take a model, make it clickable, share it — you can go start to finish in Python. If you find yourself wanting pixel-level control over the design, that’s usually a sign your project has outgrown a quick demo and is turning into a real product, at which point a general web framework starts to make sense.
How long do the share=True links stay live?
The share=True links are temporary by design. They stay up while your Python process keeps running and they expire after a set window even if your script never stops. Gradio’s official “Sharing Your App” documentation states the current expiry duration, and because that kind of detail can change between versions, I’d rather point you there than quote a number that might be stale by the time you read this. The practical takeaway matters more than the exact hours: a share link is for “look at this now,” not “keep this online for a month.” Two things kill it — closing your terminal (your machine is the server) or hitting the expiry window. If you need something that survives your laptop going to sleep or a link that stays valid indefinitely, that’s the signal to deploy to Hugging Face Spaces or your own server instead, where hosting doesn’t depend on your local process.
Can I use it with TensorFlow, not just PyTorch?
Yes. Gradio doesn’t know or care what framework your model uses, because it only interacts with your Python function. The classifier example in this guide happens to use PyTorch, but if you load a tf.keras model at the top of the file and call it inside your prediction function, the rest of the code — the gr.Interface, the components, the launch — is exactly the same. The same holds for scikit-learn models, XGBoost, a Hugging Face transformers pipeline, or a completely custom function you wrote by hand. As long as your function takes inputs Gradio can render (text, image, audio, numbers, and so on) and returns something a Gradio output component can display, the underlying machinery is your business. This framework-agnostic design is a big part of why Gradio works as a general “put a UI on any model” tool rather than being tied to one ecosystem. Just remember to list the right dependencies in requirements.txt if you deploy to Spaces.
Gradio or Streamlit — which should I pick?
It depends on what you’re building, not on which is “better.” If your goal is specifically to wrap a model in an interface and share it — one function in, a prediction out — Gradio’s function-wrapping pattern and its one-line share=True tunnel are aimed straight at that. If you’re building a multi-section data app or an interactive dashboard with charts, filters, and narrative text down the page, Streamlit’s top-to-bottom script model leans that direction. Both are Python-only, both are open source under Apache-2.0, and both are first-party SDKs on Hugging Face Spaces, so deployment isn’t a deciding factor. The clearest practical difference for a beginner is the temporary public link: Gradio has a built-in one-line share tunnel and Streamlit doesn’t ship an equivalent. So on the narrow dimension of “spin up a quick shareable model demo,” I’d reach for Gradio first; if the project is really a dashboard, I’d look at Streamlit. Neither is a wrong answer — they’re built for slightly different jobs.
How do I deploy to Hugging Face Spaces, concretely?
Create a new Space from your Hugging Face account and select the Gradio SDK when prompted. A Space is backed by a git repository, so you add your files there: an app.py containing your Gradio code (the same script you ran locally, ending in the interface definition), and a requirements.txt listing every library your app imports — gradio, plus torch, tensorflow, or whatever your model needs. Push those files, and the Space builds the environment and starts your app automatically at a stable public URL. A few gotchas worth knowing up front: pin your dependency versions if reproducibility matters, keep model weights small enough for the hardware tier you picked (or upgrade the hardware), and remember that the free CPU tier can be slow for large models. If your model is too heavy for free CPU, that’s when the paid GPU hardware comes in — a real cost, so size it against how often the demo will actually be used.
Is it safe to expose my model to the public, and can I add a login?
Exposing anything to the internet deserves a moment’s thought, and Gradio gives you controls for it. You can gate an app behind basic authentication by passing an auth argument to launch() — for example a username-and-password tuple — so only people with the credentials can open it, which is handy for a private team demo shared over a temporary link. Beyond access control, think about what your function does with input: if it runs untrusted code, hits internal systems, or logs sensitive data, a public demo can expose more than you intend. For a public Space, assume strangers will feed it every strange input imaginable, so validate and handle errors gracefully. For anything touching private data or models that can’t leave your infrastructure, skip the public tunnel entirely and self-host behind your own network and reverse proxy. The convenience of a one-click share link is real, but it’s a decision to make deliberately, not a default to accept without reading Gradio’s docs on authentication and security first.
Last updated: 2026
Found this review helpful?
👉 Browse the AI Tools Library to find the right tools for your workflow.