
On the Hub, your README does much of the work of getting a model found
A common question from people who’ve just trained their first model goes something like this: “I’ve got a working model sitting on my laptop — now what?” The instinct is to treat uploading as an afterthought, a quick export once the “real work” of training is done. That instinct is backwards. On Hugging Face, how easily people can find, evaluate, and run your model depends heavily on the model card, the tags, and any demo you wrap around it — the weights alone don’t surface in the Hub’s search and filters.
Here’s the thing that surprises beginners: the Hugging Face Hub is git-based. Every model lives in its own repository, and the star of that repository is a README.md file with a small block of structured metadata at the top. Get that block right and your model shows up in the correct filter panels, next to the datasets it was trained on, tagged with the task it performs. Get it wrong — or skip it — and your model is technically online but effectively invisible.
This walkthrough is built for someone shipping their first repository, not for people who already know the CLI cold. We’ll go step by step: create the repo and write a card that surfaces in search, push weights from PyTorch, TensorFlow, or JAX without scrambling the file layout, then stand up an interactive demo with Spaces so people can try the thing without cloning anything. Everything below is compiled from Hugging Face’s public documentation and the Hub’s visible behaviour, not from any private benchmark.
Step 1: Create the repo and write a model card that people can actually find
Creating a repository is the least interesting part, so let’s get it out of the way. You can click “New Model” from your profile on the Hub, or do it from Python. The programmatic route matters because it’s the same code you’ll reuse when you automate things later:
from huggingface_hub import login, HfApi

login()  # paste your access token when prompted
api = HfApi()
api.create_repo(repo_id="your-username/my-first-model")
That gives you an empty git repo with a URL. Now for the part that actually earns discovery. A Hugging Face model card is a README.md, and the top of that file holds a YAML metadata block — the section fenced between two lines of three dashes. The Hub reads that block to slot your model into its filters. This is a real, checkable feature of the Hub, not a growth-hacking trick: the fields you fill in become the facets readers browse by.
---
license: apache-2.0
language:
  - en
library_name: transformers
pipeline_tag: text-classification
tags:
  - sentiment
  - beginner-friendly
datasets:
  - imdb
base_model: distilbert-base-uncased
---
Walk through why each line pulls its weight. pipeline_tag tells the Hub which task your model performs, which is how it lands under the “Text Classification” filter — and, importantly, whether the little inference widget on your model page knows what interface to render. library_name connects it to the loading code, so the auto-generated “Use this model” snippet is correct. license is a field the Hub can use as a search filter; leaving it blank means your model won’t appear when someone filters results by license. datasets and base_model create real links back to the dataset and parent model pages, which means your repo shows up in the “models trained on this dataset” and “fine-tunes of this base model” lists — free inbound discovery you didn’t have to campaign for.
If you want to see what those fields look like from the other side of the Hub — the person scrolling filters and deciding whether your repo is worth downloading — we walked through how to do that in finding a usable open model on Hugging Face.
Below the YAML, write prose like you’re helping the next person, not padding a portfolio. Sections worth including are: what the model does in one sentence, a copy-pasteable code snippet that loads and runs it, the intended use and the out-of-scope use, how it was trained and on what data, and its known limitations and biases. That last one isn’t a compliance box — it helps someone tell whether your model fits their use before they deploy it. Honest limitations give readers the information they need to decide.
Step 2: Push weights from PyTorch, TensorFlow, or JAX and lay the files out right
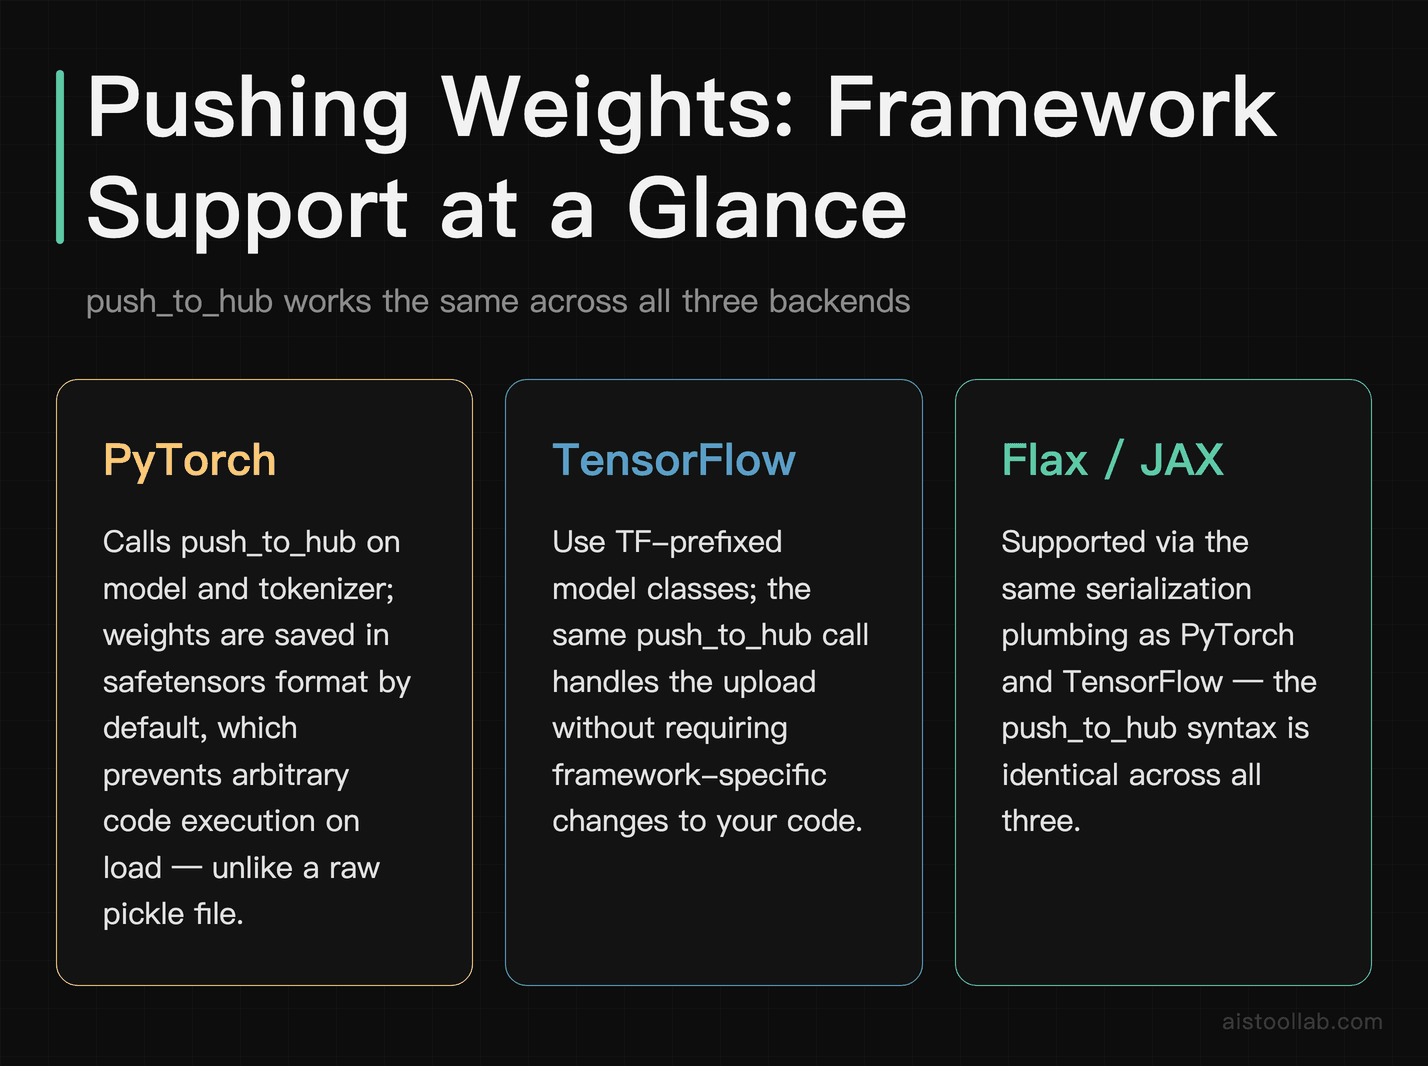
The good news for beginners is that if you built your model with the transformers library, uploading is close to trivial regardless of which backend you used. The library exposes a push_to_hub method on models and tokenizers across frameworks — PyTorch, TensorFlow (the TF-prefixed model classes), and Flax/JAX all support it because they share the same serialization plumbing:
# works the same whether model is a PyTorch, TF, or Flax class
model.push_to_hub("your-username/my-first-model")
tokenizer.push_to_hub("your-username/my-first-model")
That single call handles the awkward part — large binary files. The Hub uses Git LFS-style large-file storage for weights, so you don’t manually wrestle multi-gigabyte checkpoints through plain git. When you save with transformers, PyTorch weights are written in the safetensors format by default, which is worth knowing about: it’s a format designed so loading a file can’t execute arbitrary code the way a raw pickle can. For a public model other people will download, shipping safetensors is one of those small choices that makes your repo look like it was made by someone who knows what they’re doing.
Not everything is a transformers model, though — plenty of first models are a custom PyTorch nn.Module, a saved TensorFlow SavedModel directory, or a Flax checkpoint you serialized yourself. For those, you skip the high-level helper and upload files directly:
api.upload_folder(
    folder_path="./my_model_dir",
    repo_id="your-username/my-first-model",
)
When you go the raw route, file organization becomes your job, and it’s where discoverability quietly lives or dies. Keep the loading artifacts at the repo root (the weights, the config, the tokenizer or preprocessor files) so the “Use this model” snippet and any downstream tooling can find them by convention. Put example scripts, training notebooks, and figures in clearly named subfolders. Name your weight files predictably. A tidy root directory isn’t cosmetic — a lot of the Hub’s automatic features assume standard filenames, and a messy layout means those features silently don’t fire.
Where a model repo actually belongs — Hugging Face Hub versus the alternatives
Hugging Face isn’t the only place to park a model, so before you commit, here’s a side-by-side look at some common homes. The cells below describe features according to each platform’s own documentation; where this article doesn’t cover a detail, the cell says so rather than guessing. Because plans and quotas change, treat any pricing or free-tier detail as something to confirm on each platform’s current official pricing page before you rely on it.
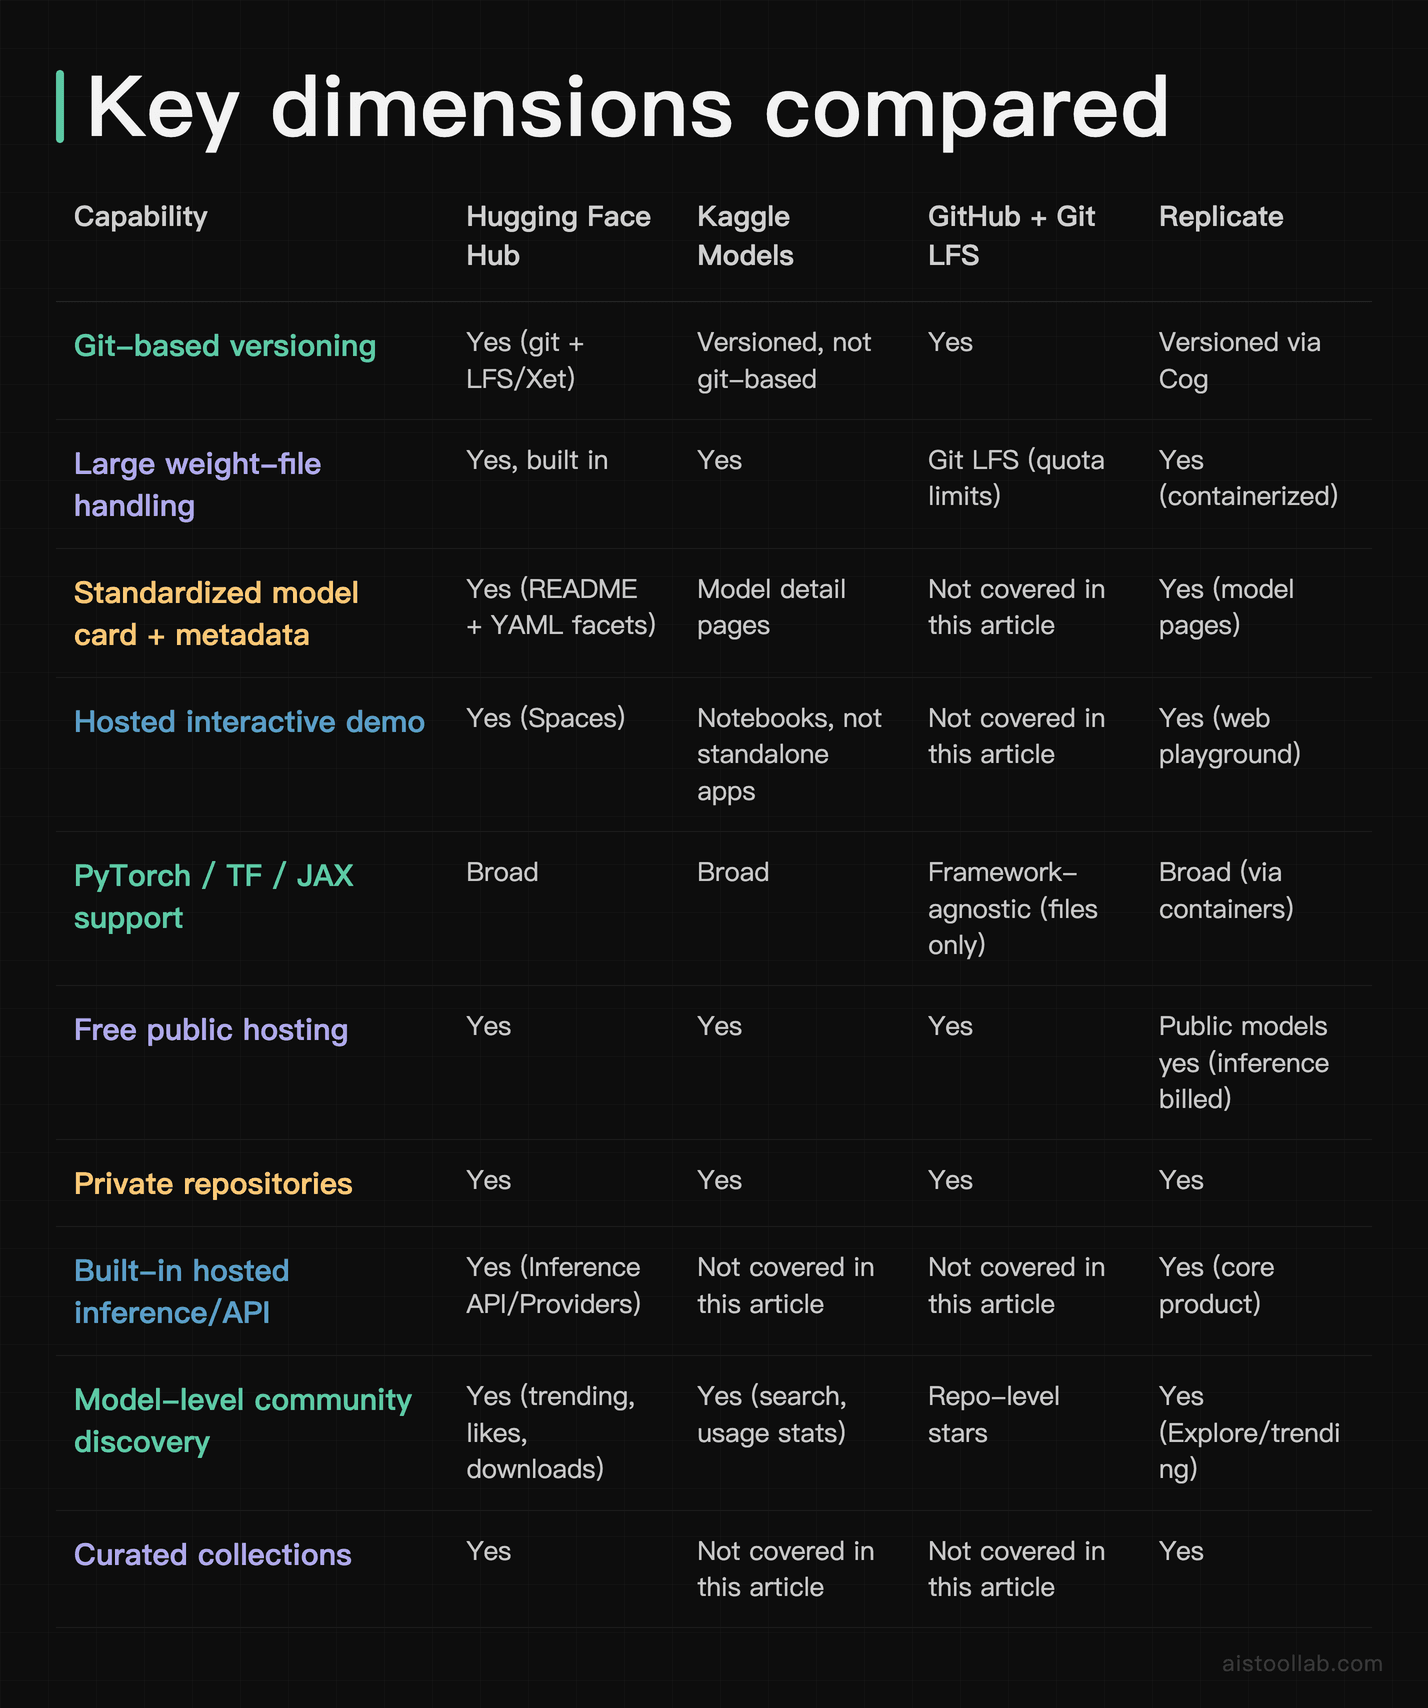
Read that as a fit question, not a scoreboard. If you want a one-click web demo people can poke without deploying anything, Hugging Face offers that through the Spaces column. If your model was born inside a Kaggle competition and lives near that audience, Kaggle Models keeps it in context. If your priority is serving paid inference through an API and you don’t mind that running the model costs money, Replicate is built around exactly that. And if you just need versioned file storage with no model-specific discovery layer, plain GitHub with Git LFS is perfectly fine — you’re simply opting out of the community features. For a beginner whose goal is “get found and let people try it,” the Hub combines standardized cards, discovery facets, and demos in one place.
Step 3: Ship a Spaces demo and work with the discovery signals
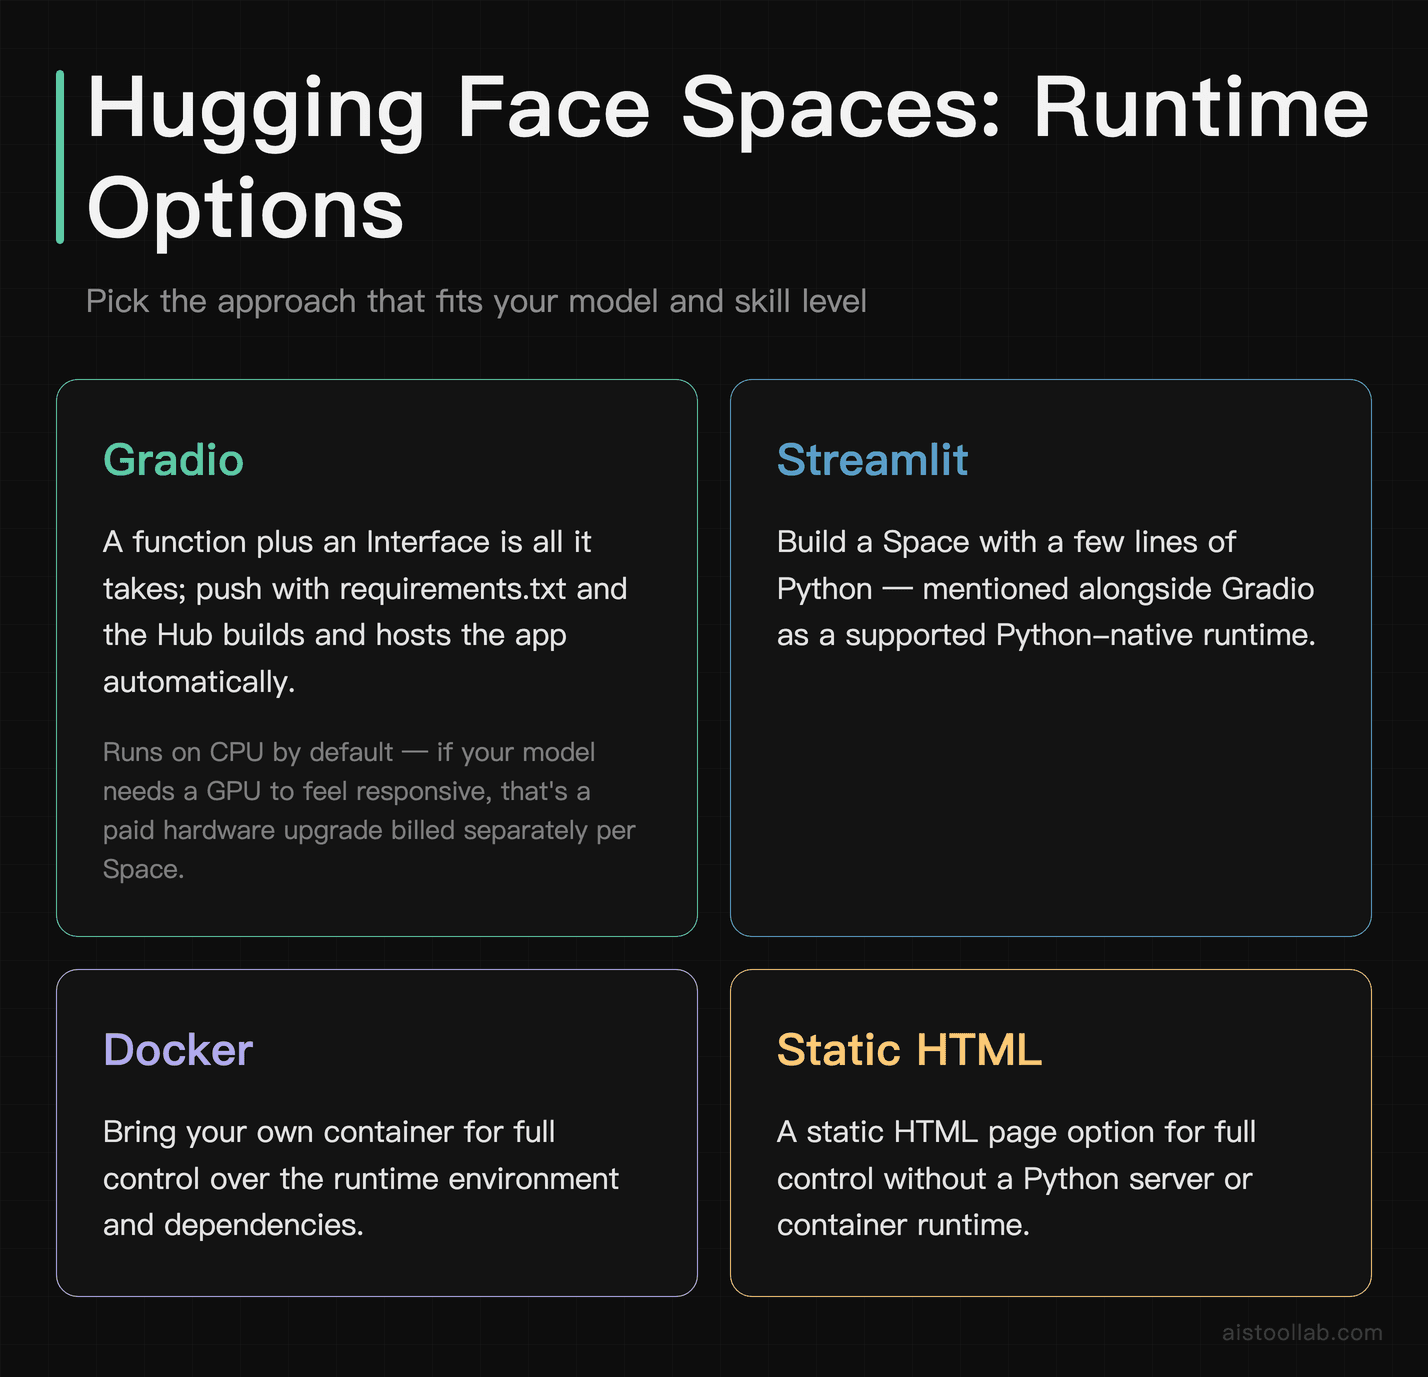
A model page with a code snippet is fine for developers. A model page with a live demo is what gets shared in a Slack thread or a Reddit comment, because the person clicking doesn’t have to install anything. That’s what Hugging Face Spaces is for: a Space is a small hosted app that sits next to your model. You can build one with Gradio or Streamlit in a few lines of Python, or bring your own Docker container or a static HTML page if you want full control. Free Spaces run on CPU hardware; if your model needs a GPU to feel responsive, there’s a paid hardware upgrade billed separately, and you can weigh whether the demo is worth that cost before committing.
A minimal Gradio Space is genuinely just a function and an interface:
import gradio as gr
from transformers import pipeline

clf = pipeline("text-classification", model="your-username/my-first-model")

def predict(text):
    return clf(text)[0]

gr.Interface(fn=predict, inputs="text", outputs="json").launch()
Push that plus a requirements.txt to a Space repo and the Hub builds and hosts it. Link the Space from your model card and vice versa, and you’ve closed the loop: someone lands on the model, tries it in the browser, and — if it’s good — likes it, which brings us to how discovery actually works.
How the discovery signals really behave
I want to be careful here, because “the algorithm” gets over-mythologized. Hugging Face hasn’t published a precise trending formula I can point you to line by line, so I won’t pretend to reverse-engineer one. What’s observable on the Hub, and what beginners can actually influence, are three concrete things. First, downloads and likes are counted and displayed per model. Second, the metadata facets from Step 1 (task, library, license, language) are how people filter their way to you in the first place; a model with no pipeline_tag simply isn’t in the room when someone browses that task. Third, collections — the Hub’s feature for grouping related models, datasets, and Spaces — let you and others bundle your model into a curated set, which is a legitimate, non-spammy way to add context and a discovery path.
The honest takeaway: you can’t hack your way to trending, but you can remove the reasons the Hub has to hide your model. Complete metadata, a working demo, a base-model and dataset link that pull in cross-referenced traffic, and a card that answers real questions — that’s the controllable surface area.
Who this workflow is actually for
Say you’re a grad student who fine-tuned a small classifier for a course project. Publishing it with a clean card and a Gradio Space turns a throwaway assignment into a portfolio link you can drop into an application — and if your base model and dataset are tagged, you inherit a trickle of discovery from those pages without any self-promotion.
Now imagine you’re a solo developer who built a niche model — say, a tagger for a specific document type your day job needed. A Space demo lets a potential user validate whether it fits their case in thirty seconds, before they ever read your code. That’s the difference between “interesting repo” and “thing I actually adopted.” If you spend your time comparing small purpose-built utilities the way we did in our roundup of AI developer utility tools, you already know how much a working demo can matter next to a wall of specs.
Or picture yourself as part of a two-person startup shipping an internal model you’re not ready to open-source. The same Step 1 and Step 2 flow works with a private repository — you get the versioning, the card structure, and optionally a private Space for teammates, without publishing anything. When you’re ready to go public, you flip a setting rather than migrating platforms.
Start with the card, not the compute
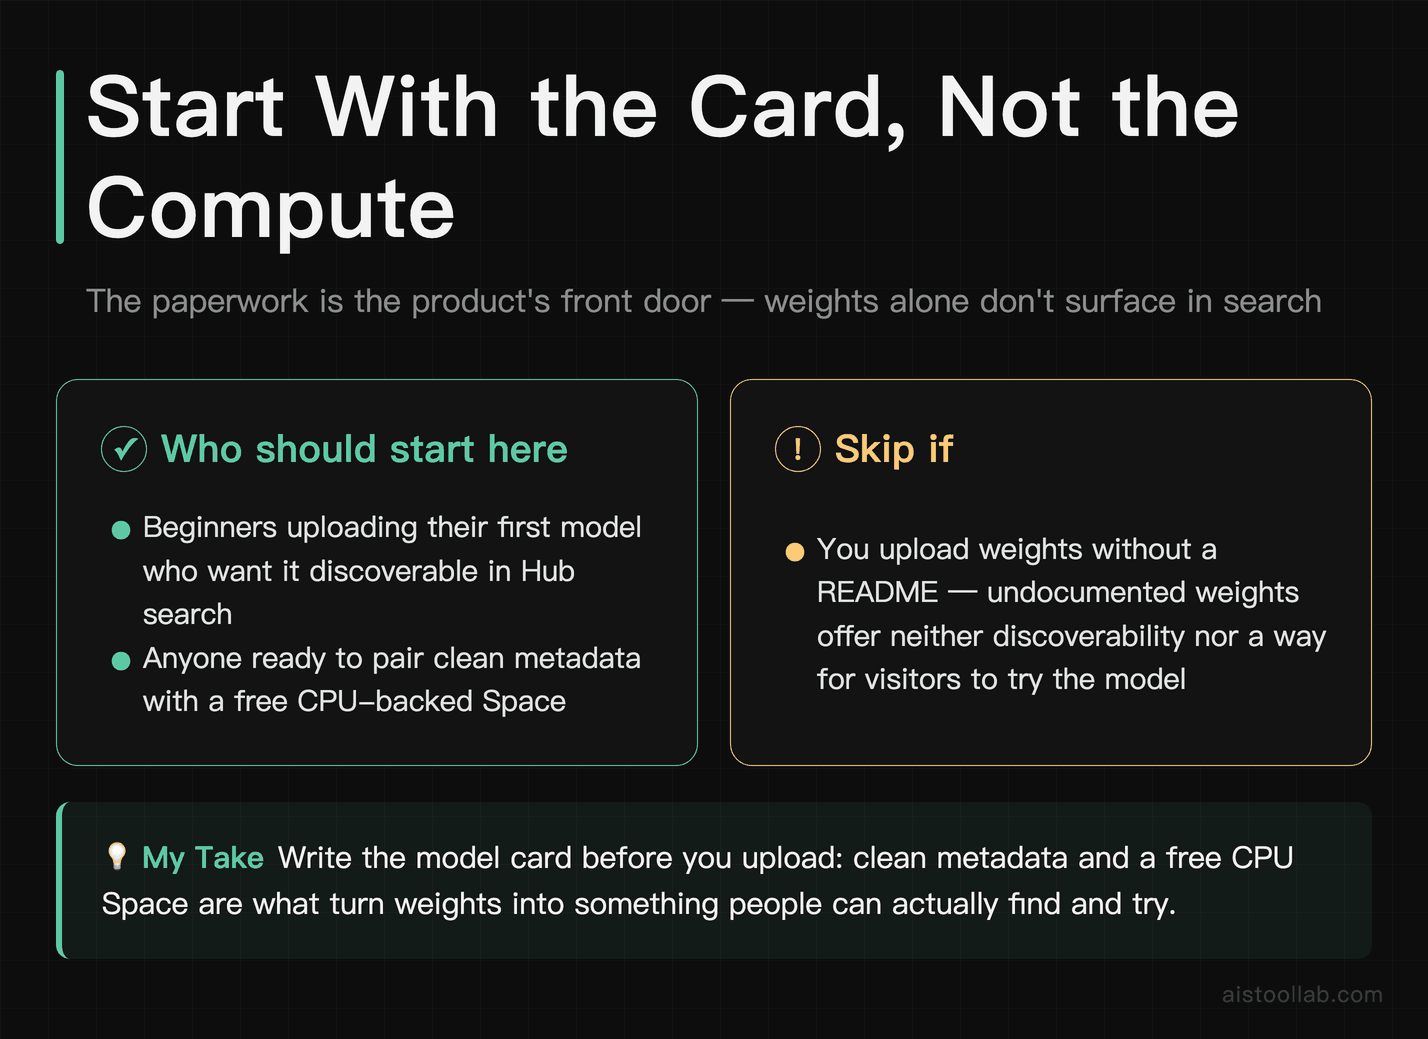
If you do one thing before uploading, make it the model card — because on Hugging Face the paperwork is the product’s front door, and a free CPU Space plus clean metadata gives people a way to find and try your first model, whereas undocumented weights offer neither.
Frequently Asked Questions
Do I have to pay to host a model on Hugging Face?
Whether hosting requires payment depends on the current plans, so the reliable answer is to check Hugging Face’s official pricing page, since pricing changes. Hosting a public model repository on the Hub, and creating private repositories, are among the account capabilities described there rather than something to take from a blog post. Where money enters the picture is compute and scale, not storage of a first model. Spaces run on CPU hardware by default; if your demo needs a GPU to respond quickly, that’s a paid hardware upgrade billed separately, and you decide per-Space whether it’s worth it. There’s also a paid PRO subscription and an Enterprise tier aimed at teams who want more capacity and organizational features. For the exact current figures, check Hugging Face’s official pricing page rather than trusting a number in a blog post, since pricing changes. But the practical answer for a beginner shipping their first classifier or fine-tune is: you can create the repo, write the card, upload the weights, and publish a CPU-backed demo — see the current pricing page for what your plan covers. Only reach for paid GPU time once you actually have a demo that people are hitting and the CPU version feels sluggish.
What’s the difference between a model repository and a Space?
They’re two different repo types that work together. A model repository stores the artifacts — the weights, config, tokenizer or preprocessor files — plus the model card that documents them. It’s the thing people download or load in their own code. A Space is a small hosted application: a running program, usually a Gradio or Streamlit app, that gives people an interface to interact with a model in the browser without installing anything. The clean mental model is “the model repo is the product, the Space is the storefront.” You don’t strictly need a Space — plenty of models live perfectly well as repos with a code snippet — but a Space lowers the barrier for someone to try your model, because they don’t have to set up an environment or read your loading code. In practice, one pattern is to publish the model repo first, then build a lightweight Space that loads that model and link the two together so visitors can move between “try it” and “use it in my code” in one click.
My model isn’t a transformers model — can I still upload it?
Yes. The push_to_hub convenience method is tied to the transformers library, but the Hub itself is framework-agnostic underneath — it’s git repositories with large-file storage, and it doesn’t care whether your weights came from a custom PyTorch module, a raw TensorFlow SavedModel, a Flax checkpoint, or something entirely outside the mainstream. For those cases you use the lower-level upload path, create_repo followed by upload_folder or upload_file, to push your files directly. What you lose by going raw is the automatic niceties: the Hub won’t automatically generate a “Use this model” snippet if your files don’t follow standard naming conventions, and the inference widget may not know how to run your model. So the trade is a little more manual documentation on your part. Write a card that shows exactly how to load and run the files you uploaded, keep the important artifacts at the repo root with predictable names, and your model is just as shareable — you’re only doing by hand what the library would have done for you.
How do I get downloads and likes when I’m starting from zero?
Start by accepting that you can’t force it, then remove every reason the Hub has to overlook you. The controllable levers are concrete. Fill in the full metadata block so your model appears under the right task, library, and license filters — a model with no pipeline_tag won’t appear under that task filter. Link your base model and training dataset in the YAML, because that creates inbound paths from those pages to yours. Publish a Spaces demo so the barrier to trying your model is a click, not an install. Write a card that answers real questions, including honest limitations, so the people who do find it stay. Add it to a relevant collection for context. The Hub surfaces trending views, though it doesn’t publish the exact ranking formula, so there’s no basis to assume a new repo is permanently disadvantaged, and a small, timely burst of genuine interest can be worth pursuing. None of this is a growth hack; it’s just making sure a good model isn’t invisible. Do the boring metadata work well and the discovery mostly takes care of itself.
Last updated: 2026
Still shopping around?
👉 Browse the AI Tools Library and filter by what you actually need.