Who this is for: you want a hands-on route through the Hugging Face Hub — filtering, reading model cards, and loading a candidate locally. It is a walkthrough, not an argument about benchmarks.
Before and after the Hub step:
- Building your own evaluation — the methodology once you have candidates
- The evaluation platforms, by need — hosted alternatives to running it yourself
- Benchmark basics — what the numbers on a model card actually mean
Contents
The Problem Nobody Warns You About: Over a Million Models and No Clue Which One to Pick
You’ve decided to add an AI feature to your app. Maybe it’s a support-ticket classifier, maybe a chatbot, maybe a summarizer for the pile of PDFs your team keeps complaining about. So you head to Hugging Face, type your task into the search bar, and… get hit with thousands of results. bert-base-uncased, distilbert, mistral-7b, fourteen different fine-tunes you’ve never heard of, and a model called tinyllama-cosmic-unicorn-v3 that somehow has 40,000 downloads.
Which one is actually good? Which one will run on your laptop instead of melting it? And how do you tell whether that benchmark score someone slapped on the model card means anything at all?
That’s the gap this guide fills. The Hugging Face Model Hub is the closest thing the AI world has to a central library — but like any library, it’s useless if you don’t know how to use the catalog. Below, I’ll walk through filtering models by what matters, reading the benchmark scores that actually predict real-world quality, and loading a model locally with the Transformers library so you can test it yourself before committing. No PhD required — just a willingness to copy-paste a few lines of Python.
What the Model Hub Actually Solves (and What It Doesn’t)
The Hugging Face Model Hub is a hosting and discovery platform for machine learning models. Think of it as GitHub, but for trained AI weights instead of source code. Researchers and companies upload models, attach a “model card” (basically a README), and the community downloads, fine-tunes, and benchmarks them. According to Hugging Face’s official documentation, the Hub hosts well over a million model repositories spanning text, vision, audio, and multimodal tasks.
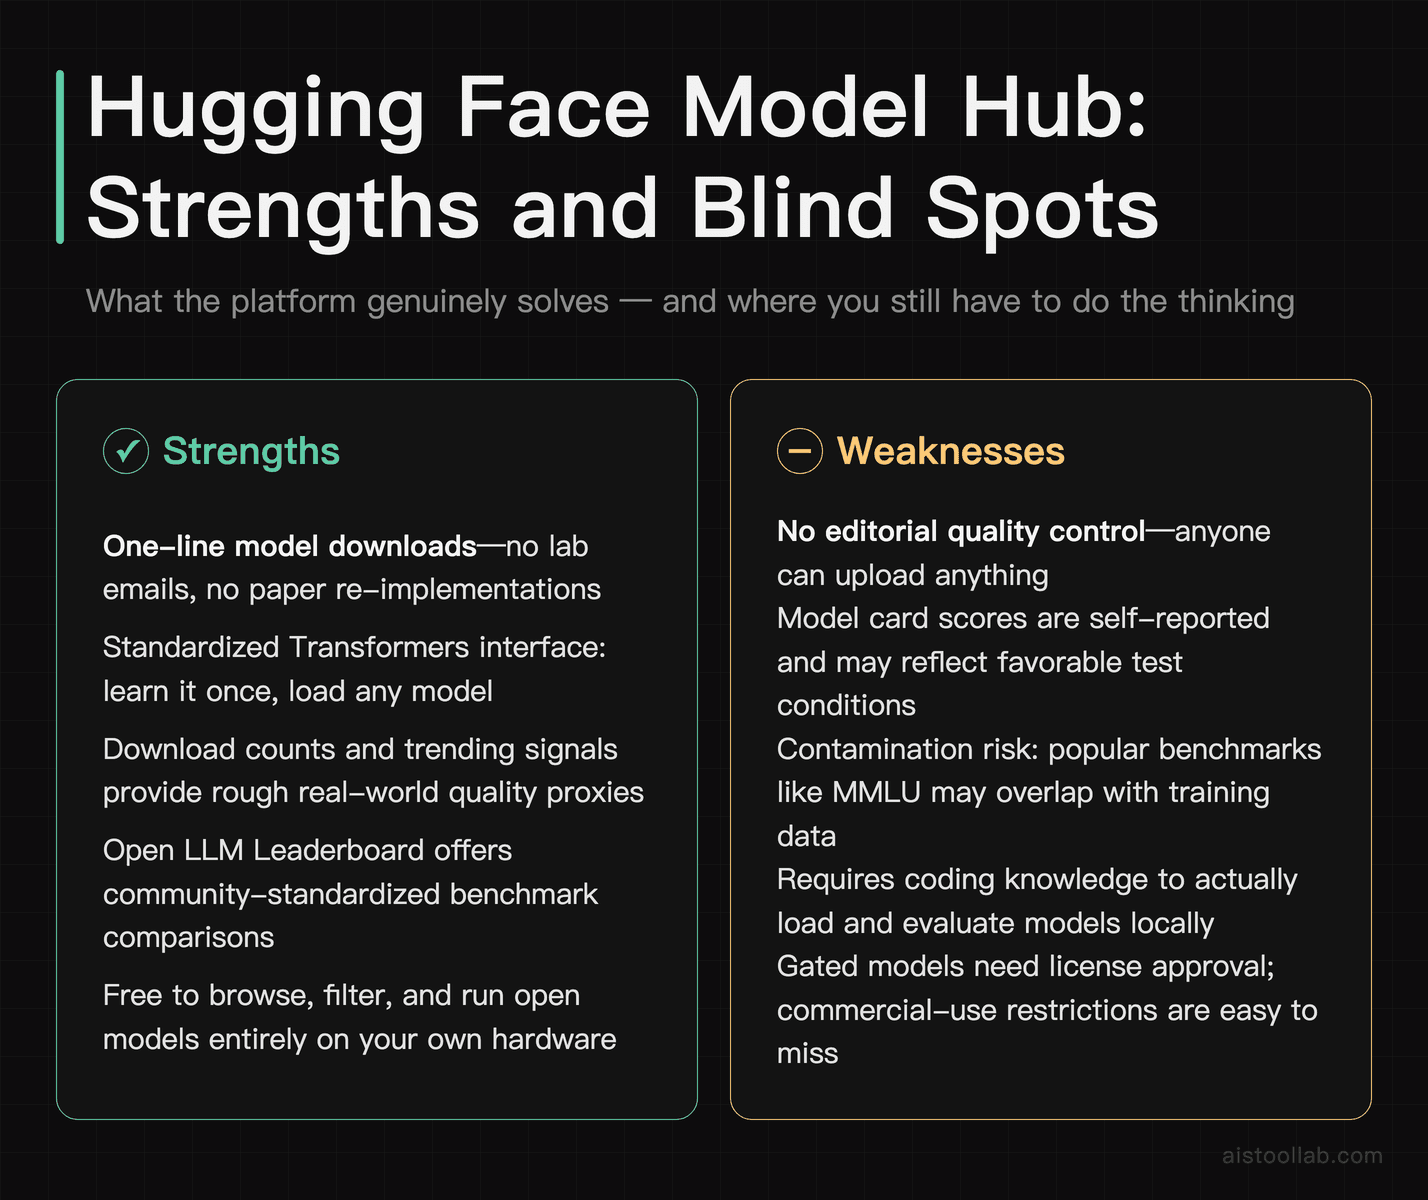
What it solves: discovery and distribution. Instead of emailing a lab for their weights or rebuilding a model from a paper, you pull it in one line of code. It also standardizes the interface — once you know how to load one text-generation model with Transformers, you basically know how to load all of them.
What it doesn’t solve: quality control. Anyone can upload anything. A model with a gorgeous card and impressive-looking numbers might have been benchmarked on the test set it was trained on (a classic cheat), or scored on a task that has nothing to do with yours. The Hub gives you the tools to evaluate — download counts, leaderboards, community discussions — but you still have to do the thinking. That’s the whole point of learning to read the metrics rather than trusting a number on a card.
Before You Start: Prerequisites
You don’t need a beefy GPU to follow along, but here’s what helps:
- Python 3.9+ installed. Most of the examples run fine on CPU for small models.
- A Hugging Face account (free). Some gated models — like certain Llama or Gemma releases — require you to accept a license before downloading. A free account also gives you an access token for those.
- The libraries: install them with
pip install transformers torch huggingface_hub. If you’re on Apple Silicon, PyTorch supports the MPS backend for a decent speed bump. - Realistic expectations on hardware. A 7-billion-parameter model in full precision wants roughly 14GB+ of memory; quantized versions can squeeze onto consumer machines. A 70B model is a different beast entirely — that’s cloud or serious workstation territory.
That’s it. No paid API key needed to browse, filter, or run open models locally. You only pay if you use Hugging Face’s hosted Inference Endpoints or a third-party API — more on the cost tradeoffs later.
Step-by-Step: Navigating and Filtering the Model Hub
Step 1 — Start with the task, not the model name
Go to the Models page and use the left-hand sidebar. The single most useful filter is Tasks: text generation, text classification, summarization, question answering, image classification, automatic speech recognition, and dozens more. Picking your task first cuts that overwhelming list down to models actually built for the job. Searching by name is how beginners end up using a translation model for sentiment analysis and wondering why it’s nonsense.
Step 2 — Sort and filter by signal, not vibes
Once filtered by task, sort by Trending, Most Downloads, or Most Likes. Downloads are a rough proxy for “people actually use this and it didn’t break.” Likes lean toward community endorsement. Neither is a quality guarantee, but a model with hundreds of thousands of downloads has usually survived more scrutiny than one with twelve.
You can also filter by Libraries (Transformers, Diffusers, etc.), Languages, and Licenses — that last one matters more than people realize. Some popular models ship under licenses that restrict commercial use or impose usage caps. If you’re building a product, read the license before you fall in love with the model.
Step 3 — Read the model card like a skeptic
Open a model and scan the card for: the base model and training data, the intended use, any reported benchmark scores, and — crucially — the limitations section. A good card tells you what the model is bad at. If the card is empty or just auto-generated, treat any claims with suspicion. Check the Community tab too; that’s where people post “this hallucinates badly on long context” or “runs great quantized.” Real-world reviews live there.
Step 4 — Cross-check against a leaderboard
Model cards are self-reported. For an apples-to-apples comparison, Hugging Face has historically run the Open LLM Leaderboard, which evaluated open models on a standardized battery of benchmarks under identical conditions. This is where the real comparison happens — and where you need to understand what the scores mean. I dug into that platform separately in my Open LLM Leaderboard Review 2026, but here’s the working knowledge you need.
Decoding the Benchmark Scores That Matter
A model card might brag “MMLU: 68.4” and you’re supposed to be impressed. Impressed by what, exactly? Here’s what the headline benchmarks actually measure — and how to read them without getting fooled.
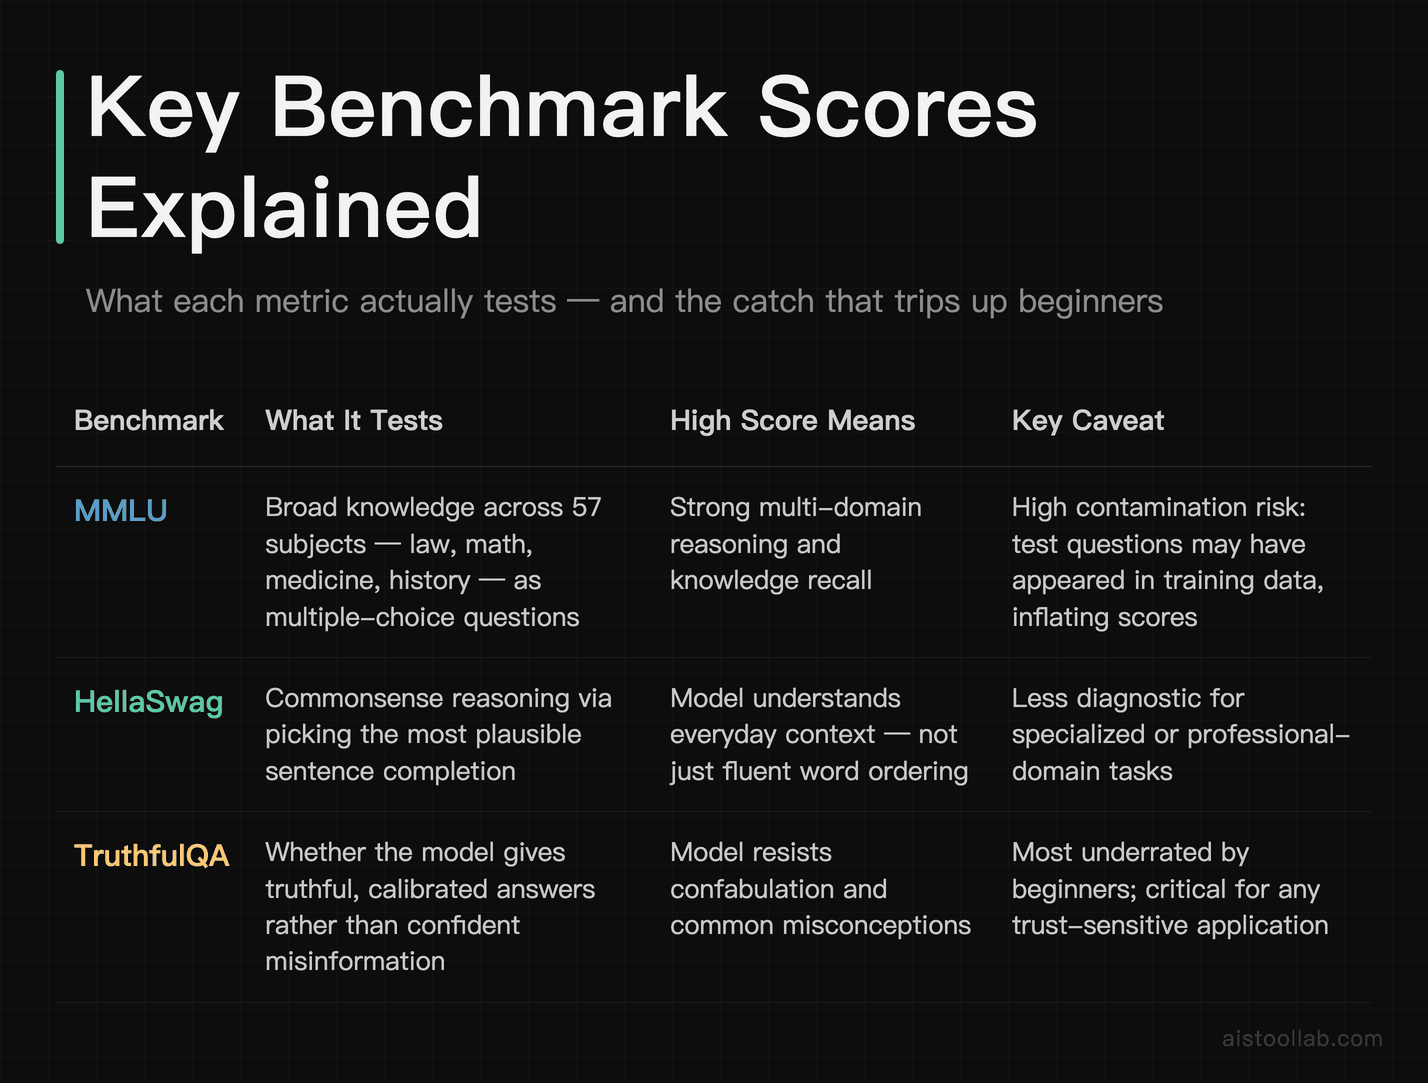
MMLU (Massive Multitask Language Understanding) tests broad knowledge across 57 subjects — law, medicine, math, history — as multiple-choice questions. It’s a rough proxy for “how much does this model know and reason across domains.” Scores are percentages of correct answers. A score in the low-to-mid range signals a smaller or older model; top frontier models cluster much higher. The catch: because MMLU is so widely used, it’s also the benchmark most at risk of “contamination” — training data accidentally including the test questions, which inflates scores. Treat a single MMLU number as one data point, not gospel.
HellaSwag measures commonsense reasoning by asking the model to pick the most plausible ending to a scenario. It sounds trivial, but it catches models that string fluent words together without actually understanding context. High HellaSwag means the model “gets” everyday logic.
TruthfulQA is the one I tell beginners to care about more than they expect. It measures whether a model resists generating popular falsehoods and conspiracy-flavored answers — the stuff that “sounds right” but isn’t. A model can score brilliantly on MMLU and still flunk TruthfulQA, which tells you it’s knowledgeable but prone to confidently making things up. For anything customer-facing, that gap matters.
One honest caveat: Hugging Face restructured its leaderboard over time, and the original v1 benchmark suite (which featured MMLU, HellaSwag, and TruthfulQA prominently) was later replaced by a tougher v2 set — including IFEval, BBH, MATH, GPQA, MuSR, and MMLU-Pro — to combat saturation and contamination, before the leaderboard itself was archived. So depending on when you’re reading, the exact metrics on display may differ. The underlying skill of interpreting “knowledge vs. reasoning vs. truthfulness” stays the same. I broke down the individual metrics in more depth in AI Model Performance Metrics Explained 2026.
Don’t forget the metric nobody puts in the headline: latency
Benchmark accuracy tells you how smart a model is. It says nothing about how fast it answers or how much it costs to run. The metrics that decide whether your app feels snappy or sluggish are:
- Latency — time to first token and total response time. For a chat interface, anything that makes the user wait staring at a blank box kills the experience.
- Throughput — tokens per second, and how many requests you can serve at once. This is the number that determines your cloud bill at scale.
- Model size / memory footprint — directly drives both speed and whether you can self-host at all.
A smaller, “dumber” model that answers in 200ms often beats a brilliant model that takes 8 seconds — for the right use case. Specialized inference providers like Groq have made speed a headline feature; I compared that approach in my Groq AI Inference Platform Review 2026.
Loading and Testing a Model Locally with Transformers
Theory’s nice, but the only way to truly evaluate a model is to run it on your own data. Here’s the fastest path. The pipeline helper handles tokenization, model loading, and decoding in one call:
from transformers import pipeline

# Sentiment analysis — small, runs on CPU in seconds
classifier = pipeline("sentiment-analysis")
result = classifier("This tutorial actually made sense, shocking.")
print(result)
# [{'label': 'POSITIVE', 'score': 0.9998}]
That used a default model. To test a specific model from the Hub, pass its repo ID:
generator = pipeline(
    "text-generation",
    model="distilgpt2"          # swap in any text-gen model ID
)
output = generator(
    "The best thing about open-source AI is",
    max_new_tokens=40
)
print(output[0]["generated_text"])
For more control — and to measure latency yourself — load the tokenizer and model directly:
import time
import torch
from transformers import AutoTokenizer, AutoModelForCausalLM

model_id = "distilgpt2"
tokenizer = AutoTokenizer.from_pretrained(model_id)
model = AutoModelForCausalLM.from_pretrained(model_id)

prompt = "Explain latency in one sentence:"
inputs = tokenizer(prompt, return_tensors="pt")

start = time.time()
outputs = model.generate(**inputs, max_new_tokens=50)
elapsed = time.time() - start

text = tokenizer.decode(outputs[0], skip_special_tokens=True)
print(text)
print(f"Generated in {elapsed:.2f}s")
That elapsed timer is your homemade latency benchmark. Run it a few times (the first run is slower due to loading) and you’ve got a real feel for the model’s speed on your hardware — which is the only number that matters for your project. For bigger models, add torch_dtype=torch.float16 and device_map="auto" to use GPU memory efficiently, or look for quantized GGUF/4-bit versions on the Hub to fit larger models into less RAM.
Gated models need a token: run huggingface-cli login, paste the access token from your account settings, and the same code works. The beauty here is consistency — the load-and-test pattern is identical whether you’re trying a 60MB classifier or a 7B chat model.
Who This Workflow Is For: Three Real Scenarios
The solo developer prototyping on a budget
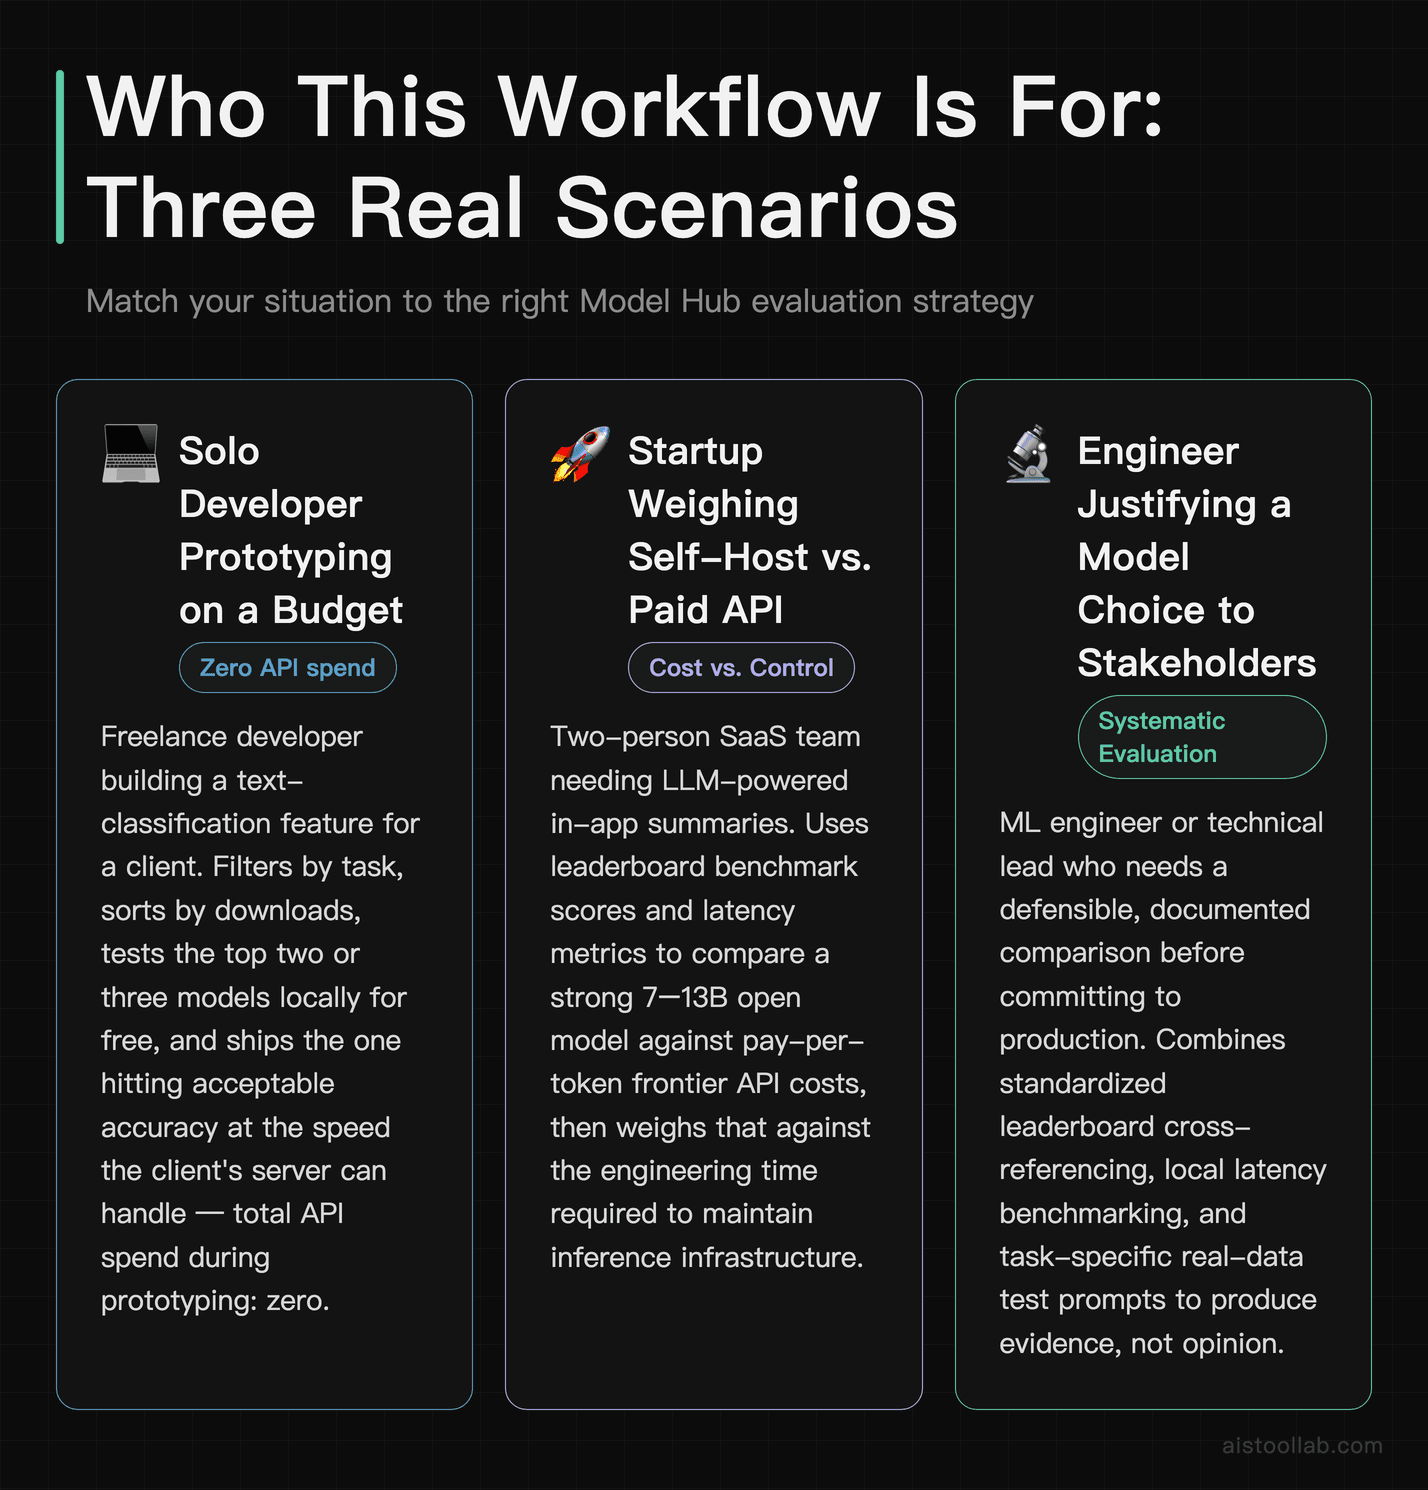
You’re a freelance developer building a document-classification feature for a client, billing hourly, and you don’t want to burn the budget on API calls during development. The Model Hub lets you grab a compact fine-tuned classifier, run it locally for free, and validate the whole pipeline before deciding whether you even need a paid model. You filter by the text-classification task, sort by downloads, test the top two or three locally, and ship the one that hits acceptable accuracy at the speed your client’s server can handle. Total API spend during prototyping: zero.
The startup choosing between self-hosting and an API
A two-person SaaS team needs an LLM for in-app summaries. The decision is self-host an open model versus pay per token to a cloud provider. Here the leaderboard and latency metrics earn their keep: you compare a strong 7–13B open model’s benchmark scores against the cost-per-token of a hosted frontier model, then weigh that against your engineering time to maintain inference infrastructure. I walked through exactly this calculation in Open-Source LLMs vs Cloud-Based Models — the answer flips depending on your request volume.
The researcher or student reproducing results
A grad student reading a new paper wants to verify its claims. Because the authors uploaded weights to the Hub, the student loads the exact model, runs it against the same benchmark, and checks whether the reported numbers hold up. This reproducibility — pulling a named, versioned model in one line — is genuinely one of the quiet superpowers of the platform.
Common Mistakes Beginners Make
Trusting self-reported scores blindly. A number on a model card was generated by the uploader, possibly under favorable conditions. Always cross-reference with a standardized leaderboard or your own test.
Ignoring quantization options. Beginners try to load a full-precision 13B model, run out of memory, and give up. Half the time there’s a 4-bit version sitting right there that runs on their existing GPU with minimal quality loss.
Optimizing for the wrong metric. Chasing the highest MMLU when your task is real-time chat is like buying a race car for school runs. Match the metric to the job — accuracy for analysis, latency for interaction.
Skipping the license. Building a commercial product on a non-commercial-licensed model is a legal headache waiting to happen. Filter by license early.
Hugging Face Model Hub vs. Other Ways to Get a Model
The Hub isn’t the only route to running AI. Here’s how the main options stack up for someone getting started.
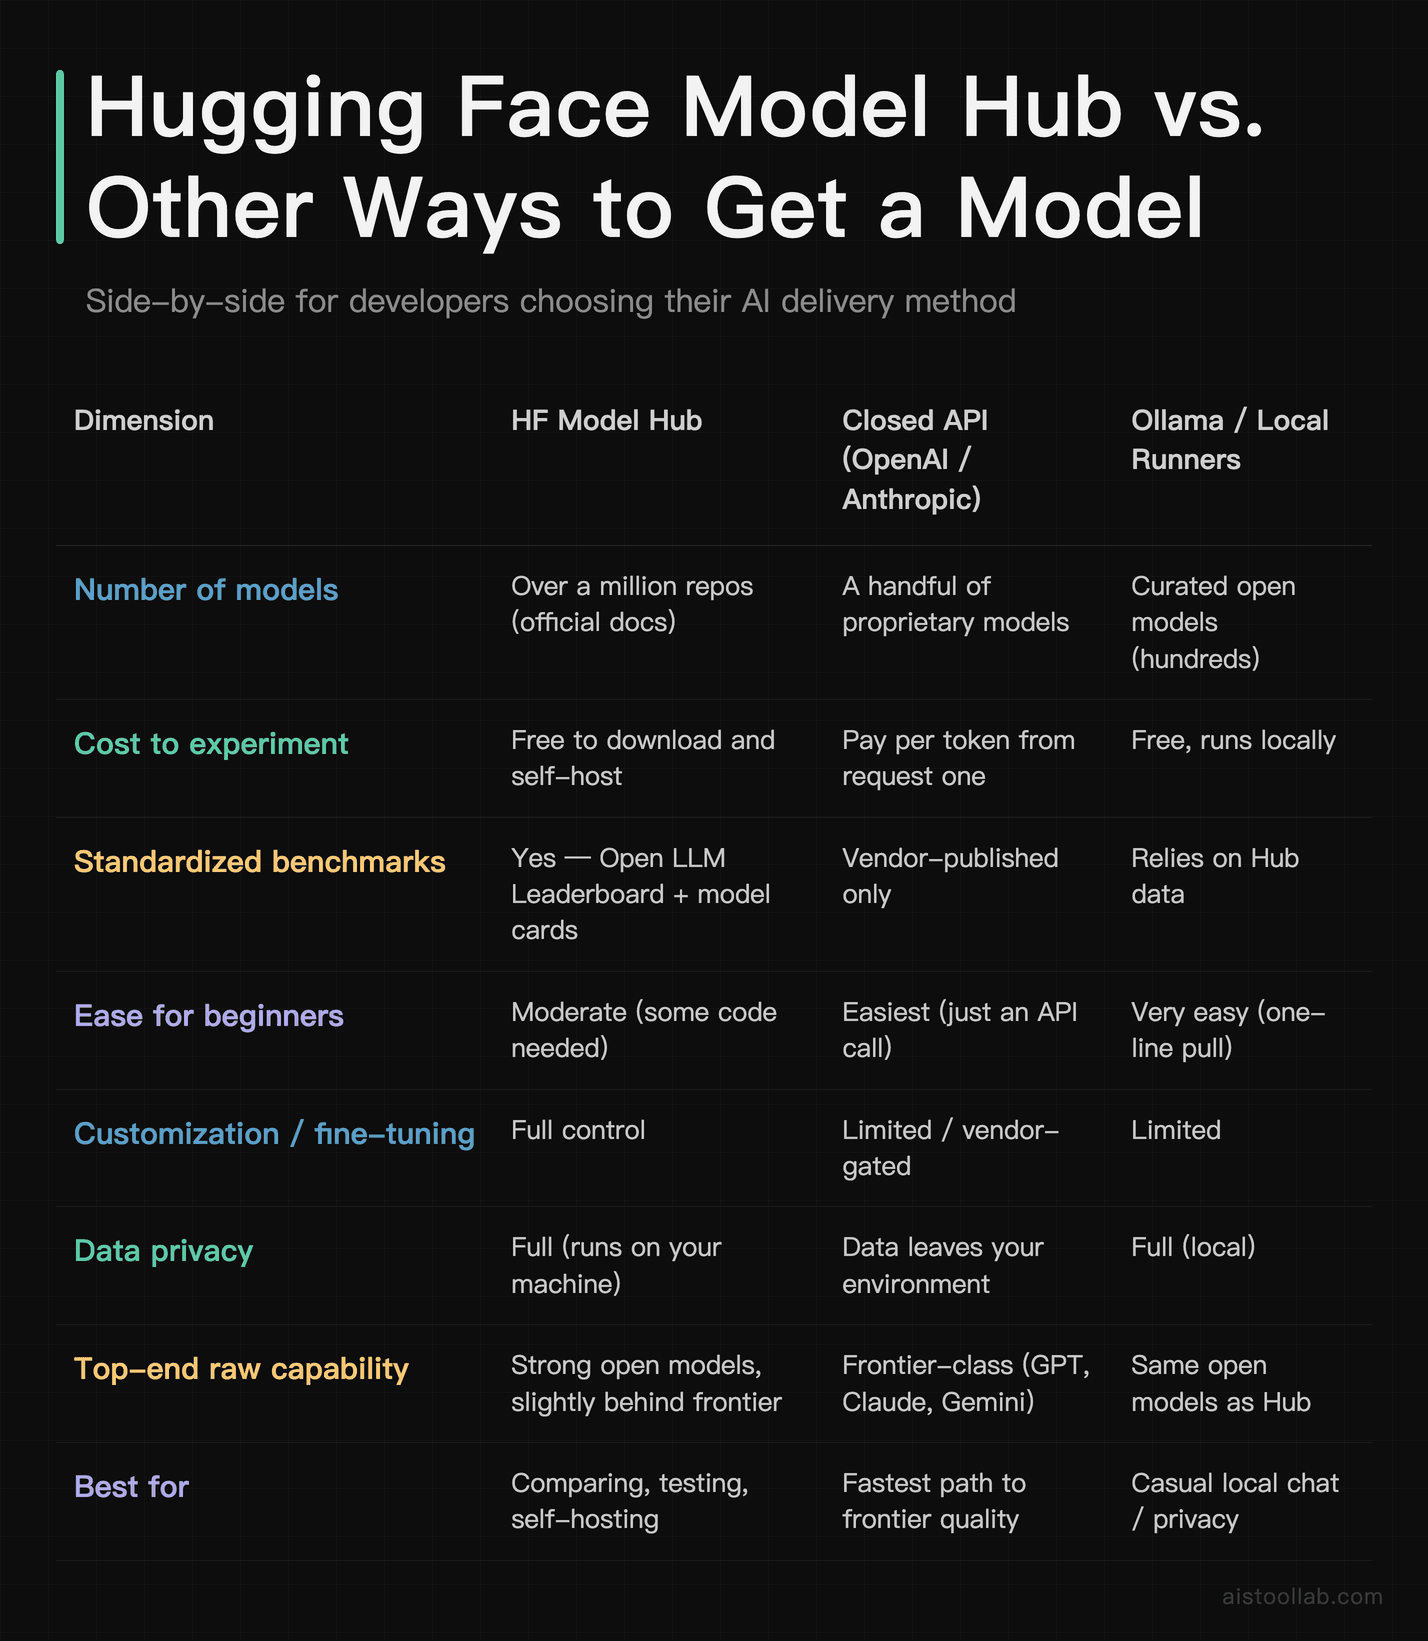
The honest read: if you want a very capable model with zero setup and don’t mind paying per token, a closed API is convenient. If you want to compare options, control costs, keep data in-house, or fine-tune, the Hub is hard to beat. Ollama is the gentlest on-ramp for running open models locally but leans on the Hub’s ecosystem anyway. For benchmark-driven model selection — the whole point of this guide — the Hub is the right home base. If you’re weighing the frontier closed models specifically, my Best Large Language Models Ranked by Performance Metrics in 2026 breakdown compares leading models from OpenAI, Anthropic, Meta, and Google head-to-head.
Frequently Asked Questions
Is the Hugging Face Model Hub free to use?
Browsing, filtering, downloading open models, and running them on your own hardware are all free — that’s the core of the platform and you never need a credit card for it. A free account is only required for gated models (some Llama and Gemma releases ask you to accept a license first) and for getting an access token. Where money enters is optional paid services: Hugging Face offers a Pro subscription with perks, plus Inference Endpoints and dedicated hosting where you pay for compute by the hour, and an Enterprise tier for organizations (pricing per the official page, subject to change). For a beginner learning to evaluate and test models, you can do essentially everything in this tutorial without spending a cent. The costs only show up when you decide to let Hugging Face host inference for you at scale rather than running models on your own machine or a cloud instance you manage yourself. Start free, upgrade only when a real workload justifies it.
Do I need a powerful GPU to run models from the Hub?
Not for everything. Plenty of useful models — sentiment classifiers, small summarizers, embedding models, distilled language models — run comfortably on a regular laptop CPU in seconds. The picture changes with large language models: a 7-billion-parameter model in full 16-bit precision wants roughly 14GB or more of memory, and a 70B model is firmly in high-end GPU or cloud territory. The practical workaround is quantization. Many popular models have 4-bit or 8-bit versions on the Hub (often in GGUF format) that shrink the memory footprint significantly while keeping most of the quality, letting you run surprisingly capable models on consumer hardware. Apple Silicon Macs can use PyTorch’s MPS backend for a speed boost too. My advice for beginners: start with small models to learn the workflow, measure performance on your actual hardware using the timing code above, and only reach for cloud GPUs once you’ve confirmed a bigger model is genuinely necessary for your task.
What’s the difference between MMLU, HellaSwag, and TruthfulQA?
They test different things, which is exactly why you shouldn’t rely on a single one. MMLU measures broad factual knowledge and reasoning across 57 academic and professional subjects via multiple-choice questions — think of it as a general-knowledge exam. HellaSwag measures everyday commonsense reasoning by asking the model to choose the most sensible continuation of a scenario, catching models that produce fluent nonsense. TruthfulQA measures resistance to repeating popular myths and falsehoods — whether a model gives an accurate answer or a confident, wrong one that merely “sounds right.” A model can ace MMLU (lots of knowledge) yet score poorly on TruthfulQA (prone to confident hallucination). For a customer-facing or factual application, that TruthfulQA gap is the warning sign that matters most. Read these as a profile rather than a ranking: high knowledge, strong commonsense, and good truthfulness together signal a well-rounded model. One strong score alone can hide real weaknesses, especially given benchmark contamination risks on widely used tests like MMLU.
How do I know if a benchmark score is trustworthy or gamed?
Healthy skepticism is correct here. The biggest risk is “data contamination” — the model was trained on data that happened to include the benchmark’s test questions, inflating its score without reflecting real capability. Signs to watch: a relatively small or obscure model posting scores that rival frontier systems, scores that appear only on the model card with no independent verification, or a model that crushes one benchmark but performs oddly on similar tasks. Your defenses are straightforward. First, prefer scores from a standardized leaderboard that evaluates all models under identical, controlled conditions rather than self-reported card numbers. Second, check the Community tab and external discussions on Reddit or Hacker News, where people quickly call out suspiciously good results. Third — and most reliable — run the model yourself on your own examples. No benchmark predicts your specific use case as well as ten test prompts from your actual data. If a model’s real-world output disappoints despite glowing numbers, trust your eyes over the leaderboard.
Which is better for beginners: the Model Hub or just using ChatGPT’s API?
It depends on what you’re optimizing for. If your goal is a fast path to high-quality output and you don’t mind paying per token, a closed API like OpenAI’s or Anthropic’s is genuinely easier — you make an HTTP request and get frontier-level results with zero model management. If your goals include comparing models objectively, controlling costs at scale, keeping data on your own infrastructure for privacy, fine-tuning on your own data, or simply learning how AI models actually work under the hood, the Model Hub is far more educational and flexible. Many developers end up using both: prototype and benchmark options on the Hub, then choose between self-hosting an open model and calling a paid API based on volume and quality needs. For learning to evaluate model performance — the literal subject of this tutorial — the Hub is the more instructive choice because it exposes the benchmarks, the code, and the tradeoffs directly instead of hiding them behind a polished endpoint. Start on the Hub to understand, then pick whichever deployment fits your production reality.
How do I load a gated model like Llama?
Gated models require two extra steps beyond a normal download. First, visit the model’s page on the Hub while logged into your free account and accept the license terms — for Llama and Gemma releases this is a quick form click, and access is typically granted shortly after. Second, authenticate your local environment so the download has permission. Run huggingface-cli login in your terminal and paste an access token generated from your account settings (Settings → Access Tokens → create a token with read permission). Once that’s done, the exact same AutoModelForCausalLM.from_pretrained("model-id") code works as it does for any open model — the gating is purely about access control, not a different loading procedure. If you skip authentication, you’ll get a clear error telling you the repo is gated. One tip: keep your token private and out of any code you commit to version control. For shared or production environments, store it as an environment variable rather than hardcoding it, which Transformers will pick up automatically.
What does “latency” mean and why isn’t it on the leaderboard?
Latency is the time the model takes to respond — usually split into “time to first token” (how long before the answer starts appearing) and total generation time. It’s arguably the most important metric for any interactive application, because a brilliant answer that takes ten seconds feels broken in a chat interface. Accuracy leaderboards like the Open LLM Leaderboard generally don’t rank latency because it isn’t a property of the model alone — it depends heavily on your hardware, batch size, quantization, and inference framework. The same model can be slow on a CPU and much faster on a specialized inference chip. That’s why the practical move is to measure latency yourself using the timing code in this guide, on the hardware you’ll actually deploy on. If raw speed is your priority, specialized inference providers have built their entire pitch around low latency for open models. Always pair an accuracy benchmark with your own latency measurement before committing — the two together tell the real story, and one without the other is half a decision.
Can I use Hugging Face models in a commercial product?
Often yes, but you must check the license for each individual model — this is non-negotiable. Models on the Hub ship under a range of licenses. Many use permissive terms like Apache 2.0 or MIT that allow commercial use freely. Others, including some well-known releases, carry custom licenses with conditions: restrictions on certain use cases, attribution requirements, or usage caps tied to your company’s size. A few are explicitly non-commercial or research-only, meaning you legally cannot ship them in a paid product. You can filter by license in the Hub’s sidebar to narrow to commercially friendly options from the start, which saves heartache later. Beyond the model weights, also consider the license of the training data if it’s disclosed, and any third-party components. When the stakes are high — a funded startup, an enterprise deployment — it’s worth a quick legal review rather than assuming. The good news is that plenty of strong, genuinely open models exist under permissive licenses, so you’re rarely forced to choose between quality and commercial freedom.
The Bottom Line
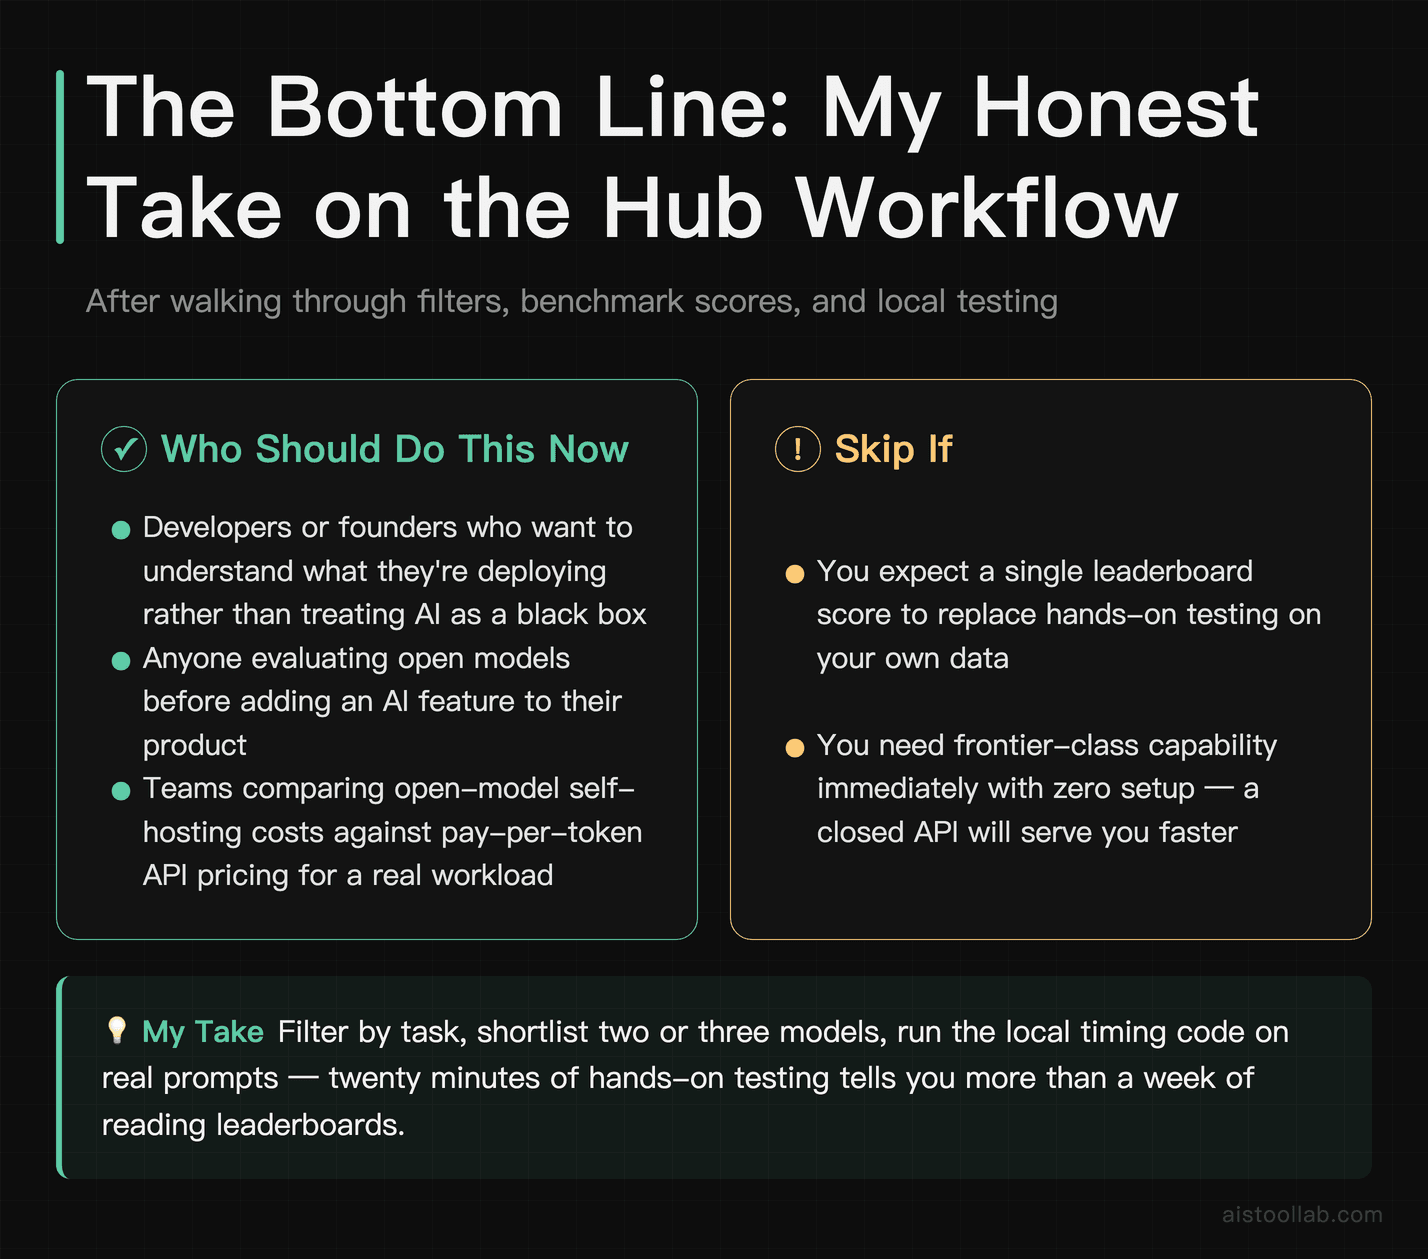
If you’re just starting out and want to actually understand what you’re deploying rather than treating AI as a black box, learning the Hugging Face Model Hub is one of the highest-leverage skills you can pick up this year. The workflow that matters is simple to state and powerful in practice: filter by task, sort by real signal, read benchmark scores as a profile rather than a single trophy number, and — most importantly — load the model and test it on your own data before you trust anyone’s claims.
Here’s my concrete recommendation. If you’re a developer or founder evaluating options, spend an afternoon doing exactly this: pick your task, shortlist the top two or three models, run the local timing code above on each, and throw ten prompts from your real use case at them. You’ll learn more in twenty minutes of trying a model on your own prompts than in a week of reading leaderboards. The benchmarks point you in the right direction; your own test data closes the deal. Open a terminal, run that first pipeline call, and go find out which model actually earns a spot in your stack.
Last updated: 2026
Found this review helpful?
👉 Browse the AI Tools Library to find the right tools for your workflow.