What people get wrong before they even type a prompt
A common belief among first-timers is that great Midjourney images come from cramming a paragraph of art-school vocabulary into every prompt — “hyperrealistic octane render, volumetric lighting, 8K, trending on ArtStation” and so on. It’s worth questioning that assumption before you build a whole habit around it, because a lot of that vocabulary is people copying each other rather than knowing what each word does.
Here’s the more useful way to think about it: Midjourney ↗ is a text-to-image generator, and your job as a beginner isn’t to sound like a concept artist. It’s to describe a clear subject, a clear setting, and a clear look — then learn the handful of controls that genuinely change the result. The rest of the vocabulary is worth adding once those basics are steady.
This guide is compiled from Midjourney’s official documentation and public user discussion, and it’s aimed squarely at the confused beginner: how the tool actually works, how to get an account and run your first prompt, which prompt ingredients matter, the mistakes that come up most often in beginner discussions, and a few low-pressure projects so your first week isn’t spent staring at a blank command box.
How Midjourney turns text into an image
At the core, Midjourney is a generative AI model that produces images from written descriptions. You type a prompt, the model interprets it, and it renders new pixels that match your description — it isn’t searching a library of existing photos and stitching them together. That’s the mental model that trips up beginners most: you’re describing something for a model to imagine, not typing keywords into a stock-photo search bar.
Two behaviours are worth knowing up front. That grid is a feature, not a bug — it’s four interpretations of the same idea, and picking between them is part of the workflow. Second, Midjourney leans toward a stylized rendering unless you tell it otherwise. It exposes a --stylize parameter (accepting values from 0 to 1000, per Midjourney’s official Parameter List documentation) precisely so you can push the output toward or away from its default artistic interpretation.
What makes it feel different from some other AI art tools comes down to workflow rather than magic. It has historically been operated through a Discord bot using slash commands, alongside a browser-based web app, and it runs a public community feed where you can see what other people are generating and the prompts they used. If you’ve mostly seen tools where you type into a single web box and get one image back, the Discord-command style and the four-image grid are the first things that will feel unfamiliar — and the first things worth getting comfortable with.
Setting up your account and getting into the room
Getting started has a couple of moving parts, so take them one at a time. Midjourney is a paid, subscription-based service — I’d check Midjourney’s official pricing page for the current tiers and whether any trial exists before you plan your budget, because that’s exactly the kind of detail that changes without notice. Don’t assume there’s a free tier waiting for you.
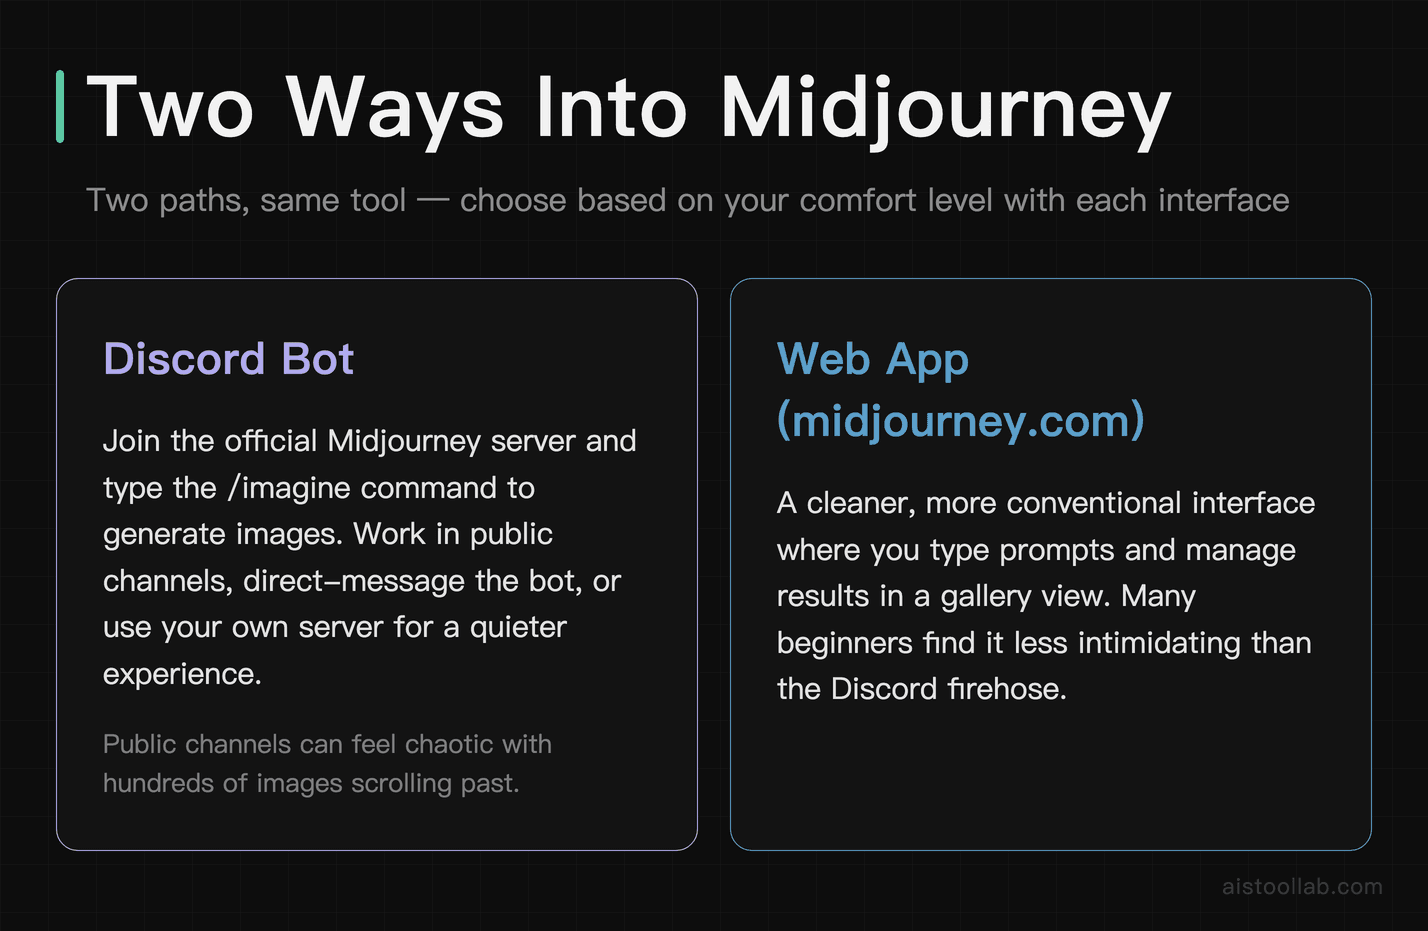
The two ways in are the Discord integration and the web app. For the Discord route, you’ll need a Discord account, then you join the official Midjourney server (or add the bot). Midjourney generations historically happen by typing the /imagine command. If the crowded public channels feel chaotic — and they can, with hundreds of images scrolling past — you can direct-message the bot or work in your own server so your results aren’t buried under everyone else’s. The web app at midjourney.com gives you a cleaner, more conventional interface where you type prompts and manage results in a gallery view, which many beginners find less intimidating than the Discord firehose.
My honest suggestion for anyone new: subscribe, open the web app first to get a feel for prompting without the Discord noise, and keep the community feed open in another tab.
Your very first prompt, step by step
Here’s what that first run looks like, following the official documentation (a walkthrough of the steps, not a report of a session I ran myself). In Discord you’d type /imagine, and a prompt field appears; in the web app you type into the prompt bar. Either way, start with something plain and concrete:
/imagine prompt: a red ceramic coffee mug on a wooden table, morning light from a window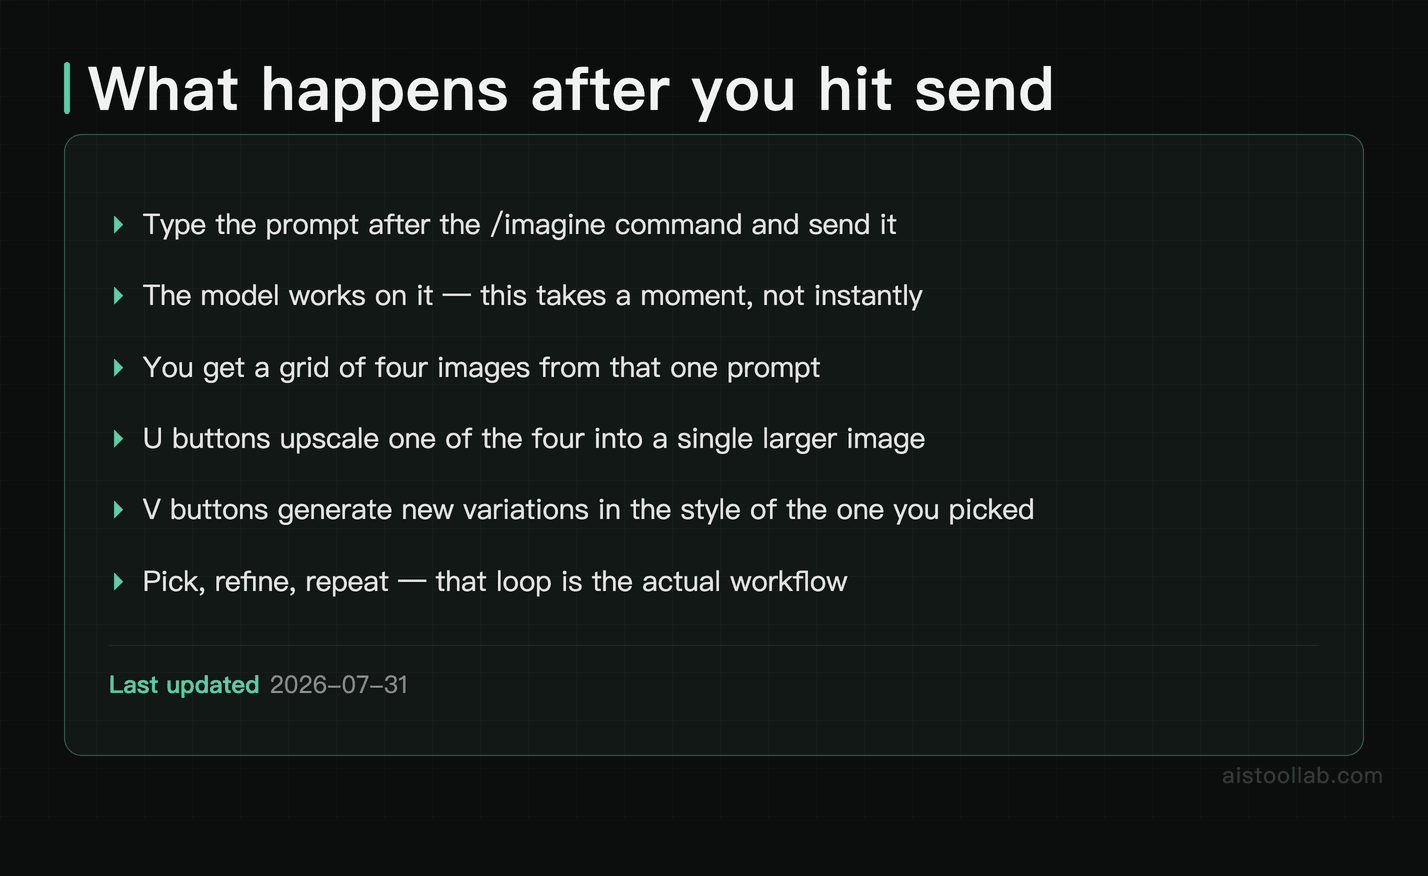
Send it, wait for the model to work, and you’ll get a grid of four images. Under a Discord grid you’ll see buttons: U1–U4 to upscale one of the four to a larger single image, and V1–V4 to generate fresh variations based on the one you liked. There’s also a re-roll button to generate a completely new grid from the same prompt. In the web app these actions live as on-hover or side-panel controls, but the logic is identical: generate, pick, refine.
Notice what I did there — I didn’t reach for “cinematic masterpiece, ultra-detailed, award-winning.” I named a subject (a red ceramic mug), a setting (wooden table), and a light source (morning window light). That’s a complete, workable prompt. Run it, look at the four results, and only then decide what to change. Maybe the mug’s the wrong shade, maybe you want a top-down angle, maybe the light’s too flat. Each of those is a small, deliberate edit to your next prompt — which is exactly how you build skill instead of gambling.
The prompt anatomy that actually changes your output
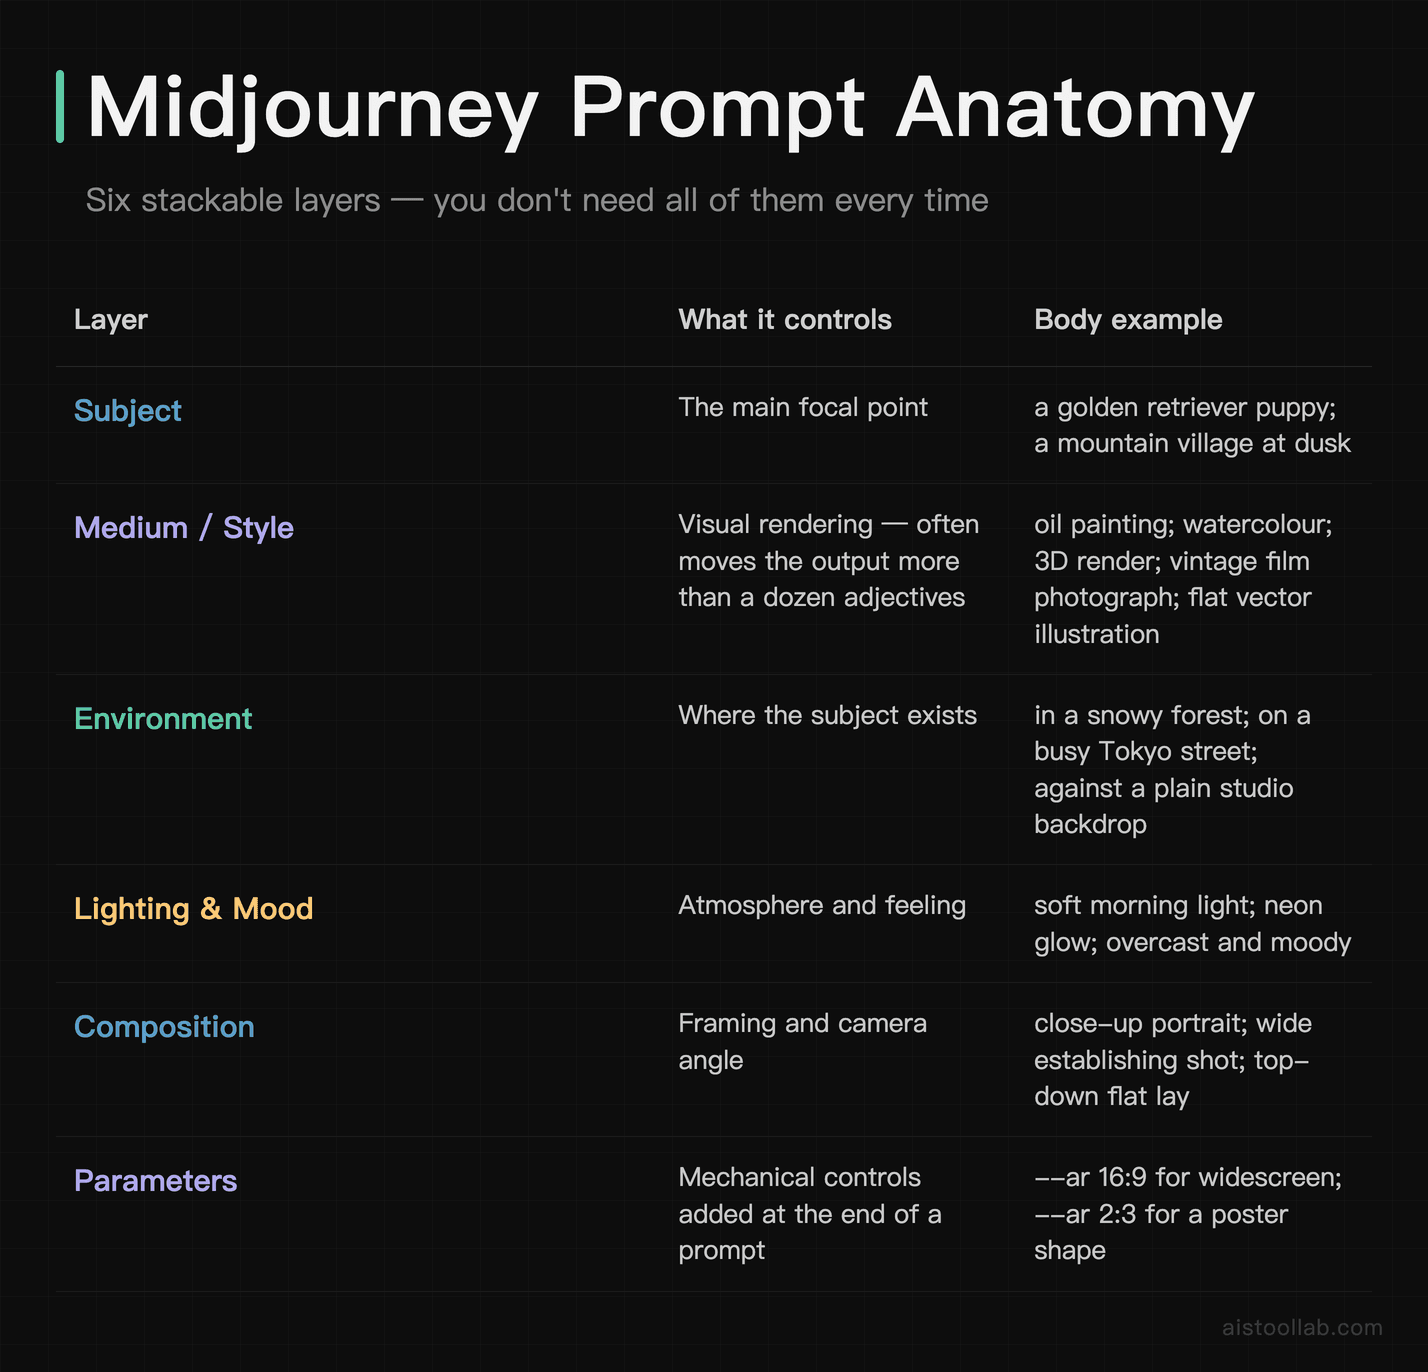
Once you’re past your first grid, it helps to think of a prompt as a few stackable layers rather than a random word salad. You don’t need all of them every time, but knowing they exist is what separates “why does this look wrong” from “I know what to adjust.”
- Subject — the main thing: a golden retriever puppy, a mid-century armchair, a mountain village at dusk.
- Medium / style — oil painting, watercolour, 3D render, vintage film photograph, flat vector illustration.
- Environment — where it is: in a snowy forest, on a busy Tokyo street, against a plain studio backdrop.
- Lighting and mood — soft morning light, neon glow, overcast and moody.
- Composition — close-up portrait, wide establishing shot, top-down flat lay.
Then come parameters — the flags you add at the end of a prompt to control mechanics rather than content. These are documented features; the ranges below come from Midjourney’s official Parameter List documentation. The ones worth learning first:
--arsets the aspect ratio (for example--ar 16:9for widescreen or--ar 2:3for a poster shape). Beginners forget this constantly and then wonder why everything’s a square.--stylize(or--s), values 0–1000, controls how strongly Midjourney applies its own artistic flavour. Lower stays closer to your literal prompt; higher gives the model more creative licence.--chaos(or--c), values 0–100, controls how varied the four grid images are from each other. High chaos gives you wildly different options; low keeps them consistent.--nois a negative descriptor —--no texttries to keep text out of the image.--seedlets you reuse a starting value, which is useful when you want more repeatable results from the same prompt.
My advice: change one parameter at a time. If you crank stylize, chaos, and aspect ratio all at once, you’ll get a different image and no idea which flag caused it. Move one lever, read the result, then move the next.
How it compares with the other tools you might be weighing up
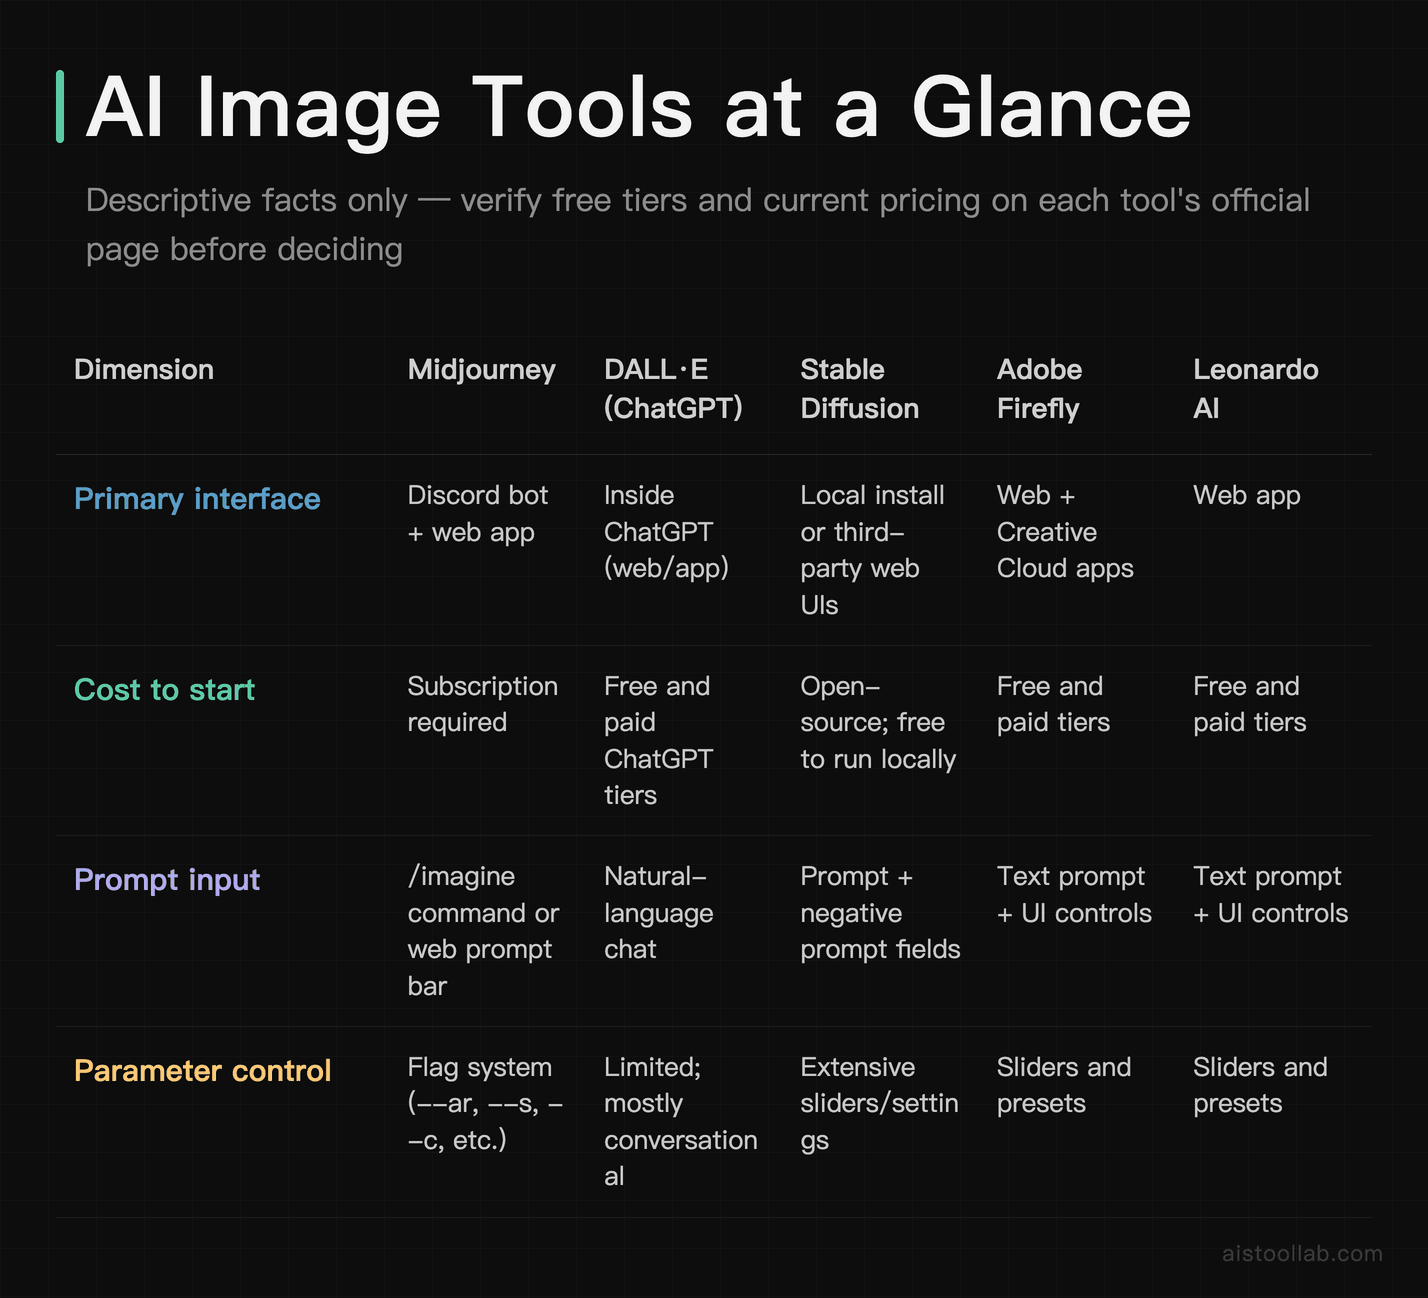
A note on how to read the chart above: these are descriptive facts about how each tool works and where you access it, not scores or a ranking. I’m not crowning a winner — different beginners have different constraints, and I’ll get to who might reasonably prefer what afterward. Anything volatile (free tiers, exact pricing, commercial terms) you should confirm on each tool’s official pages, as of 2026-07, because these change often.
Two things the chart doesn’t cover, supported by the official pages
The chart is about where you access each tool and how you steer it. Two further dimensions tend to matter once you start working for real, and for these I can point you at an official page rather than paraphrase.
Editing part of an image instead of re-rolling all of it. OpenAI’s help centre describes an editor inside ChatGPT — “The editor lets you add, remove, and update parts of your image” — and states in the same section that “Highlights are not always precise, and edits may extend beyond the area you selected” (Images in ChatGPT, checked 2026-07-31). Worth carrying into your expectations: by the vendor’s own description, selecting a region does not guarantee the change stays inside it.
Running a model on your own machine. Stability AI’s licence page lists a free Community licence for “researchers, developers, small businesses, and creators with less than $1M in annual revenue”, and a separate Enterprise licence for “enterprise, API providers, and businesses with annual revenue exceeding $1M” (Stability AI licensing, checked 2026-07-31). The same page has an FAQ that handles self-hosting, fine-tuners, researchers and the revenue threshold as separate questions, so if your situation sits near any of those lines, read the answer that matches your case rather than the tier headline.
Three other dimensions — how many images one prompt returns, whether there’s a built-in community feed, and what each vendor’s commercial-use terms actually say — I have deliberately left out rather than reconstruct them. Two of these vendors’ documentation pages could not be retrieved on 2026-07-31 (one returned HTTP 403 to automated requests, the other timed out), and writing a per-tool answer from memory or a third-party summary is exactly the kind of thing that ends up wrong six months later. If your decision turns on one of those three, the vendor’s own page is the place to read it. As of 2026-07-31 those pages could not be retrieved from here, so the three dimensions are left out rather than reconstructed. They are re-checked on a weekly schedule, and this section will be reassessed if verifiable source material becomes available.
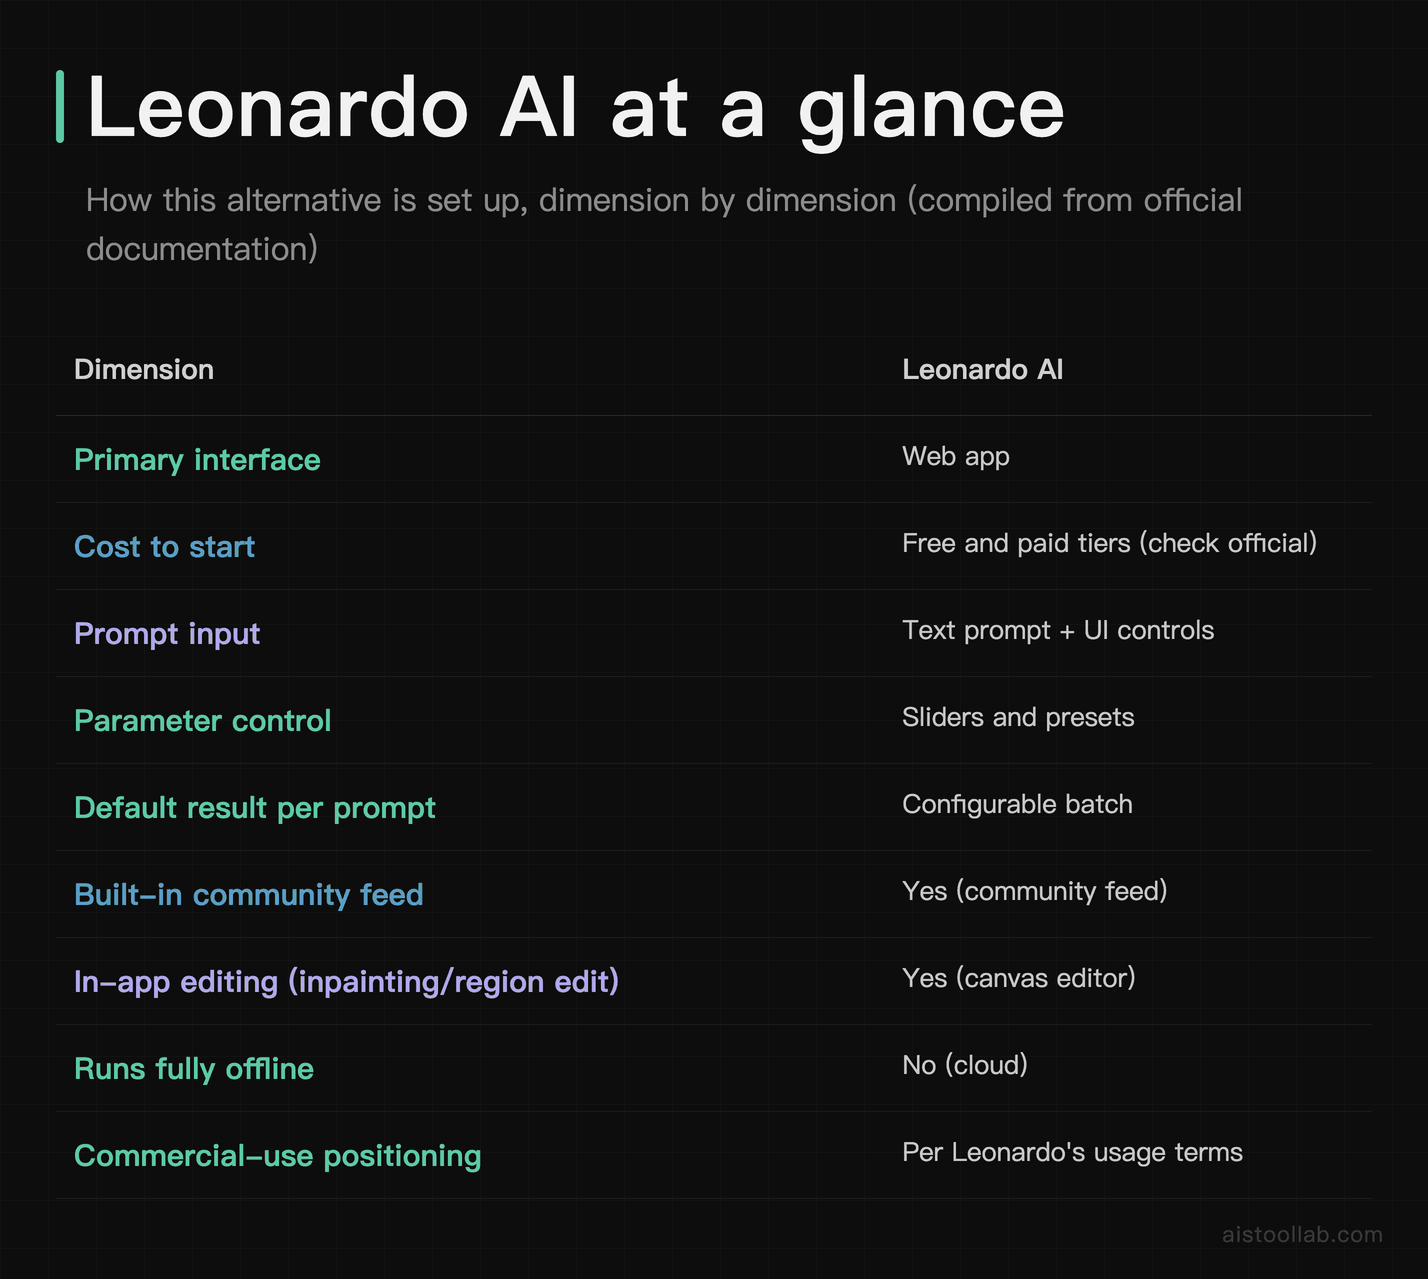
So who might reasonably start where? If you specifically need output you can use commercially without second-guessing the training data, Adobe’s public positioning on Firefly is built around that concern. And if you’re drawn to Midjourney’s grid-and-refine workflow and don’t mind that it’s subscription-only, that’s a fair reason to start there — just go in knowing the paid requirement rather than being surprised by it.
The mistakes that sink most beginners
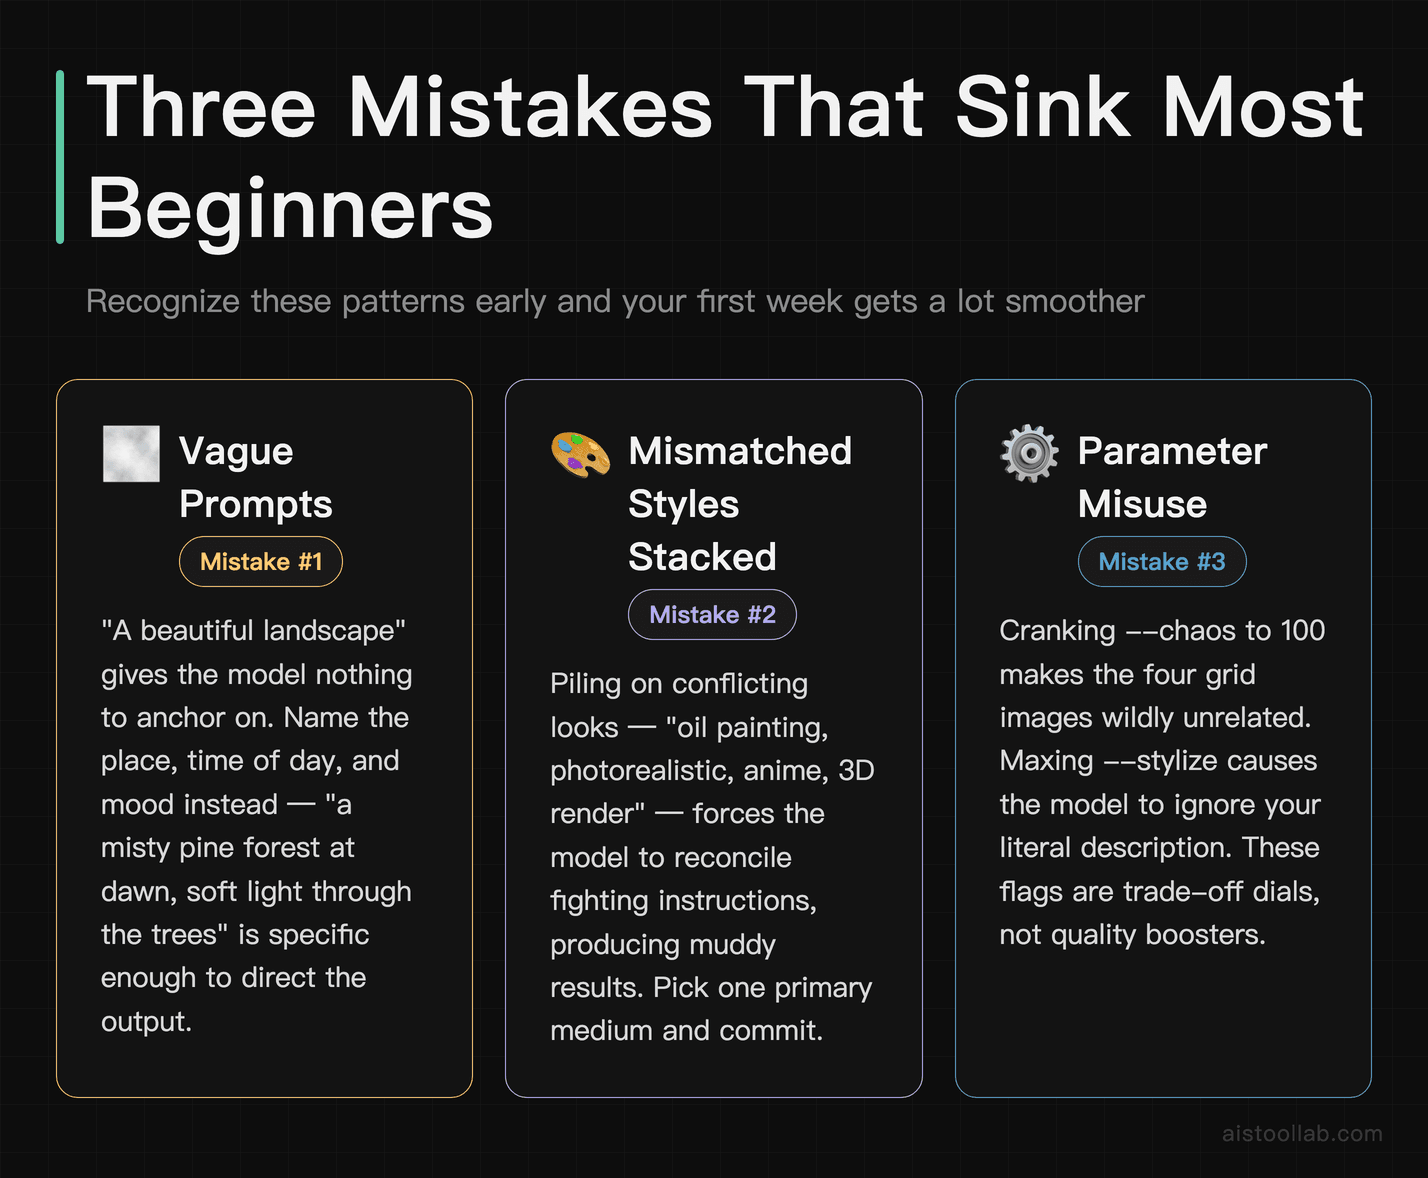
Vague prompts. “A beautiful landscape” gives the model almost nothing to anchor on, so it fills the gaps however it likes and you feel like it “doesn’t listen.” Name the place, time of day, and mood. “A misty pine forest at dawn, soft light through the trees” is night-and-day more directable than “a beautiful landscape,” not because it’s longer but because it’s specific.
Mismatched styles stacked together. Beginners often pile on conflicting looks — “oil painting, photorealistic, anime, 3D render” — hoping more is better. The model then has to reconcile instructions that fight each other, and the result is muddy. Pick one primary medium and commit. If you want a hybrid, introduce it deliberately, not by accident.
Parameter misuse. The classic is cranking --chaos to 100 and then being frustrated that the four images have nothing to do with each other — that’s literally what high chaos does. Same with maxing --stylize and then complaining the image ignored your literal description. These flags aren’t “quality boosters” you turn up for better results; they’re trade-off dials. Learn what each one trades before you push it.
Forgetting aspect ratio. If you need a banner, a phone wallpaper, or a book cover, set --ar up front. Generating a square and cropping later throws away composition the model carefully arranged.
Copying mega-prompts you don’t understand. It’s tempting to paste a 60-word prompt you saw in the community feed. The problem is you can’t adjust what you can’t parse — when it comes out slightly wrong, you won’t know which of those 60 words to change. Borrow ideas, sure, but build your own prompt so you can steer it.
Five low-stakes projects to build your instincts
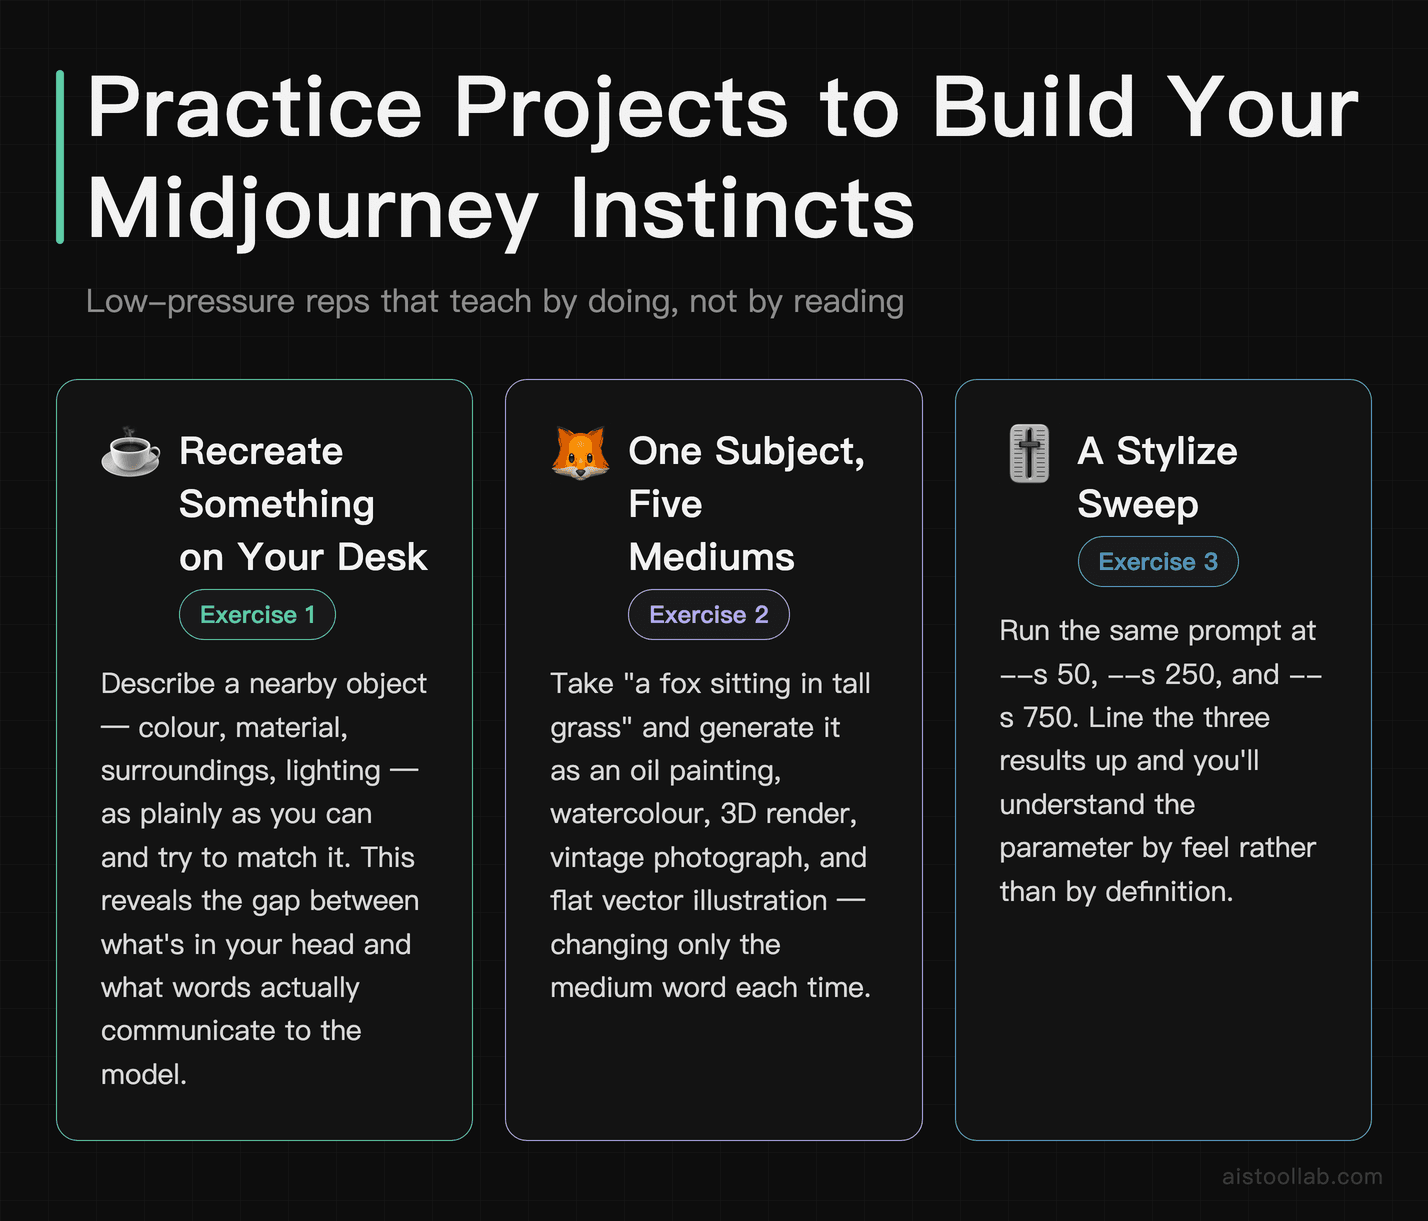
Skill here is muscle memory, and muscle memory comes from reps that don’t carry any pressure. Before you attempt the “real” creative piece you’re excited about, run a few throwaway exercises. Each of these has a narrow goal, so you can actually tell whether it worked.
1. Recreate something on your desk
Say you’re looking at your own coffee mug right now. Describe it as plainly as you can — colour, material, surroundings, lighting — and try to get Midjourney to render something close. This teaches you the gap between what’s in your head and what words actually communicate, which is the whole game.
2. One subject, five mediums
Take a single subject — “a fox sitting in tall grass” — and generate it as an oil painting, a watercolour, a 3D render, a vintage photograph, and a flat vector illustration, changing nothing but the medium word.
3. A stylize sweep
Run the same prompt at --s 50, --s 250, and --s 750. Line the results up. Now you understand that parameter by feel, not by definition — and you’ll reach for it on purpose next time.
4. A simple book cover with a set aspect ratio
If you’re a solopreneur or a marketer who’s going to need real assets eventually, practice with a constraint. Pick a mood, set --ar 2:3, and aim for a clean, uncluttered composition with room where a title would go. This forces you to think about layout, not just pretty pixels.
5. Consistency with seed
Generate an image you like, note its seed, and try to produce a close sibling using --seed plus small prompt tweaks. Consistency is one of the harder things for beginners, and starting to experiment with it early pays off when you later want a matched set.
Where does this leave you? Midjourney rewards deliberate practice more than clever vocabulary. If you’re on a tight budget and just testing whether AI image generation is for you, remember it’s subscription-only, so a free local option like Stable Diffusion or the free tier inside a tool you already pay for might be the lower-commitment first step — that’s purely a cost-of-entry call. But if the grid-and-refine loop appeals to you and the subscription isn’t a dealbreaker, spend your first sessions on these throwaway projects rather than your dream piece. The confidence you build on low-stakes reps is what makes the creative work actually work. I also keep Suno AI Review 2026 and my Adobe Podcast Free guide handy for anyone assembling a broader AI-creative toolkit beyond images.
Frequently Asked Questions
Do I absolutely have to use Discord to run Midjourney?
Not anymore, but it helps to understand both paths. Midjourney has historically been operated through a Discord bot, where you type the /imagine command and get your grid of four images back in a channel or a direct message with the bot. That’s still a fully supported way to work, and it’s where a lot of the community activity lives. There’s also a web app at midjourney.com with a more conventional interface — a prompt bar, a gallery of your results, and on-screen controls for upscaling and variations — which many beginners find calmer than the fast-scrolling public Discord channels. If Discord feels like walking into a crowded party, start in the web app, get comfortable prompting, and dip into Discord later for the community feed. Either way, you’re using the same underlying model and the same parameters; My suggestion for a nervous first-timer is the web app first, Discord second once the basics click.
Is there a free way to try Midjourney before subscribing?
Midjourney is a paid, subscription-based service, and whether any free trial exists is exactly the kind of thing that changes from month to month — so I’d check Midjourney’s official pricing page for the current situation rather than trusting any figure you read secondhand, including here. Don’t assume a free tier is waiting. If your real question is “can I explore AI image generation without paying anything first,” the honest answer is that other tools make that easier: Stable Diffusion is open-source and can be run locally at no software cost if you’re comfortable with a technical setup, and some cloud tools offer limited free tiers (confirm on their own official pages). None of that is a knock on Midjourney — it’s just a matter of matching your budget to your commitment level. Plenty of people try a free option first to decide whether they even enjoy the prompt-and-refine process, then subscribe to Midjourney once they know they’ll use it.
Why do my images ignore part of my prompt?
First, the prompt may be too vague — if you wrote “a nice scene,” the model had wide latitude and simply chose for you; getting specific about subject, setting, and lighting narrows its options. Second, you may have stacked conflicting instructions, like asking for both “photorealistic” and “anime” in the same breath, which forces the model to compromise in ways that look like it ignored you. Third, a high --stylize value deliberately gives Midjourney more creative licence to reinterpret your words, so if you want it to stay literal, lower that parameter. The fix is almost always to simplify and change one thing at a time: strip the prompt down to its essentials, run it, then add detail back gradually. When you build the prompt yourself instead of pasting a long one you found, you’ll know exactly which word to adjust when something comes out wrong.
Can I use Midjourney images for my business or client work?
Commercial use is generally allowed under Midjourney’s subscription terms, but the specifics — what’s permitted at which subscription level, ownership and licensing details, and any restrictions — are governed by Midjourney’s current Terms of Service, and those terms get updated, so read the live version before you put an image in front of a paying client. I won’t quote specific clauses here because doing so from memory is exactly how people end up with outdated information. A related point worth knowing: if commercial safety around training data is a hard requirement for your work — for instance, a risk-averse corporate client — Adobe publicly positions Firefly around content trained on licensed and public-domain sources (per Adobe’s official Firefly pages), which is a different value proposition from Midjourney. For most independent creators and small businesses, checking the current terms once and keeping a note of what tier you’re on is enough. Just don’t assume; verify against the official document the day you need to rely on it.
Last updated: 2026
Looking for other options in this category?
👉 Browse the AI Tools Library and compare more tools side by side.