
A common question from people about to submit their first AI tool — to a marketplace, a model hub, or their own launch page — is some version of: how much documentation is actually enough? Everyone knows they “need docs.” Far fewer know which docs, in what order, and how to tell whether the ones they wrote are any good before real users hit them.
So this is a checklist, not a pep talk. Four documents, one testing habit, and a running theme: your documentation is the part of the product a stranger touches first. If you’re submitting a model, an API, a plugin, or a full app, the reviewer, the buyer, and the first curious developer all form an opinion from your words before they ever see your code run. Let’s make those words do their job.
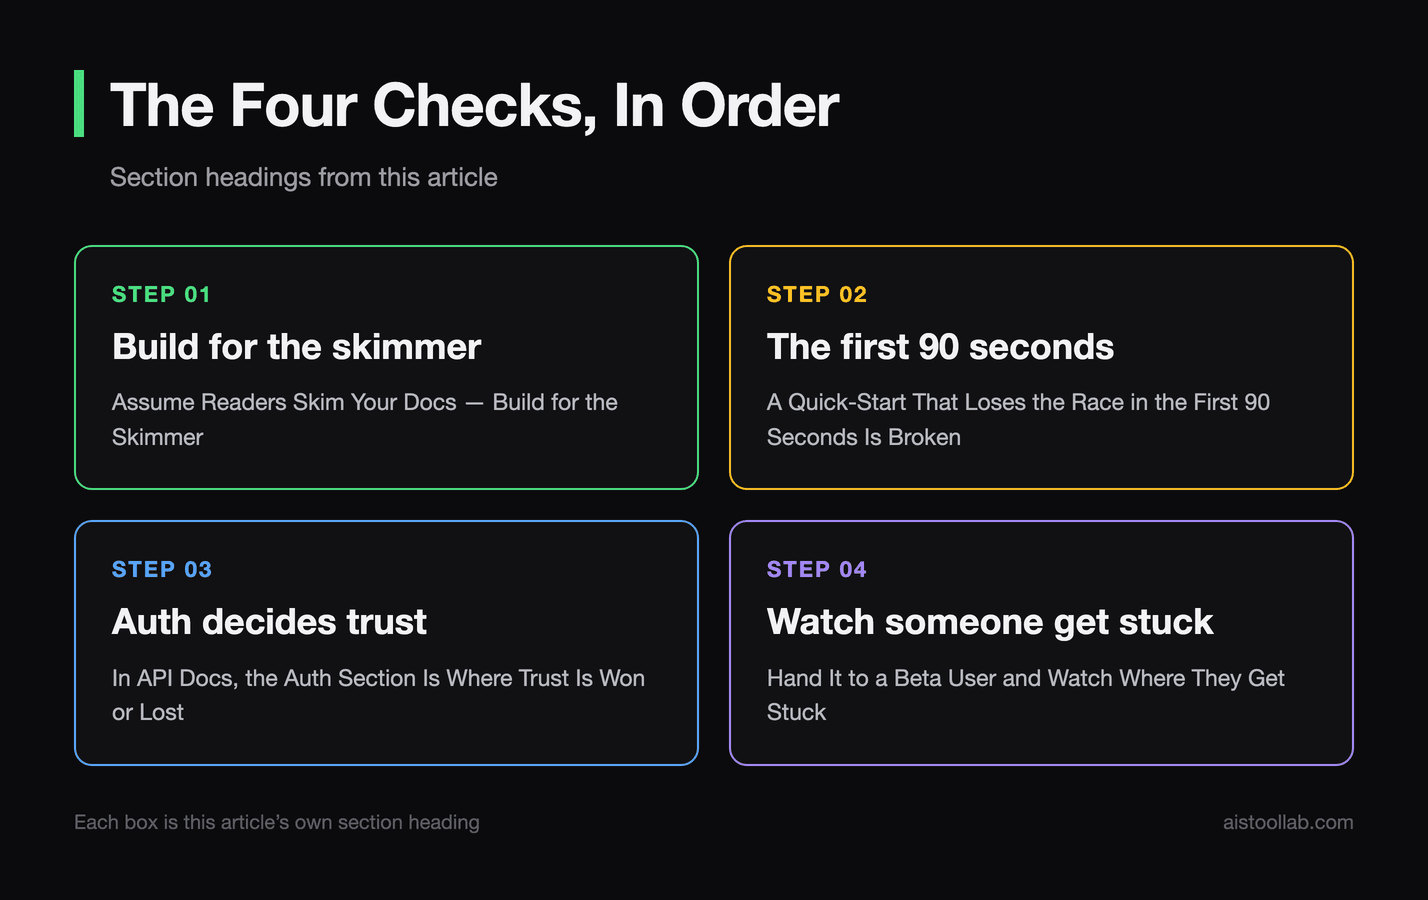
Step 1: Assume Readers Skim Your Docs — Build for the Skimmer
Here’s the premise the whole checklist rests on. Assume the person opening your documentation isn’t reading it like a novel. Many arrive with one question — “can this do the thing I need?” — and they’re scanning for a yes or no. If your README opens with a company origin story and buries what the tool does in paragraph four, you’ve already lost the skimmer.
So your README earns its place by answering, in the first screen, four things: what this is, what problem it solves, what it costs, and how to start. Treat that opening block as a headline, not an introduction. A good README structure looks roughly like this, top to bottom: a one-sentence description of the tool; a short “what you can do with it” list of concrete capabilities; an install or sign-up line; a minimal working example; a pointer to the quick-start and API reference; and only then the deeper stuff — configuration, limits, licensing.
Pricing deserves its own callout, and this is where a lot of first-time submissions go quiet. If your tool has a free tier and paid plans, say so plainly in the README with a link to the live pricing page — don’t hardcode the dollar figures into a Markdown file you’ll forget to update, and don’t leave readers guessing whether the thing that looks free will bill them next month. “Free tier available, see pricing” is honest and low-maintenance. A stale price is worse than no price.
One more README habit that pays off: write your feature list as verbs the reader recognizes, not adjectives you like. “Transcribe audio to timestamped text,” “generate product descriptions from a CSV,” “convert an OpenAPI spec into a client library” — these tell a skimmer instantly whether they’re in the right place. “Powerful,” “seamless,” and “next-generation” tell them nothing.
Say you’re a solo developer shipping an API
Imagine you built a small AI endpoint over a couple of weekends and you’re submitting it to a developer marketplace. Your reader is another developer with a terminal open and about ten minutes of patience. For you, the README’s install-and-first-call block and the API reference’s auth section are load-bearing. Everything else is secondary until those two work cold, on a machine that isn’t yours.
Say you’re the only marketer at a small SaaS startup
Now imagine you’re not the person who wrote the code — you’re the one writing the words that ship with it. Your job is translating the engineer’s mental model into the reader’s. You’ll live in the README and quick-start, and your superpower is being the least technical person in the room: if a step confuses you, it will confuse a chunk of your users too. Write down every place you got stuck; those are your future FAQ entries.
Say you’re submitting a model to a public hub
If you’re publishing a model rather than an API, the “docs” are your model card: what the model does, what data shaped it, its known limits, and a copy-paste inference snippet. The audience skews toward researchers and tinkerers who care a lot about intended use and failure modes. I walk through the submission side of that in the Hugging Face guide, and the interface layer in the Gradio write-up — both assume the model card is already doing its job.
Step 2: A Quick-Start That Loses the Race in the First 90 Seconds Is Broken
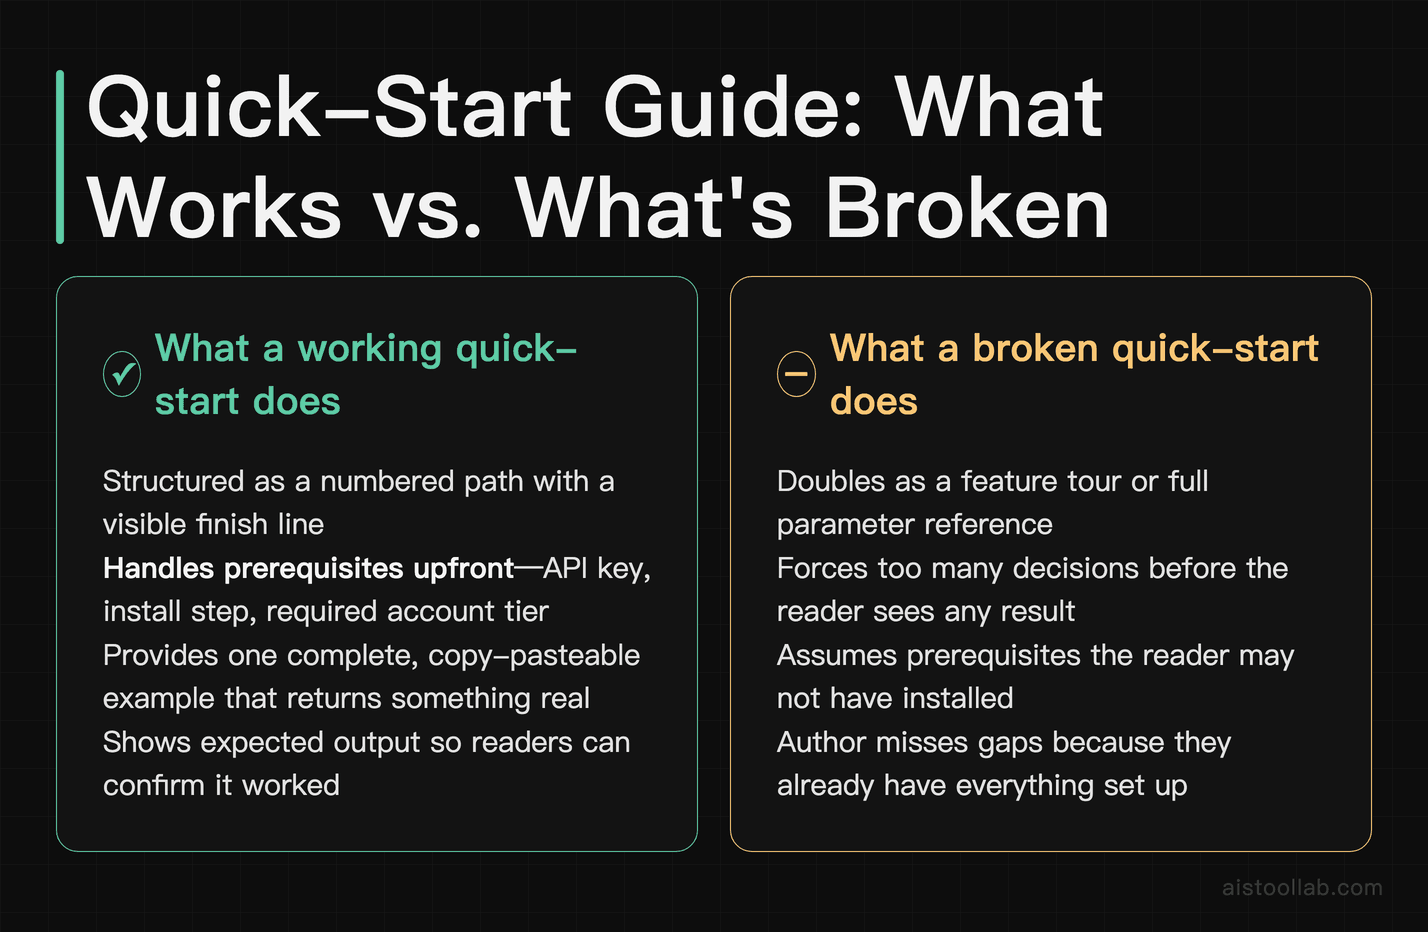
The quick-start guide has exactly one purpose: get a brand-new user from “signed up” to “it worked” as directly as possible. That’s it. It is not a feature tour, not a reference, not the place to show off every parameter. If a reader has to make more than a handful of decisions before they see a result, the quick-start is carrying too much.
The test I’d hold your quick-start to is the “cold start” test: could someone who has never seen your tool follow it start to finish without opening a second tab to figure out a prerequisite? That means the very first line handles the boring blockers — where to get an API key, what to install, what account tier is required — instead of assuming them. Assumed prerequisites are an easy way for a quick-start to stall, and the author may not notice because they already have everything installed.
Structure a quick-start as a numbered path with a visible finish line:
- Get your credentials — one link, one sentence on where the key lives.
- Install or set up — the single command or the single button.
- Make your first call — one complete, copy-pasteable example that returns something real.
- Confirm it worked — show the expected output so the reader knows they succeeded.
- Point to what’s next — one link to the full docs, then stop.
That fourth step is an easy one to skip, and skipping it is a quiet disaster. If you don’t show the expected output, a new user who gets a slightly different response has no way to know whether they succeeded or broke something. Paste the real response — even an abbreviated version — so success is unmistakable. The goal isn’t to teach everything; it’s to hand the reader one small, undeniable win, because a win is what makes them keep going.
Keep the happy path clean. Edge cases, optional parameters, and error handling belong in the reference, not the quick-start. Every “but if you want to also…” you add is another fork in the road where a beginner can take a wrong turn. Write the shortest true path to a working result, and move everything else out.
Step 3: In API Docs, the Auth Section Is Where Trust Is Won or Lost
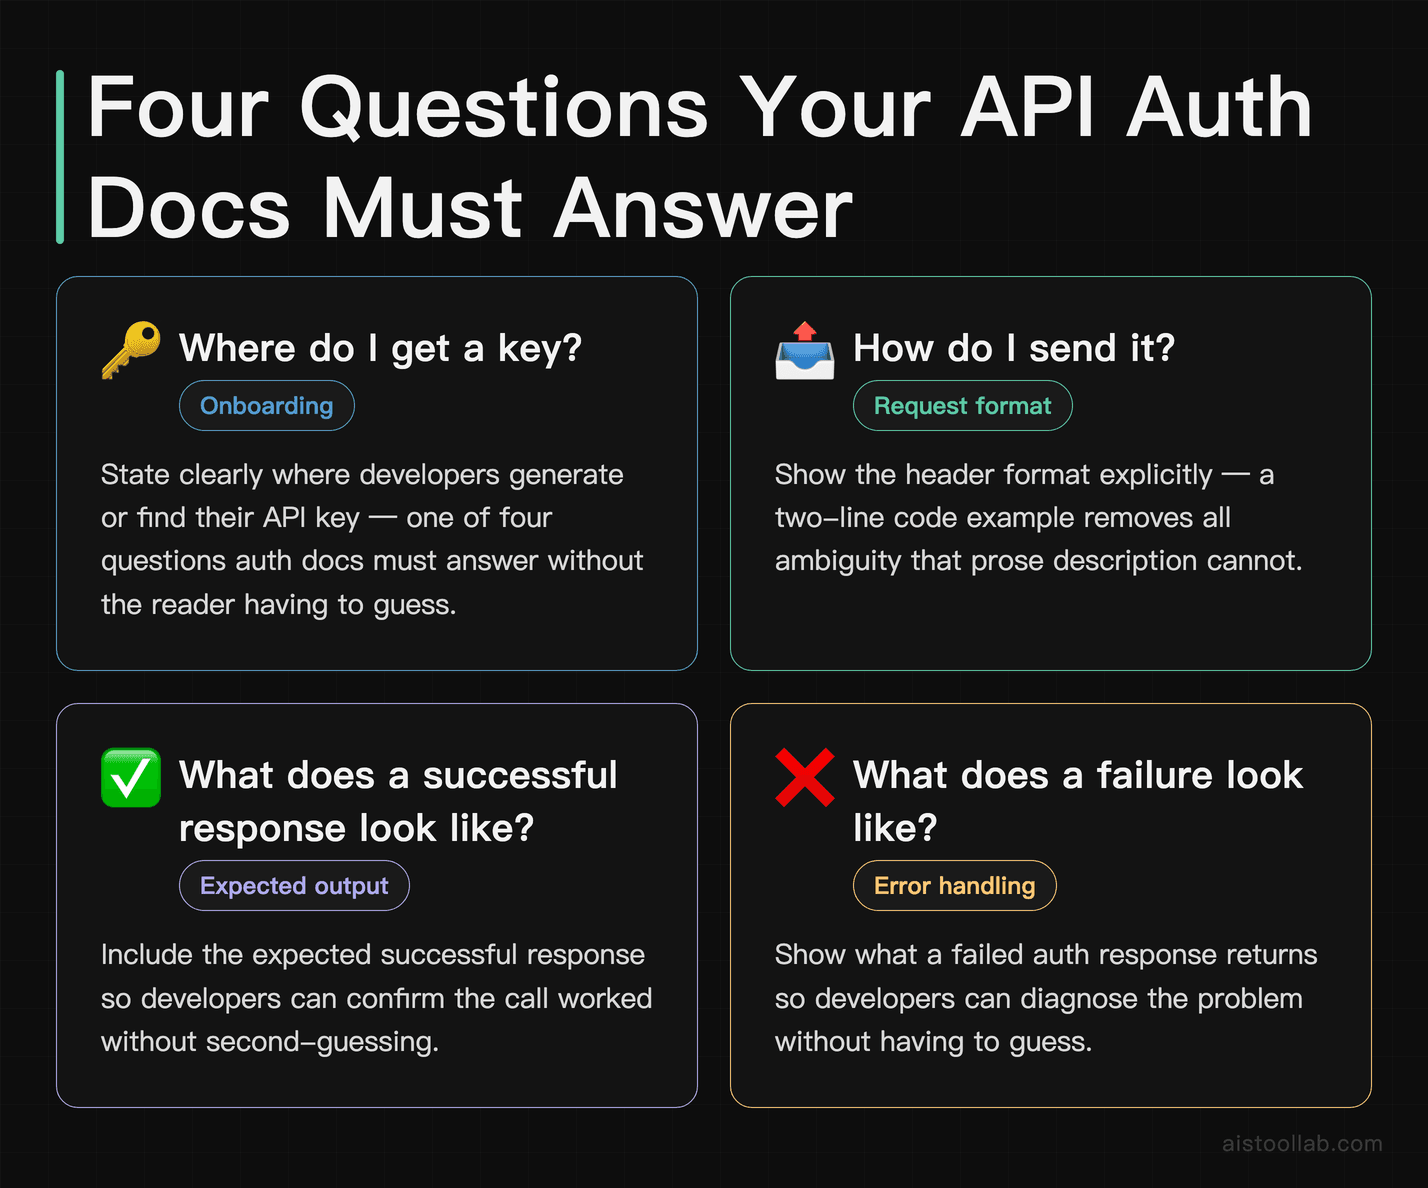
API documentation is one place where a tool’s docs can feel unfinished, and authentication is a section that’s easy to leave incomplete. A developer can forgive a thin parameter description; they cannot start at all if they can’t authenticate. So the auth section deserves careful attention.
Good auth docs answer four questions without the reader having to guess: where do I get a key, how do I send it, what does a successful response look like, and what does a failure look like. Show the header format explicitly — don’t describe it in prose when a two-line example removes all ambiguity:
curl https://api.yourtool.com/v1/generate \
  -H "Authorization: Bearer $YOUR_API_KEY" \
  -H "Content-Type: application/json" \
  -d '{"prompt": "a short haiku about deadlines"}'
Notice the key is an environment variable, not a literal string. That’s deliberate, and it’s a rule to enforce across every example you publish: never paste a real, working key into your docs, screenshots, or demo videos. Use an obvious placeholder like $YOUR_API_KEY or sk-xxxxxxxx, and add one line telling readers to store the key in an environment variable rather than committing it to code. You’re documenting a secure habit at the same time as documenting your API — beginners copy whatever pattern they see first.
Beyond auth, every endpoint in your reference needs the same skeleton so readers can build a mental template: the method and path, required and optional parameters with types, a complete request example, a complete response example, and the error codes it can return. That last one is worth extra attention. When a call fails at 2 a.m., the error-code table is the difference between a five-minute fix and an abandoned integration. List the status codes, what each means in your system, and a likely cause.
Show your examples in more than one form where you can. A curl command proves the raw HTTP works; a short snippet in a common language shows how it feels in real code:
import requests

resp = requests.post(
    "https://api.yourtool.com/v1/generate",
    headers={"Authorization": f"Bearer {api_key}"},
    json={"prompt": "a short haiku about deadlines"},
)
print(resp.json())
Where all of this lives is its own decision, and it’s worth making on purpose rather than defaulting to whatever’s easiest. If your tool is a single script, a well-structured README in the repo may genuinely be enough. If you’re shipping a real API, a platform that turns an OpenAPI spec into a browsable, testable reference saves you from hand-maintaining many endpoint pages. It describes what each option is built for rather than ranking them; feature sets and pricing change, so confirm the current details on each platform’s own site before you commit.
- Hosting model — GitHub README: Lives in your repo; Docusaurus: Self-hosted static site; Mintlify: Hosted SaaS; ReadMe: Hosted SaaS
- Cost — GitHub README: Current pricing per its official pricing page; Docusaurus: Open-source project; current pricing per its official site; Mintlify: Current pricing per its official pricing page; ReadMe: Current pricing per its official pricing page
- Content format — GitHub README: Markdown; Docusaurus: Markdown / MDX; Mintlify: MDX; ReadMe: Markdown
- API reference from OpenAPI — GitHub README: Manual only; Docusaurus: Via plugin; Mintlify: Yes; ReadMe: Yes
- Interactive “try it” explorer — GitHub README: No; Docusaurus: Via plugin; Mintlify: Yes (API playground); ReadMe: Yes (“Try It”)
- Built-in doc versioning — GitHub README: Git branches/tags; Docusaurus: Built-in; Mintlify: Supported; ReadMe: Supported
- Search — GitHub README: GitHub search; Docusaurus: Via search plugin; Mintlify: Built-in; ReadMe: Built-in
- What it’s designed around — GitHub README: Tiny projects / a single overview page; Docusaurus: Teams wanting full control with no hosting bill; Mintlify: Teams wanting a polished API reference without hand-building it; ReadMe: API-first products that want an interactive reference out of the box
Read the last row as “what each is designed around,” not a scoreboard. A hobby project genuinely may be well served by the free option; a product whose entire value is an API may find the manual route eats more hours than a hosted platform costs. Match the tool to your situation, not to a ranking.
Step 4: Hand It to a Beta User and Watch Where They Get Stuck
You cannot proofread your way to good documentation, because you can’t un-know how your own tool works. The curse of knowledge is real: every prerequisite you forgot to write down is a prerequisite you don’t consciously see anymore. A reliable fix is to put your docs in front of someone who doesn’t have your context and watch what happens.
The method matters more than the number of testers. A handful of the right people, watched closely, tells you more than a large survey with vague answers. Here’s a testing approach that catches the real problems:
- Pick testers who match your actual audience. If your tool is for developers, a non-technical friend’s confusion is less useful than a developer’s silence at step three.
- Give them a task, not a review request. “Read my docs and tell me what you think” produces politeness. “Using only the quick-start, make one successful API call and tell me how long it took to get stuck” produces truth.
- Watch, don’t help. The instinct to jump in and explain is exactly the instinct that hides your documentation’s gaps. Every time you have to explain something out loud, that explanation is missing from the docs. Write it down instead of saying it.
- Log the exact stumble points. Where did they re-read a sentence? Where did they open a new tab? Where did they say “wait, where do I get that?” Those moments are your rewrite list.
A lightweight version of this fits into a Slack thread with your team or a short call with a couple of friendly early users — you don’t need a formal program to get signal. The point is simply to observe a fresh brain colliding with your words. If more than one tester stalls at the same line, treat that as a signal the line may need work, no matter how clear it looks to you.
Pay special attention to the seams between documents. A classic failure is a quick-start that assumes the reader already generated an API key, while the README assumes the quick-start covers it — so the one step that matters lives in neither. Beta testers walk straight into those gaps because they don’t know the map you carry in your head. If you want more on shaping inputs so tools respond well, that’s the flip side of the same coin, and it’s covered in the piece on submitting content to AI tools.
Print the checklist, then read your own docs like a stranger who’s in a hurry
If you do only one thing before you hit submit: hand your quick-start to someone who’s never seen the tool, give them a task, and stay quiet while they get stuck — the list of where they stall is the list of what to fix.
Frequently Asked Questions
Do I really need separate README, quick-start, and API docs — can’t one file do it all?
For a genuinely tiny project, one well-organized README can carry the load, and forcing three documents where one would do just creates maintenance work. But the three exist because they serve different readers at different moments. The README is for the person deciding whether to bother at all — it answers “what is this and should I care.” The quick-start is for the person who already decided yes and wants a fast win. The API reference is for the person who’s committed and now needs precise, lookup-style detail on every endpoint. Cramming all three into one file means each reader wades through the other two’s content to find theirs, and a reader who’s skimming rather than reading in full is liable to bounce. A reasonable middle ground for a small tool is a README that contains a short quick-start section inline, with the full API reference kept separate because it’s the piece that grows fastest and needs its own structure. Split them when any one section starts making the others hard to scan.
What should the very first code example in my API docs actually show?
The single simplest complete call that returns a real, recognizable result — nothing more. Resist the urge to lead with your flashiest endpoint or the one with fifteen parameters. The first example’s only job is to prove, in the fewest possible lines, that the reader can authenticate and get a response. That usually means one required parameter, a full request, and the full response shown right below it so success is unmistakable. Include the auth header explicitly rather than referencing it abstractly, use a placeholder key, and make the example copy-pasteable exactly as written — no “fill in the blanks” that a beginner might fill in wrong. Once that first call works for the reader, they trust that the rest of your docs are accurate, and they’ll happily explore the complex endpoints on their own. If the first example is intimidating or, worse, doesn’t run as pasted, you’ve spent your credibility before the reader ever saw what your tool can really do.
How do I document authentication without leaking real keys?
Never put a live, working key anywhere a reader can see it — not in code samples, not in screenshots, not in a demo GIF where it flashes on screen for a second. Use an obvious placeholder such as $YOUR_API_KEY or a clearly fake sk-xxxx pattern, and load it from an environment variable in your examples rather than pasting it inline. This does double duty: it protects you, and it models the secure habit you want your users to copy, because beginners can end up replicating whatever pattern your docs demonstrate first. Add one short line telling readers where to generate their own key and reminding them not to commit it to source control. If you ever suspect a real key made it into a public example — a common accident when copying from a working script — treat it as compromised and rotate it immediately. Documenting auth clearly and documenting it safely are the same task done well; sloppy examples can teach sloppy security to the people who follow them.
How many beta testers do I need to test my documentation?
Fewer than you’d think, if you watch them closely. A small number of people who match your real audience, observed while they attempt a concrete task, surfaces more actionable problems than a large group filling out a feedback form. The value comes from watching where a fresh reader stalls, not from counting responses. When the same stumble shows up across two or three testers, you’ve likely found a real gap worth fixing; problems that appear only once might be that individual’s habits rather than a doc flaw, so weight the repeats. The practical trap is testing with people who already know your tool — a teammate who helped build it can’t experience the docs cold, so their smooth run tells you nothing about a stranger’s. Recruit people with the right background but no prior exposure, give them a specific goal, and resist explaining things out loud. Every explanation you have to voice is a sentence your documentation is missing, and that’s the exact list you’re there to collect.
Should I write the docs before or after building the feature?
Writing at least a rough draft of the docs before the feature is fully built is a genuinely useful discipline, even though it feels backwards. When you try to describe how someone will authenticate, make their first call, and read the response before the code is locked, awkward design decisions surface early — a confusing parameter name or a clumsy auth flow is much cheaper to change on paper than after launch. This “docs-first” habit turns your documentation into a design spec: if the quick-start is painful to write, the experience is probably painful to use. That said, you’ll still need a real pass after the feature works, because the actual responses, error codes, and edge cases only become concrete once it runs. So the honest answer is both — sketch early to pressure-test the design, then finalize against the working implementation. What you should never do is treat docs as a last-minute chore bolted on the night before submission, because that’s exactly when the gaps a beta tester would have caught slip through untouched.
What’s the difference between a quick-start and a full tutorial?
A quick-start has one job: get a new user to their first successful result as fast as possible, along the shortest true path, skipping everything optional. It’s a sprint to a single win. A tutorial is a longer, teaching-oriented walkthrough that builds understanding — it might construct a small real project, explain why each step matters, and cover several features in context. Confusing the two is an easy documentation mistake to make: authors turn their quick-start into a mini-course, and the beginner who just wanted to see the tool work drowns in explanation before reaching any result. Keep the quick-start ruthless and short, and let it link to tutorials for readers who want depth. Think of the quick-start as the trailer and tutorials as the full episodes. A reader chooses which they need based on how much time and curiosity they have, so serving both — clearly labeled and cleanly separated — respects the person in a hurry and the person who wants to go deep, without forcing either into the other’s document.
Do AI or model submissions need the same docs as an API product?
The shape shifts, but the underlying checklist holds. When you submit a model to a public hub rather than an API to developers, your central document is the model card, and it emphasizes things an API reference doesn’t: what the model is intended for, what data and training shaped it, its known limitations and failure modes, and a copy-paste inference snippet so a reader can run it quickly. The “auth section” concern is largely replaced by a “responsible use and limitations” concern — the researchers and tinkerers reading a model card often care about intended use and where the model breaks. But the core principles transfer directly: lead with what it does and who it’s for, give a working first example with expected output, be honest about limits, and test the card on someone who’s never seen your work. Whether you’re shipping a REST endpoint or a set of weights, the person on the other side is trying to answer the same first question — “can this do the thing I need, and how fast can I find out?”
Last updated: 2026
Found this review helpful?
👉 Browse the AI Tools Library to find the right tools for your workflow.