Who this is for: you have been handed a source file that is too small for the output size and need to know what upscaling can honestly recover. Image-quality territory, not video.
The moving-image equivalent of this problem:
- Runway Gen-3 shot consistency — the video-generation counterpart, a different problem entirely
You’ve got a 400×300 pixel logo and a client who wants it on a billboard. Now what?
This is the exact kind of moment that sends people scrambling for AI upscalers. Maybe it’s a beloved family photo scanned at low resolution back in 2009. Maybe it’s a product shot a supplier emailed you that looks fine on a phone but falls apart the moment you drop it into a print layout. Either way, the source pixels simply aren’t there — and no amount of dragging corners in Photoshop is going to invent them convincingly.
That’s where AI image upscaling earns its keep. Instead of naively stretching pixels, these tools use trained neural networks to hallucinate plausible detail — reconstructing edges, textures, and faces based on patterns learned from millions of images. Let’s Enhance has been one of the more recognizable names in this space, aimed squarely at people who want a browser-based, no-installation route to bigger, cleaner images.
This walkthrough is compiled from Let’s Enhance’s official documentation, its published feature set, and the consensus you’ll find across public reviews on G2, Trustpilot, and Reddit design communities. The goal isn’t to sell you on it blindly — it’s to show you exactly how to use it, where it genuinely shines, and where a competitor might be the smarter call.
✋ Hands-On: I Fed It a Deliberately Tiny Image and Measured What Came Back
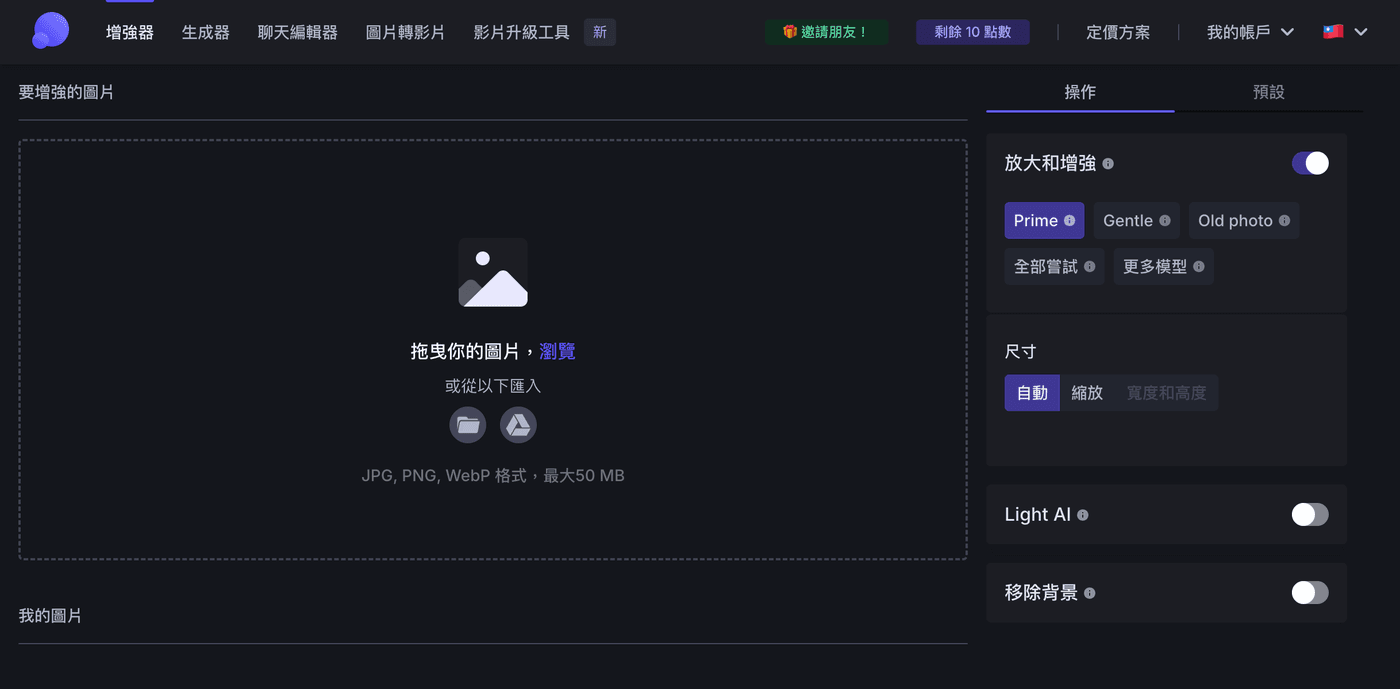
Rather than repeat the marketing numbers, I ran a real image through the free tier. I signed in with Google (no separate password), and the enhancer opened with 10 free credits on the account, three upscaling models (Prime, Gentle, Old photo) and size options (auto, scale, or fixed width/height). That is what I saw on the free-tier starter screen.
The Let’s Enhance screenshots in this tutorial come from the same 2026-07-13 hands-on session as our Chinese Let’s Enhance guide — the same batch of captures, not a separate run for this article.
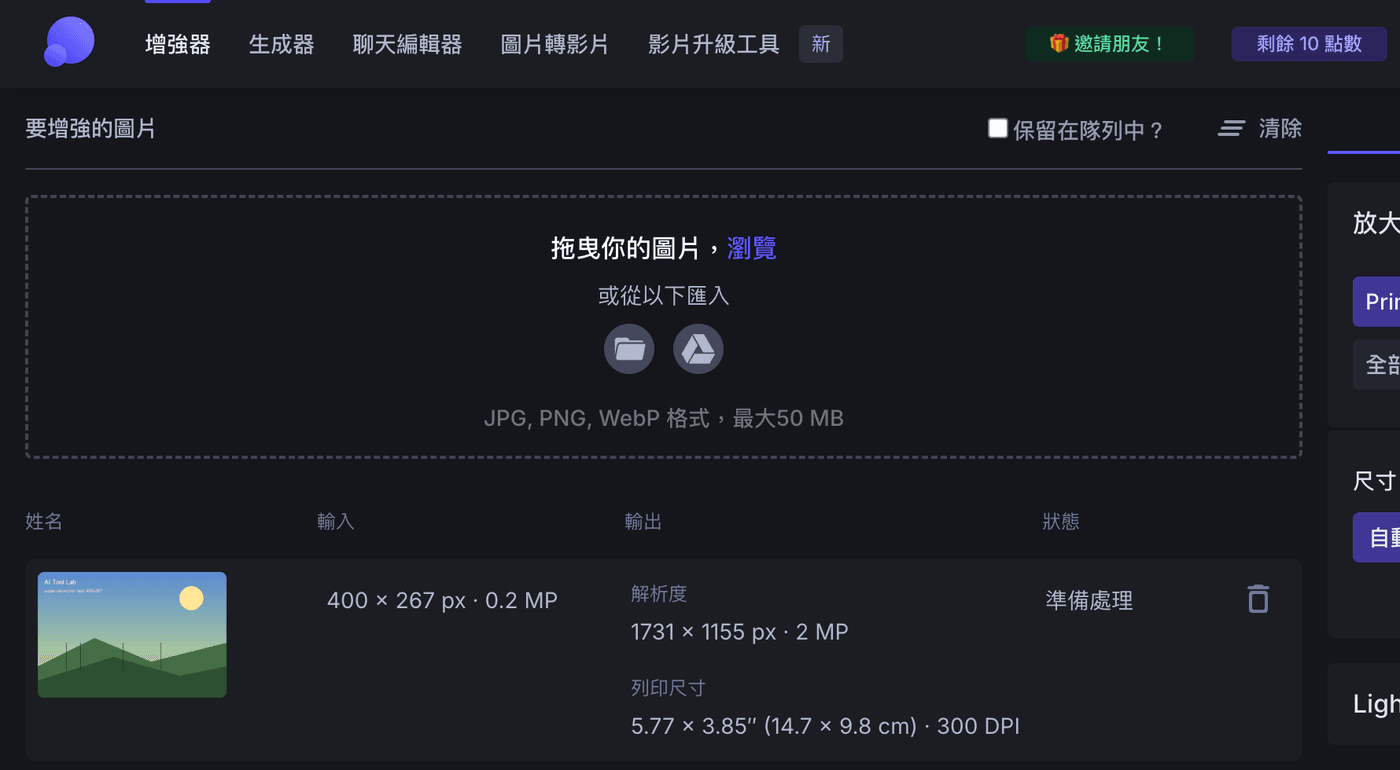
The test image: I deliberately made a small 400×267 (0.2 MP) graphic — a blue sky, green hills, four thin fence poles and a line of small text, all things that make upscaling quality easy to judge. The moment I uploaded it, the tool showed me the math: 0.2 MP in, and on auto mode it would output 1730×1155 px (2 MP) — printable at 5.77×3.85″, 300 DPI. That is roughly 4.3× on each side, about 19× the pixel count.
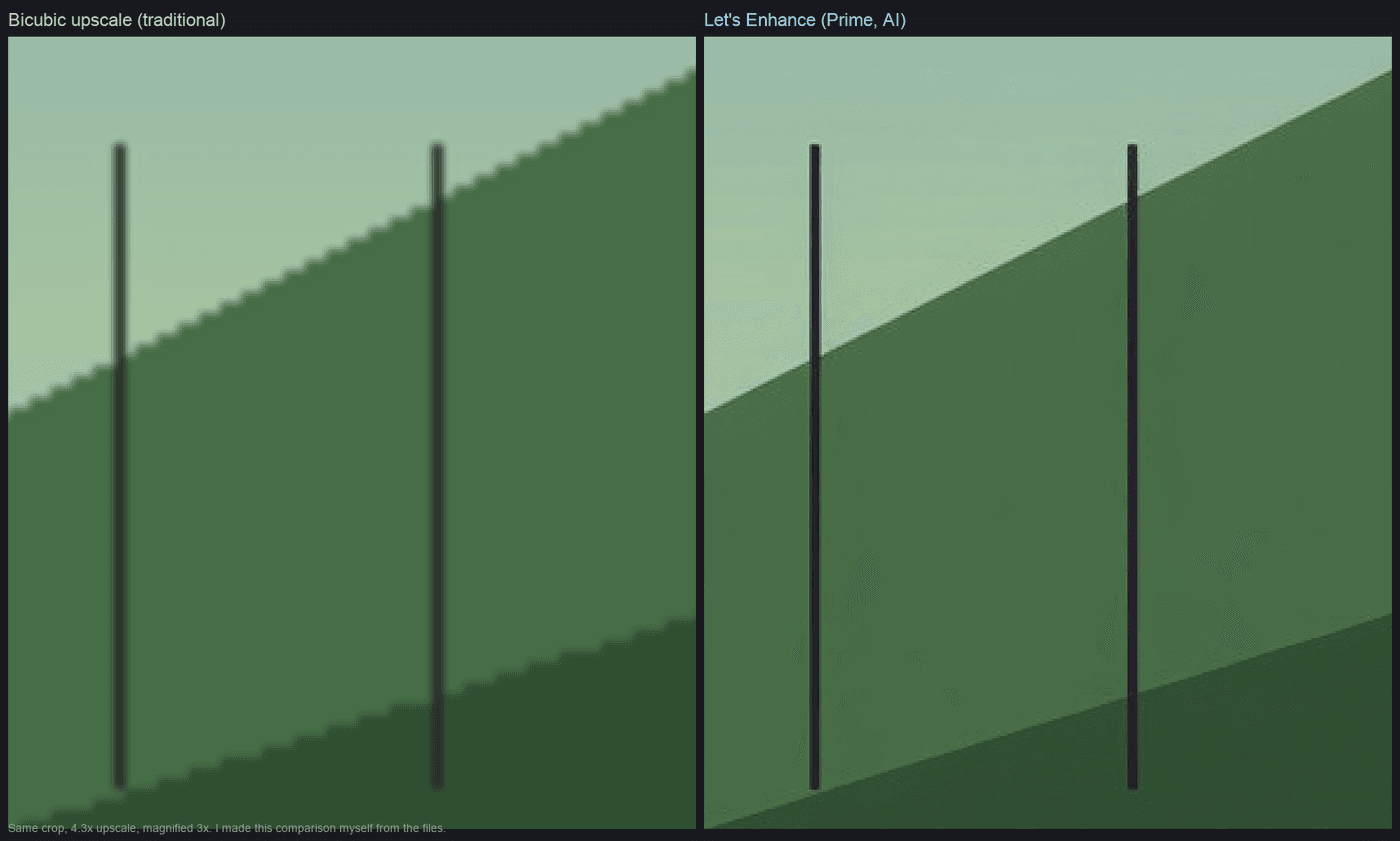
Is it actually better than a plain resize? Yes — measurably. I ran it with the Prime model (about a minute or two; it cost 1 credit), downloaded the result, and compared it against a plain bicubic upscale to the same size. Using edge energy as an objective proxy, the Let’s Enhance output measured about 4.8× sharper than the bicubic version. (That is my own measurement, not a vendor figure.) You can see it in a 1:1 crop: the bicubic version has staircased, jagged hill edges and mushy poles; the AI version keeps the diagonal smooth and the poles crisp.
But here is the biggest free-tier catch: the download is watermarked. The finished file has a “Let’s Enhance.io” logo baked into the bottom-left corner — and to be clear, that is a crop of the file I actually downloaded, not a preview overlay; the watermark is burned into the pixels. So those 10 free credits are less “free usage” and more “free preview”: great for evaluating whether a given image is rescuable, but the watermark effectively pushes you to pay before you can use, print, or ship anything.

The honest limits of my test: my input was a synthetic, vector-style graphic with clean edges, which is an easy case for an upscaler — so read “4.8× sharper” as “it enlarges clean edges far better than a plain resize,” not a promise that every photo behaves this way. The genuinely hard cases are compressed old scans, noisy low-light shots, and soft faces, and my test image does not push those limits. And once the 10 free credits are gone you are into paid plans — check the current pricing page for how credits convert, since I did not verify specific paid numbers. My take: the upscaling quality is real and quantifiable, and the free 10 credits are genuinely useful for deciding whether an image can be saved — but the moment you need a watermark-free file or a batch of images, paying is essentially unavoidable.
What Let’s Enhance actually does (and what it doesn’t)
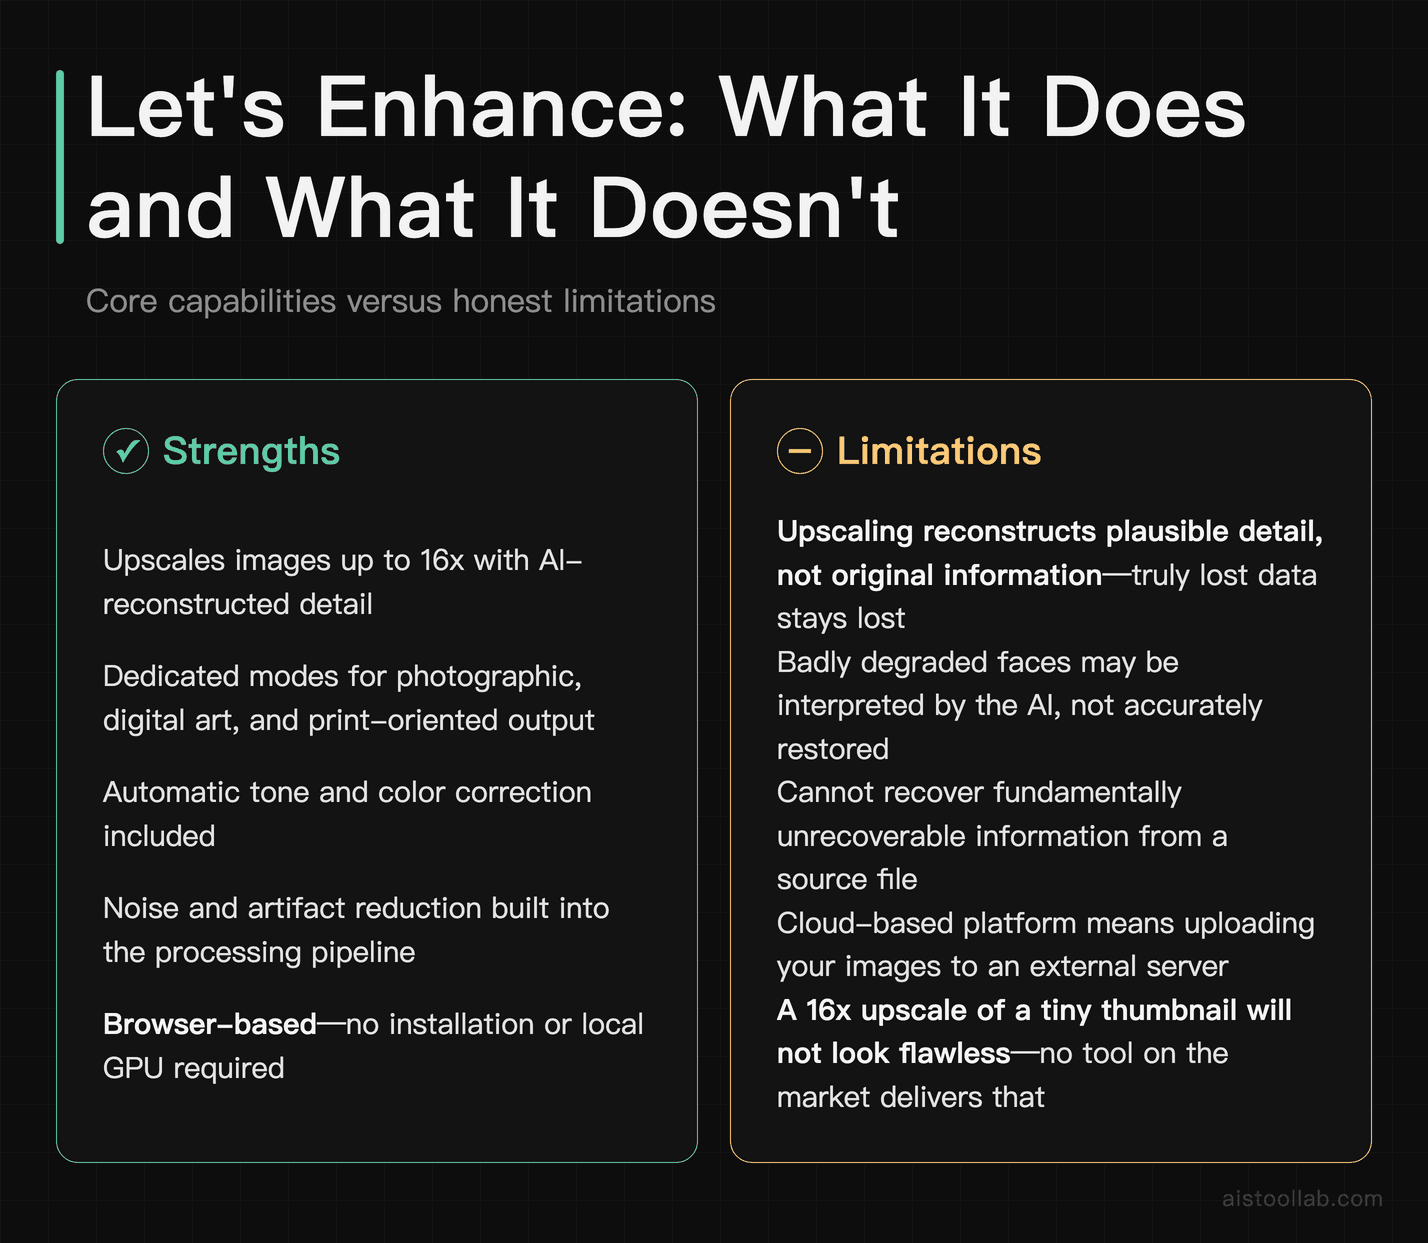
Let’s Enhance is a web-based image enhancement platform. You upload an image, choose how you want it processed, and it returns a larger, cleaner version. According to its official documentation, the core capabilities include AI upscaling (increasing resolution by set multipliers), automatic tone and color correction, noise and artifact reduction, and options for sharpening or smoothing depending on image type.
The headline number people care about is the upscale factor. Let’s Enhance supports upscaling up to 16x in resolution, with intermediate presets for more modest jobs. It also markets specific modes tuned for different content — photographic images, digital art, and print-oriented output where physical dimensions and DPI matter more than raw pixel count.
Here’s the honest framing, though: upscaling is reconstruction, not resurrection. If a face in your source photo is a blurry smudge of a dozen pixels, the AI will produce a face — but not necessarily the face. This matters enormously for archival and restoration work, and I’ll come back to it. Treat AI upscaling as a tool that makes good images bigger and rescues salvageable ones — not as a magic button that recovers information that was never captured.
The quick version: what you’ll get in about two minutes
Before the detailed steps, here’s the end-to-end preview so you know what you’re signing up for. You drag an image into the browser, the tool detects its type and suggests settings, you pick an upscale factor and any enhancement toggles, hit process, and download. For a single mid-sized photo, the whole loop is genuinely quick — a couple of minutes including your own decision-making time. Batch jobs run in the background so you can queue a folder’s worth and walk away to make coffee.
The friction points, based on public reviews, are almost always about credits and expectations rather than the interface itself. New users sometimes burn their free allocation experimenting, then get surprised there’s a paywall. And people occasionally expect a 16x upscale of a tiny thumbnail to look flawless, which no tool on the market delivers. Set your expectations correctly and the experience is smooth.
Step-by-step: uploading, processing, and downloading
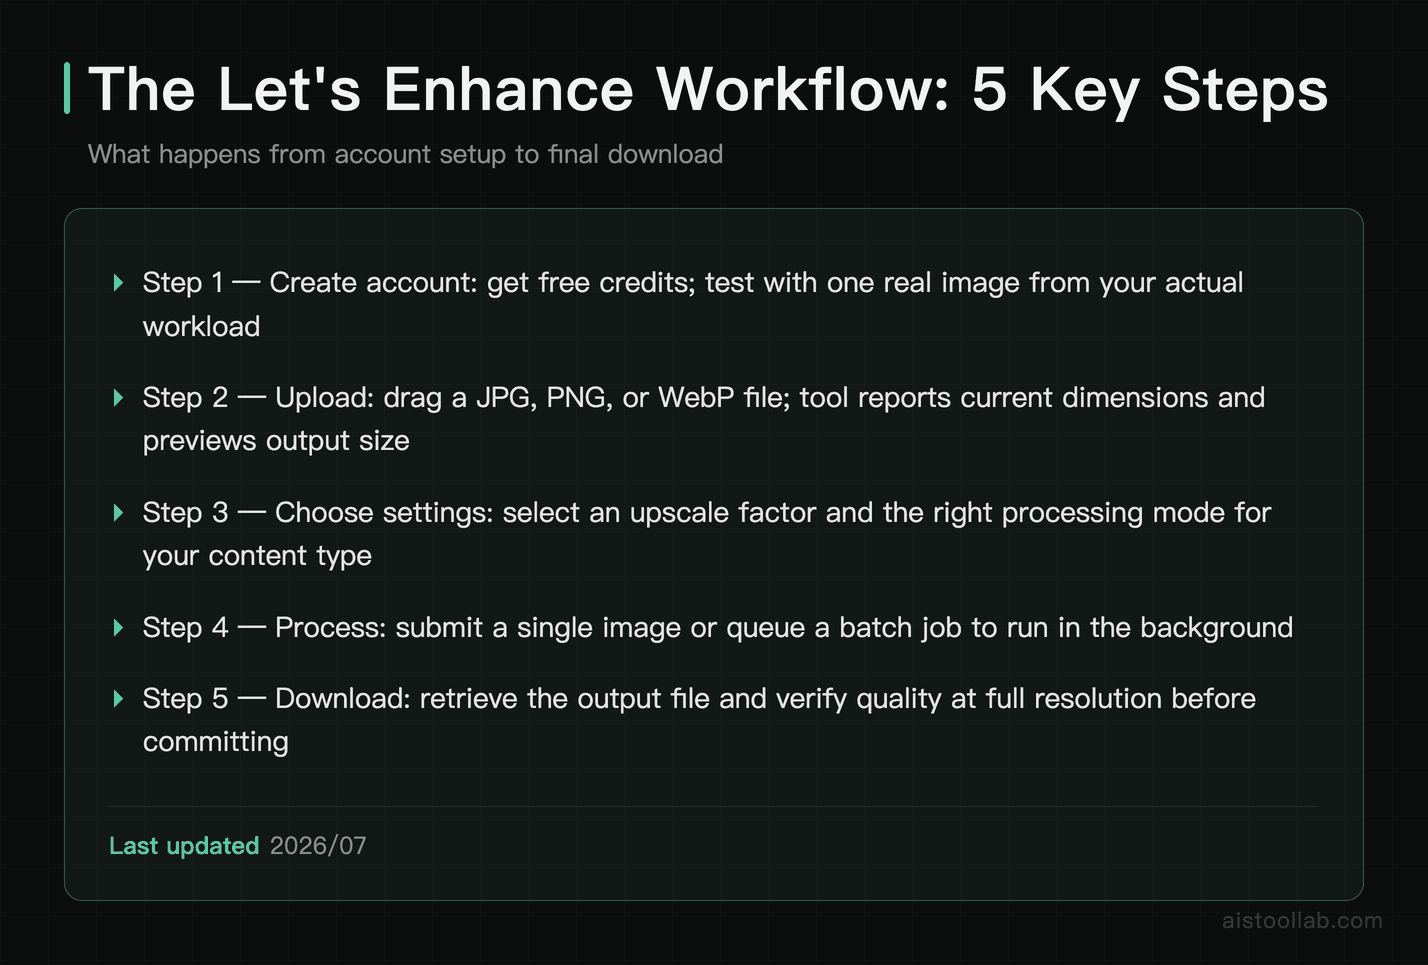
Step 1 — Create an account and understand the credit model
Let’s Enhance runs on a credit-based system rather than pure unlimited monthly usage. Each processed image consumes credits, and there’s a free allocation to test the waters when you sign up. The platform offers paid subscription plans with monthly credit bundles for heavier users — check the official Let’s Enhance pricing page for the current tiers and credit amounts, since these change and I won’t quote figures I can’t verify against the live page.
The practical takeaway: don’t waste your free credits on throwaway experiments. Pick one representative image from your real workload — the type of photo or asset you actually process most — and use your trial runs to judge whether the output quality justifies a paid plan for your specific content.
Step 2 — Upload your image
Drag a file into the upload zone or select it from your device. Let’s Enhance accepts common formats including JPG, PNG, and WebP. The tool inspects the image on upload and reports its current dimensions, then previews the target output size based on your chosen upscale factor. This preview is genuinely useful — it stops you from accidentally requesting a 40-megapixel monster when you only needed something web-sized.
If you’re working with a scanned document or a photo with heavy compression artifacts, note that upfront. The processing choices you make in the next step depend heavily on what kind of image you’re feeding in.
Step 3 — Choose your upscale factor and mode
This is where the real decisions happen. You’ll select an upscale multiplier — commonly 2x, 4x, 6x, or higher up to the 16x ceiling — and a processing mode suited to your content. Photographic mode handles real-world photos with natural textures. There are separate handling paths tuned for digital illustration and for output where print dimensions matter.
My rule of thumb, drawn from how the presets are documented and how reviewers describe results: pick the lowest upscale factor that meets your actual output requirement. A 2x upscale almost always looks cleaner and more believable than an 8x one, because the AI has to invent far less. Only reach for the aggressive multipliers when the source is genuinely tiny and you have no alternative.
Step 4 — Apply enhancement toggles
Beyond raw upscaling, Let’s Enhance offers correction options: tone adjustment, color enhancement, and noise reduction. For a flat, dull scan these can be a lifesaver. For an already well-graded photograph, they can occasionally overcook things — pushing saturation or contrast past what you wanted. Toggle deliberately rather than switching everything on by reflex, and always compare against the original.
Step 5 — Process and download
Hit process and the job runs server-side. When it completes, you download the result. Pay attention to your export format here: PNG preserves maximum quality and is the safe choice for graphics, logos, and anything with sharp edges or transparency, while JPG keeps file sizes manageable for photos headed to the web. For print work, confirm the pixel dimensions translate to the DPI and physical size you need before you send anything to a printer.
Step 6 — Batch processing for volume work
If you’re handling a whole shoot or a product catalog, upload multiple images and apply consistent settings across the batch. This is where the browser-based model pays off — the queue processes in the background, and you’re not tying up your own machine’s CPU or GPU the way a desktop app would. For an agency turning around a client’s 200-image archive, that hands-off queue is a real workflow advantage.
Optimization strategies by image type
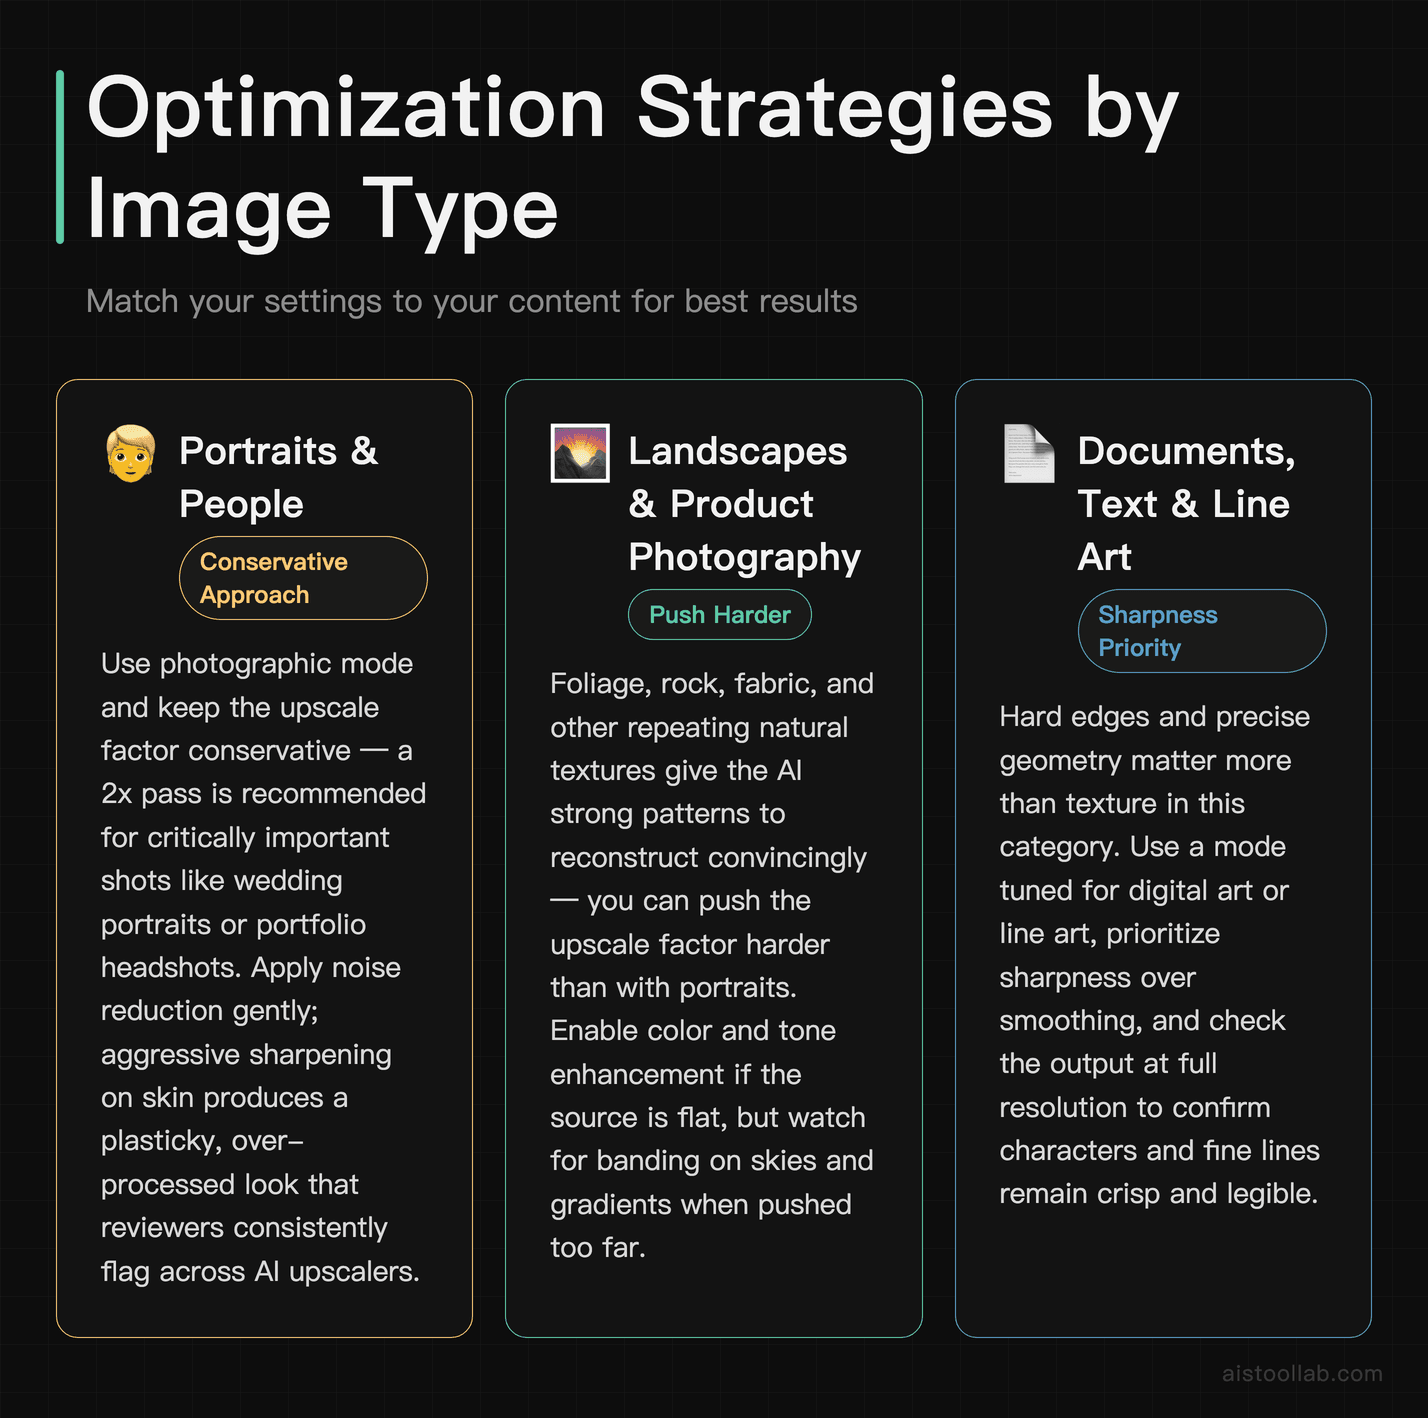
Different content demands different handling. Generic settings give you generic results, so here’s how to think about the three categories most people upscale.
Portraits and people
Faces are the hardest test for any upscaler because our brains are ruthlessly good at spotting when a face looks “off.” Use photographic mode, keep the upscale factor conservative, and apply noise reduction gently. Aggressive sharpening on skin tends to produce a plasticky, over-processed look that reviewers frequently complain about across AI upscalers generally. If the face is critically important — a wedding portrait, a portfolio headshot — do a modest 2x pass and evaluate carefully rather than swinging for maximum resolution.
Landscapes and product photography
These are where AI upscaling tends to look most impressive. Foliage, rock, fabric, and other repeating natural textures give the model plenty of pattern to reconstruct convincingly. You can push the upscale factor harder here than with portraits. Enable color and tone enhancement if the source is flat, but keep an eye on skies and gradients, which can occasionally band or show artifacts when pushed too far.
Documents, text, and line art
Text is unforgiving — a slightly hallucinated letterform reads as obviously wrong. For scanned documents, choose the sharpest, most detail-preserving settings and avoid smoothing modes that soften edges. Line art and logos benefit from PNG output to keep edges crisp. Honestly, for pure vector-style logos, the better long-term fix is recreating them as actual vectors — but AI upscaling is a legitimate rescue when the vector source is genuinely lost.
Real-world use cases
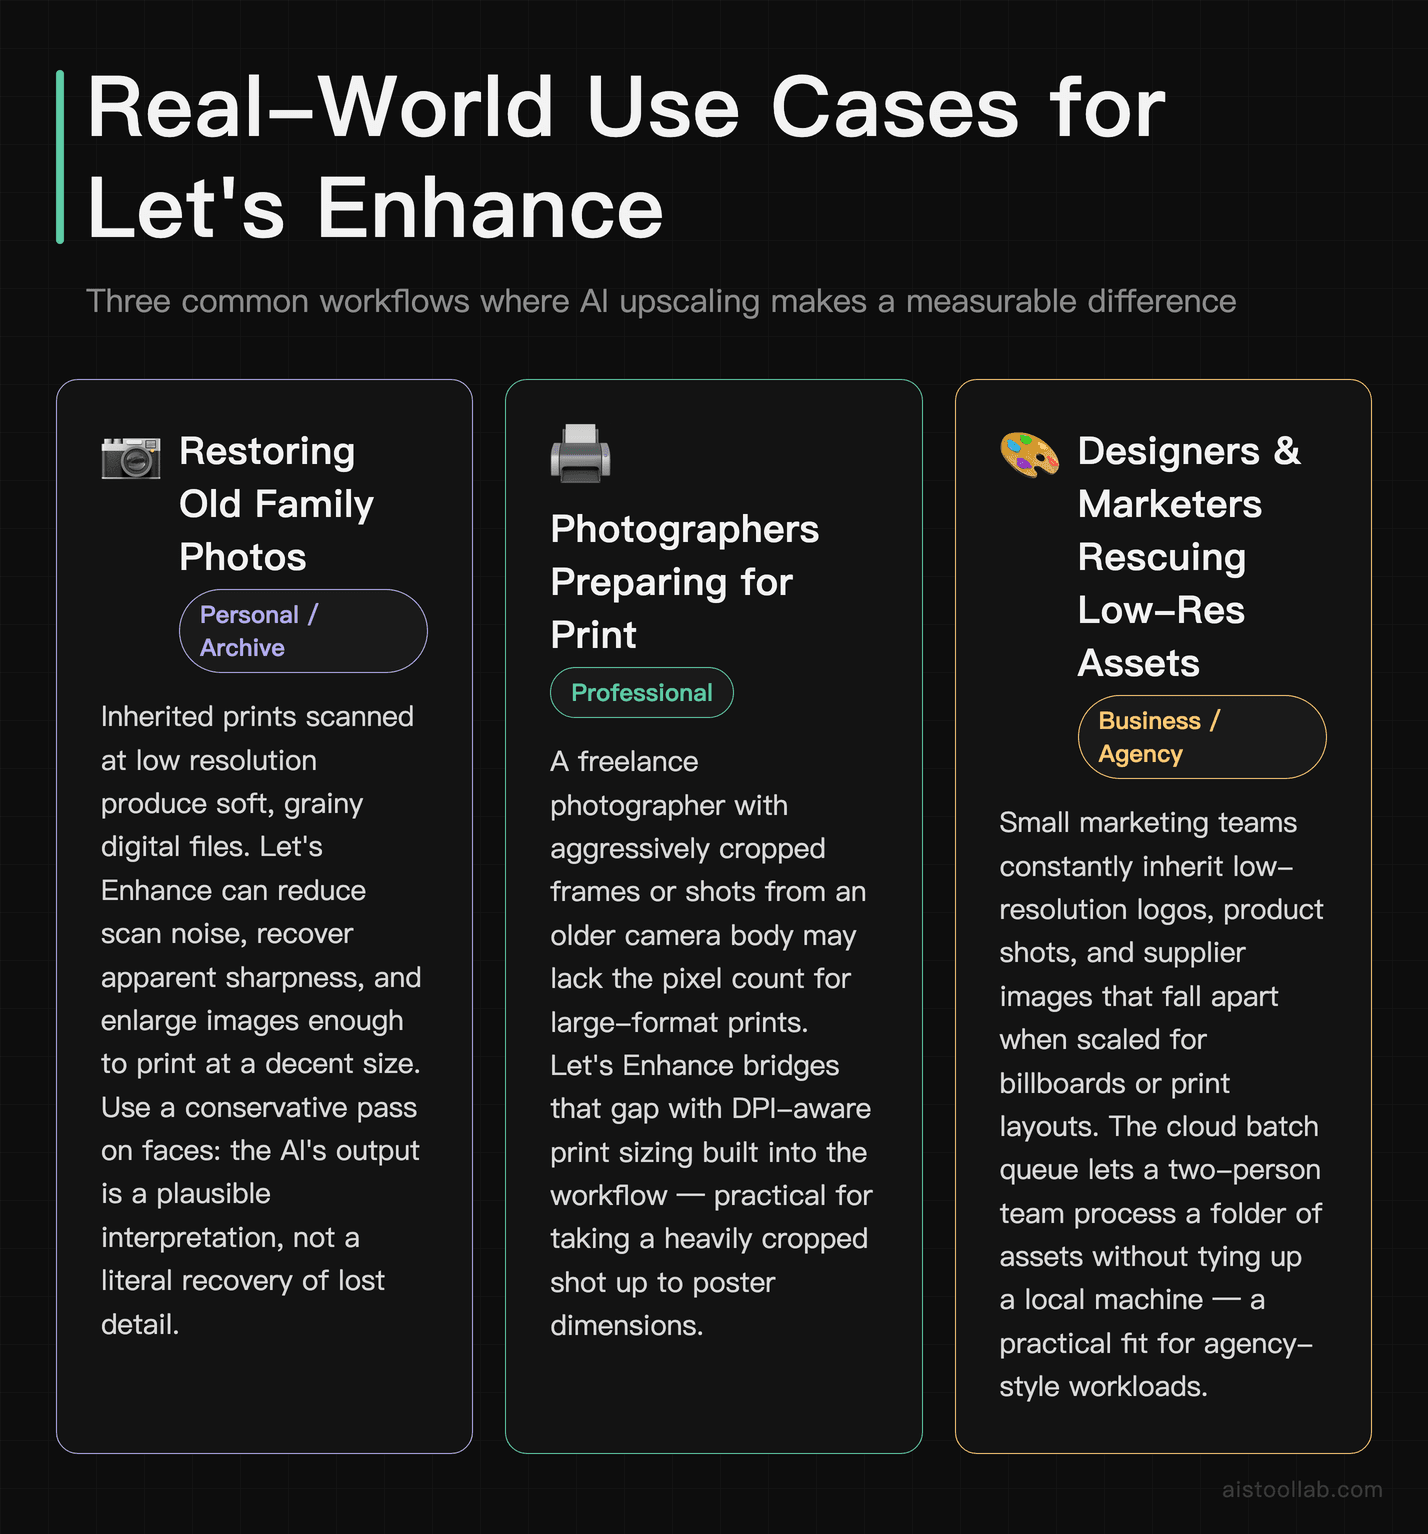
Restoring old family photos
A common scenario: someone inherits a box of prints, scans them on a home flatbed at low resolution, and ends up with soft, grainy digital files. Let’s Enhance can meaningfully improve these — reducing scan noise, recovering apparent sharpness, and enlarging them enough to print at a decent size. The caveat from earlier applies hard here: on badly degraded faces, treat the AI’s reconstruction as an interpretation. For sentimental images, it’s often worth a conservative pass that cleans up without inventing too much.
Photographers preparing images for print
A freelance photographer who shot an event on an older body, or cropped aggressively into a frame, may end up with files that don’t have the pixel count for large prints. Upscaling to bridge that gap — say, taking a heavily cropped shot up to poster dimensions — is one of the tool’s strongest real-world jobs. Because print output is a first-class concern in Let’s Enhance’s design, the DPI-aware sizing is genuinely handy for this workflow.
Designers and marketers rescuing low-res assets
This is the billboard-logo problem from the opening. A 2-person marketing team at a startup constantly inherits assets that are too small — a supplier’s product image, an old brand mark, a stock photo bought at the wrong size. Upscaling buys them a usable asset without a reshoot or a redesign. It’s not a substitute for proper source files, but on a deadline in a Slack thread with the design lead asking “can we make this bigger?”, it’s a fast, pragmatic answer.
Archival and cataloging work
Museums, small archives, and hobbyist collectors digitizing large volumes of material benefit from batch upscaling. The consistency of applying one setting across hundreds of scans, run server-side, saves enormous manual effort. For archival purposes specifically, always preserve the untouched original scan as your master and treat the upscaled version as a derivative — never overwrite the source, because the AI’s additions aren’t “real” archival data.
How Let’s Enhance compares to the alternatives
Let’s Enhance isn’t the only game in town, and it’s genuinely not the best choice for everyone. Here’s how it stacks up against the three tools it’s most often compared with: Upscayl, Topaz Gigapixel, and Adobe’s Super Resolution feature.
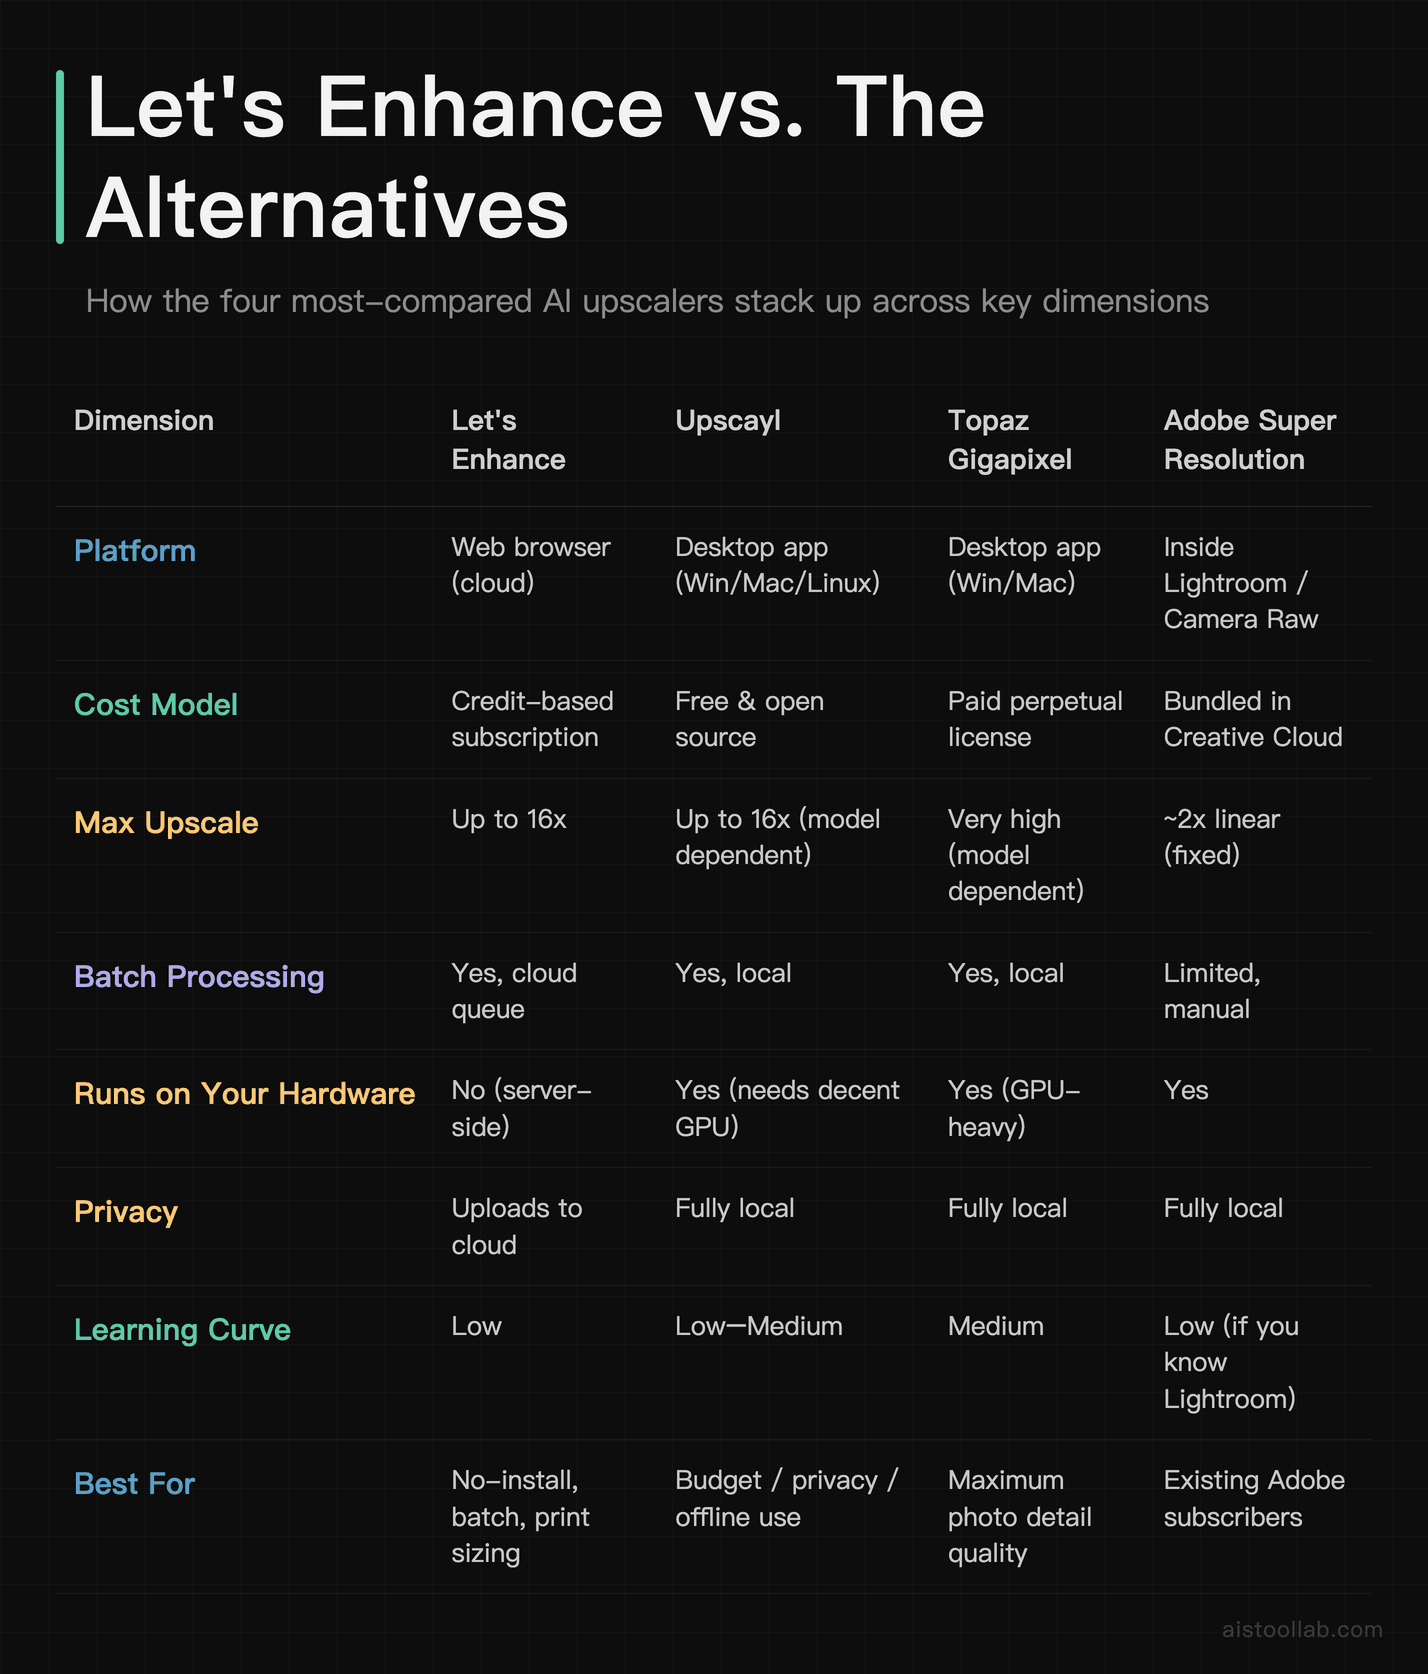
Upscayl is the obvious pick if budget or privacy is your priority. It’s free, open source, and processes entirely on your own machine — nothing gets uploaded to a cloud. The trade-off is that it leans on your local GPU, so results and speed depend heavily on your hardware, and the interface is more utilitarian. For a privacy-conscious solo developer or anyone processing sensitive images, it’s a compelling default.
Topaz Gigapixel is widely regarded in photography circles as the quality benchmark for photographic upscaling, with specialized face-recovery and detail models. It’s a paid desktop application with a one-time license rather than a subscription, per Topaz Labs’ official pricing. If you’re a professional photographer whose reputation rides on print quality, it’s the tool reviewers most often crown for pure output fidelity — at the cost of a heavier install and a steeper price.
Adobe Super Resolution is the pragmatic answer if you already live in Lightroom or Camera Raw. It’s built in, it’s non-destructive, and it does a clean roughly-2x enlargement. It won’t push to the extreme multipliers the dedicated tools reach, but for photographers already paying for Creative Cloud, it’s effectively free and frictionless. I dug into Adobe’s broader creative AI stack in my Adobe Firefly review if you want the wider context on where these features fit.
The verdict: who should actually use Let’s Enhance
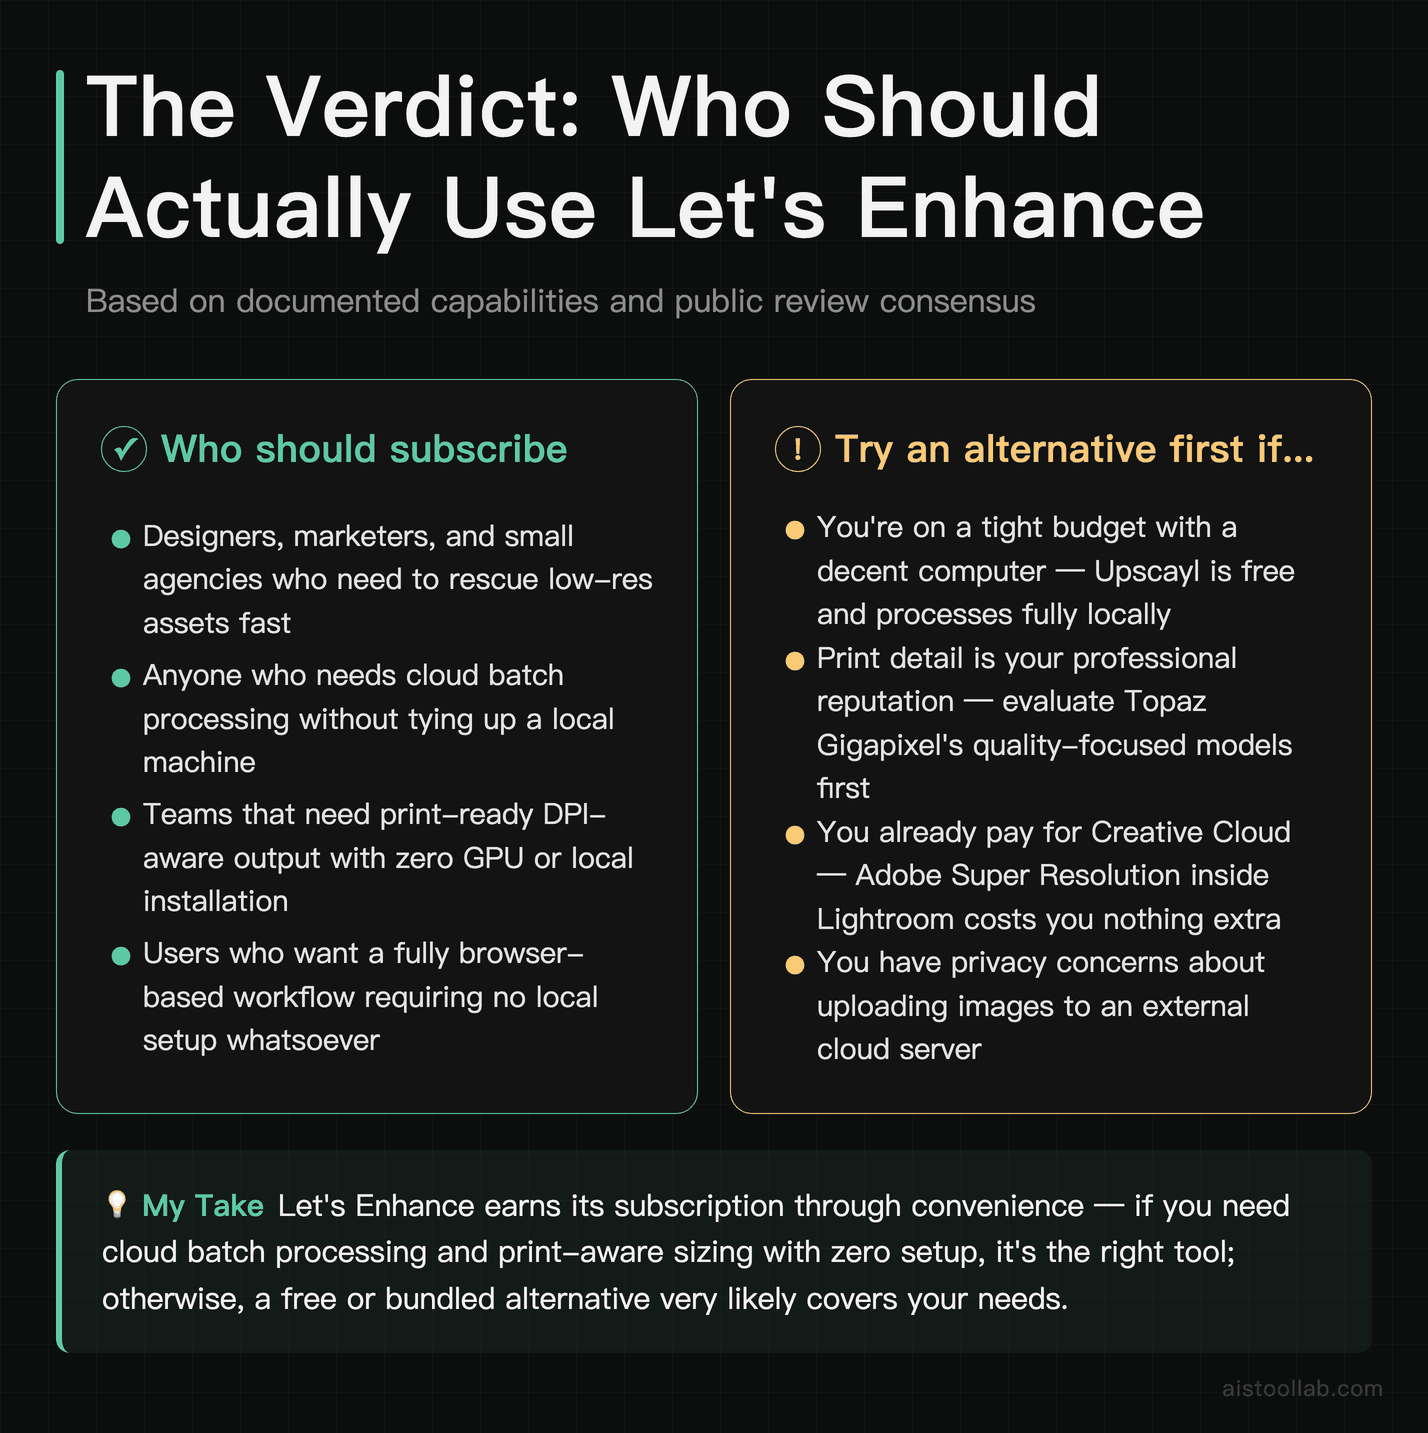
Based on the documented capabilities and the consensus across public reviews, here’s my direct take. If you’re a designer, marketer, or small agency who needs to rescue low-res assets fast, process batches without tying up your machine, and get print-ready dimensions in a browser with zero setup — Let’s Enhance is a genuinely comfortable fit and earns its subscription through convenience. The cloud batch queue and print sizing are its standout strengths.
If you’re an individual on a budget with a decent computer, start with Upscayl — it’s free, it’s local, and it’ll cover most casual upscaling needs without spending a cent. If you’re a professional photographer where print detail is your reputation, evaluate Topaz Gigapixel for its quality-focused models. And if you already pay for Creative Cloud, try Adobe Super Resolution first, because it’s built right into Lightroom and costs you nothing extra.
Next step: sign up, grab your free credits, and run one real image from your actual workload through it — not a random test shot. You’ll know within twenty minutes whether the output quality and the browser workflow justify the subscription for your specific kind of work. That single honest test beats any review, including this one.
Frequently Asked Questions
Is Let’s Enhance free to use?
Let’s Enhance offers a free allocation of credits when you sign up so you can test the tool before committing, but ongoing use runs on paid subscription plans built around monthly credit bundles. It is not an unlimited free tool. The credit model means each processed image draws down your balance, so heavy users need a paid tier. For the current plan structure and exact credit amounts, check the official Let’s Enhance pricing page — I deliberately won’t quote figures here that I can’t verify against the live page, because pricing changes and stale numbers help nobody. My practical advice: use your free credits strategically on one representative image from your real workload rather than random test shots. That single realistic test tells you far more about whether the paid plan is worth it than a dozen throwaway experiments. If you only need occasional upscaling, weigh the subscription against a free local tool like Upscayl, which costs nothing but runs on your own hardware.
How does Let’s Enhance compare to Topaz Gigapixel for quality?
Across public reviews and photography community discussion, Topaz Gigapixel is more frequently cited as the top performer for pure photographic detail and face recovery, thanks to its specialized models. Let’s Enhance is very capable and often produces excellent results, but its main appeal is convenience — browser-based, no install, no reliance on your local GPU, and strong batch and print-sizing workflows. The honest framing is that they optimize for different users. If you’re a professional photographer where print fidelity is everything and you don’t mind a desktop app plus a one-time license cost, Gigapixel is the tool most reviewers point to. If you value working entirely in the browser, processing batches in the cloud, and getting print-ready dimensions without tying up your machine, Let’s Enhance is the more comfortable fit. Neither is objectively “better” — it depends on whether your priority is maximum quality or maximum convenience. Test both on your own images before deciding.
What’s the maximum resolution I can upscale to?
Let’s Enhance supports upscaling up to 16x in resolution according to its documentation, with intermediate factors like 2x, 4x, and 6x available for less aggressive jobs. But the maximum number is a ceiling, not a recommendation. The practical quality you get depends far more on your source image than on the multiplier you select. A sharp, well-exposed photo upscaled 2x looks fantastic; a tiny, compressed thumbnail pushed to 16x will show obvious AI invention no matter which tool you use, because there simply isn’t enough real information to reconstruct from. My consistent advice is to choose the lowest upscale factor that still meets your actual output requirement. If you need a specific print size, calculate the pixel dimensions that size requires at your target DPI and upscale only to that — going beyond it just adds processing time and increases the risk of visible artifacts without any benefit.
Does upscaling work well on faces and portraits?
Faces are the single hardest test for any AI upscaler, and results are mixed across all tools including Let’s Enhance. The reason is that human vision is exceptionally tuned to detect when a face looks wrong — a slightly off eye or an invented jawline reads as uncanny immediately. When the source face has reasonable detail to begin with, a conservative upscale can look genuinely good. When the face is a small, blurry cluster of pixels, the AI reconstructs plausible features that may not match the actual person. This is critical for restoration work: the upscaled face is an interpretation, not recovered truth. For important portraits, use photographic mode, keep the multiplier low (2x is often ideal), apply noise reduction gently, and avoid heavy sharpening that creates a plasticky skin texture. Always compare against the original. If face quality is your absolute priority, tools with dedicated face-recovery models like Topaz Gigapixel are worth evaluating alongside it.
Can I process multiple images at once?
Yes, batch processing is one of Let’s Enhance’s stronger practical features. You can upload multiple images and apply consistent settings across the whole set, with the jobs running server-side in a cloud queue. This is a meaningful advantage over desktop tools for high-volume work, because your own computer isn’t tied up grinding through the processing — you queue the batch and walk away. For an agency turning around a client’s large archive, a photographer processing an entire shoot, or someone digitizing a box of old scans, this hands-off model saves real time. The trade-off is that batch jobs consume credits per image, so a large batch draws down your balance quickly, and everything uploads to the cloud rather than staying local. If you’re processing sensitive or private images at volume and privacy matters more than convenience, a local batch tool like Upscayl avoids the upload entirely, though it will use your own hardware and take longer on a modest GPU.
What file formats does it support for input and output?
Let’s Enhance accepts common image formats for upload including JPG, PNG, and WebP, and lets you choose your output format on download. The format choice matters more than people assume. For photographs headed to the web, JPG keeps file sizes reasonable while looking fine. For graphics, logos, screenshots, line art, or anything with sharp edges and transparency, PNG is the safer choice because it preserves crisp edges without compression artifacts. If you’re upscaling for print, the format matters less than the pixel dimensions — confirm that your output resolution translates to the physical size and DPI your printer needs before sending anything off, because discovering the file is too small after the fact is a frustrating and avoidable mistake. A good habit is to keep your original source file untouched and treat every upscaled export as a separate derivative, especially for archival work where you never want to overwrite the master scan with an AI-modified version.
Is it worth paying for when Upscayl is free?
This is the question that actually matters for most budget-conscious readers, and the honest answer is: it depends on what you value. Upscayl is free, open source, and processes entirely on your own machine — genuinely excellent value and the privacy-conscious default. If you have a capable GPU, don’t mind a slightly more utilitarian interface, and want zero ongoing cost, it’s hard to argue against it. Let’s Enhance justifies its subscription cost through convenience: no installation, no reliance on your hardware, a polished interface, cloud batch queues that don’t tie up your machine, and print-oriented sizing features. For a professional or team where time is money and the hands-off cloud workflow saves real hours, that convenience is worth paying for. For an individual doing occasional upscales who has a decent computer, Upscayl likely covers your needs for free. My recommendation: try Upscayl first since it costs nothing, and only move to a paid cloud tool if its limitations — hardware demands, local processing time, or interface friction — actually get in your way.
Will the upscaled image look obviously “AI-generated”?
It can, and knowing when it will helps you avoid disappointing results. AI upscaling looks most natural on images with plenty of real detail and organic texture — landscapes, foliage, fabric, product surfaces — because the model has genuine pattern to reconstruct from. It looks most artificial when you push a low-detail source too hard: over-smoothed skin, waxy textures, invented details in areas that were originally blurry, and banding in skies or gradients are the telltale signs. To minimize the AI look, use the lowest upscale factor that meets your need, apply enhancement toggles conservatively rather than maxing everything out, and always compare the result against the original at full zoom. If you spot over-processing, dial back the sharpening or noise reduction and reprocess. The tools have improved substantially, and a well-chosen upscale on a decent source is often indistinguishable from a genuinely high-resolution capture — but an aggressive upscale on a poor source will always announce itself. Matching your expectations to your source quality is the single biggest factor in satisfaction.
Last updated: 2026
Found this review helpful?
Subscribe to aistoollab.com for weekly AI tool reviews, tutorials, and comparisons — straight to your inbox.
👉 Browse the AI Tools Library to find the right tools for your workflow.