Who this is for: you are cutting AI-generated footage into a real timeline and the problem is consistency between shots, not producing a single nice clip.
The still-image equivalent of this problem:
- Upscaling small source images — the still-image counterpart, a different problem entirely
The Gap Between “Cool AI Clip” and “Actually Usable Footage”
Here’s the thing nobody tells you when you first open Runway: generating a pretty five-second clip is easy. Generating a five-second clip that matches the shot before it, holds a consistent character, moves the camera the way a real cinematographer would, and drops cleanly into a Premiere timeline without looking like a fever dream — that’s the hard part. That’s where most people stall out.
If you’ve been using Runway ↗ for a while and you’re tired of the slot-machine approach — regenerate, regenerate, regenerate until something looks decent — this guide is for you. We’re skipping the “what is AI video” preamble entirely. Instead, this is a compiled, advanced playbook built from Runway’s official documentation, its Gen-3 release notes, and the workflow patterns filmmakers and motion designers keep sharing across Reddit, Discord, and YouTube breakdowns.
The focus is deliberately narrow and deep: camera and motion control that reads as cinematic, multi-shot consistency so your sequences hang together, prompt engineering that actually steers the model, and the post-production side almost nobody documents properly — getting Runway output into your real editing pipeline at the right resolution and frame rate. Let’s get into it.
What You Should Already Have Working

This isn’t a from-zero tutorial, so a few assumptions. You should have a Runway account on a paid tier (the free credits burn up fast once you’re iterating seriously), and you should already understand the basics of text-to-video and image-to-video generation in Gen-3 Alpha or Gen-3 Alpha Turbo. According to Runway’s official documentation, the Turbo variant is the faster, lower-credit-cost option, while the standard Gen-3 Alpha model is positioned for higher fidelity — you’ll want both available depending on whether you’re drafting or finalizing.
You’ll also want an external editor ready. Nothing here requires a specific one, but the workflows assume you can cut and color somewhere — DaVinci Resolve (the free version is genuinely capable), Premiere Pro, Final Cut, or even CapCut for lighter jobs. And keep a reference image folder handy. Half of advanced Runway work is feeding it the right starting frame rather than hoping text alone gets you there.
The Single Biggest Lever for Quality: Structured Prompting

Most weak Runway output traces back to lazy prompting. People write “a woman walking through a city at night, cinematic” and wonder why it looks generic. The model isn’t reading your mind — it’s reading your syntax. The fix is to think in structured layers rather than one vague sentence.
A reliable structure that reviewers and Runway’s own prompt guidance consistently point toward looks like this: subject and action → environment and lighting → camera behavior → style and lens language. You’re describing a shot the way a director briefs a DP, not the way you’d caption an Instagram post.
Compare the two. Weak: “a car driving fast.” Structured: “a black vintage sports car speeding along a coastal cliff road at golden hour, low-angle tracking shot moving alongside the car, warm backlight, shallow depth of field, 35mm anamorphic look, subtle lens flare.” The second one gives the model an action, a setting, a light source, a camera move, and a lens character. That’s five decisions you’ve made for it instead of leaving to chance.
Style Blending Without Turning to Mush
Style blending is where things get fun and where people overdo it. You can stack aesthetic references — “shot on 16mm film, muted Kodak color palette, soft grain, handheld documentary feel” — and Gen-3 will genuinely honor a surprising amount of it. But there’s a ceiling. Cram in too many competing styles (“cyberpunk neon meets pastel watercolor meets photorealistic 8K”) and the model averages them into visual sludge.
The pattern that works: pick one dominant aesthetic and one or two modifiers. Lock the base look, then nudge. If you want consistency across a sequence, keep that style string identical across every generation and only change the action and camera lines. That single discipline does more for a coherent project than any other trick in this guide.
Runway Gen-3 vs Other AI Video Options
Runway isn’t the only game in town anymore, and picking the right tool for a job matters. Here’s how it stacks up against other notable AI video generators, based on their official documentation and public reviewer consensus rather than lab benchmarks.
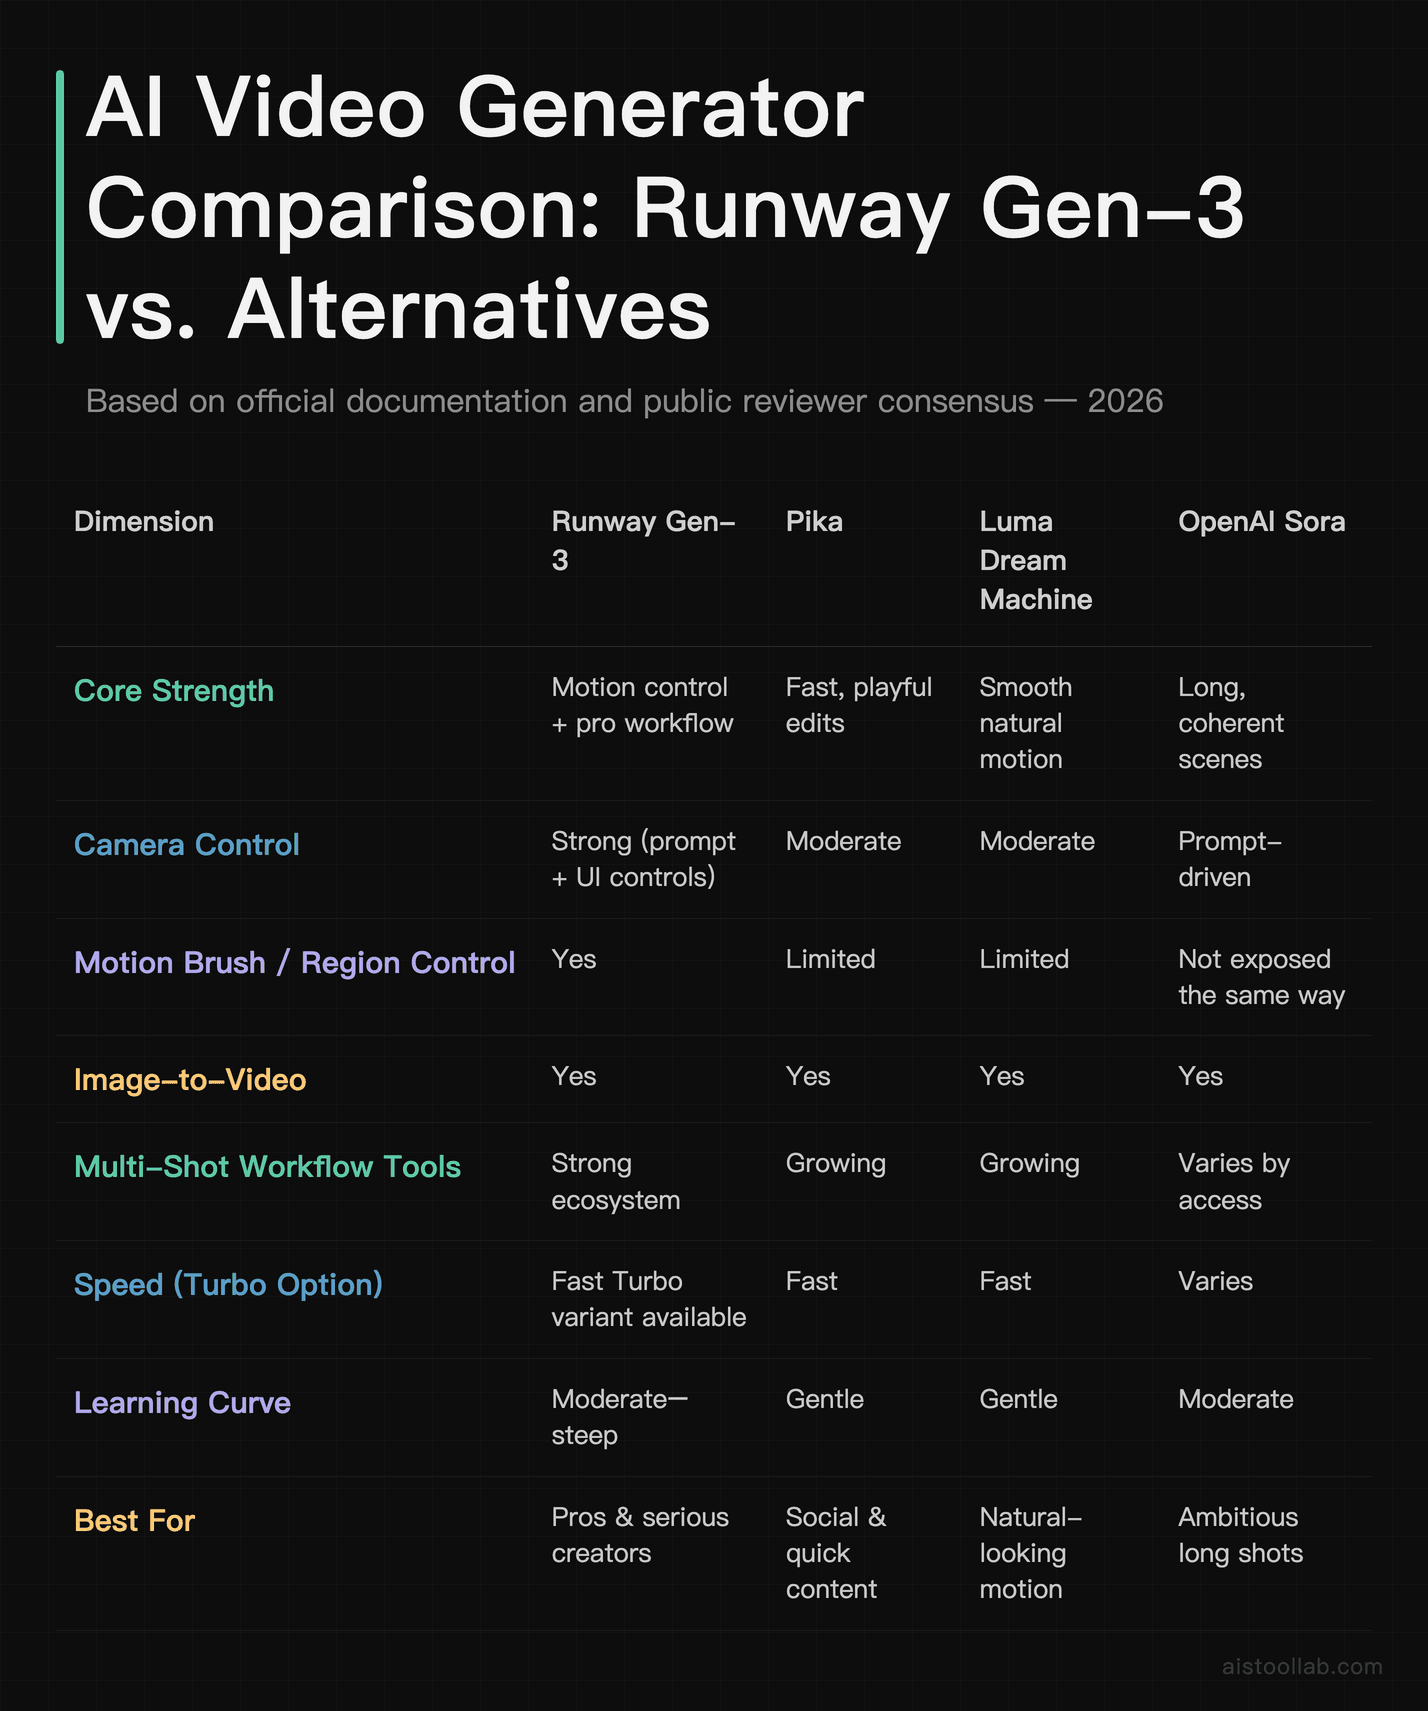
The honest summary: Runway wins on control. If your priority is steering camera and motion precisely and slotting output into a professional pipeline, it’s arguably the most complete toolkit right now. If you just want fast, fun social clips with minimal fuss, lighter tools may frustrate you less. Availability and feature sets shift constantly in this space, so treat this as a snapshot rather than gospel.
Who This Advanced Workflow Actually Serves
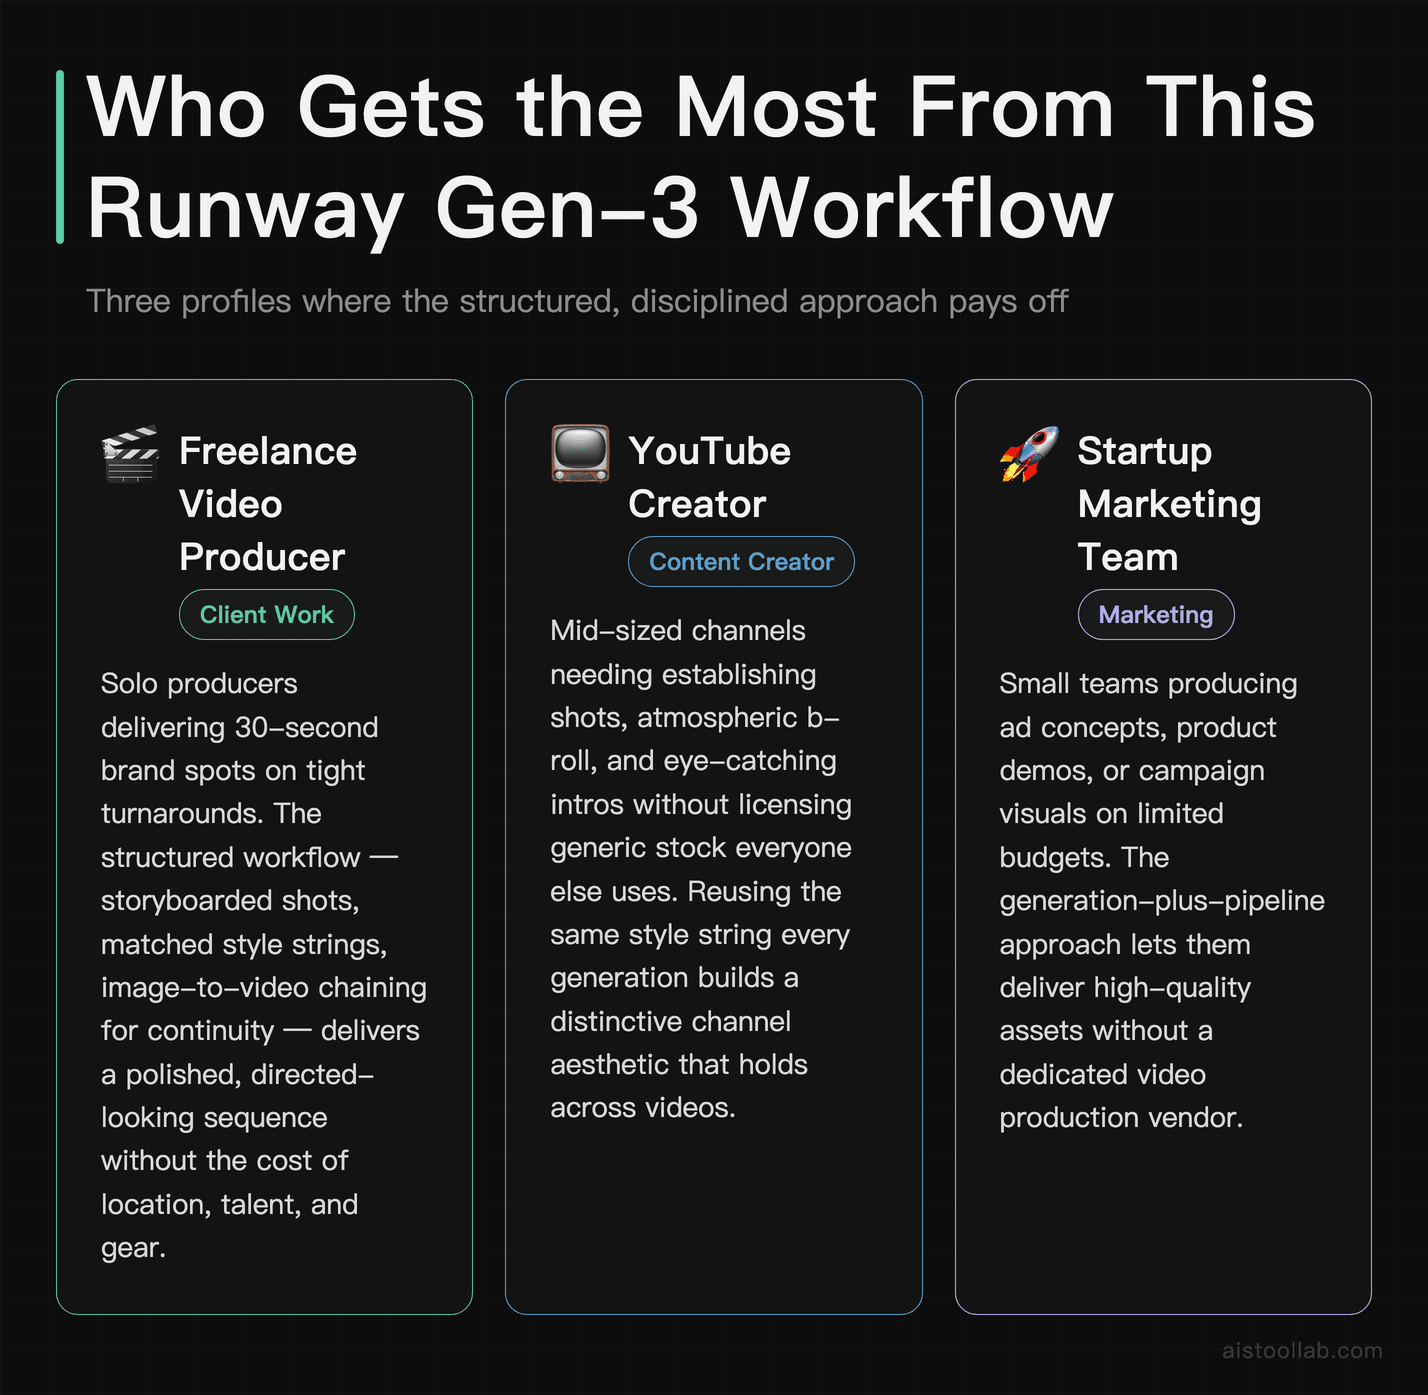
The Freelance Video Producer With Client Deadlines
Picture a solo freelancer producing a 30-second brand spot for a small business client on a tight turnaround. Shooting live-action would blow the budget on location, talent, and gear. Using Runway with the structured approach above — storyboarded shots, matched style strings, image-to-video chaining for continuity — they can produce a polished, coherent sequence and finish it in DaVinci Resolve. The camera-control discipline is what lets them deliver something that looks directed rather than randomly generated, which is exactly what keeps clients coming back.
The YouTube Creator Building B-Roll and Intros
A creator running a mid-sized channel constantly needs establishing shots, atmospheric b-roll, and eye-catching intros they can’t easily film. Instead of licensing generic stock that everyone else also uses, they generate custom clips in their channel’s aesthetic — same style string every time for brand consistency — and cut them into videos. The Motion Brush workflow is perfect here for controlled, subtle background motion behind titles. The payoff is a distinctive visual identity without a production crew.
The Startup Marketing Team Prototyping Ads
A two-person marketing team at a SaaS startup needs to test multiple ad concepts before committing budget to a real shoot. Runway lets them prototype five different creative directions in an afternoon, generate them in the exact vertical and widescreen formats each platform needs, and A/B test which concept resonates. Even if the final ad gets professionally produced later, using AI generation to validate direction first saves them from expensive guesswork. That render-format planning we covered earlier is what keeps each variant platform-ready out of the gate.
Advanced Camera and Motion Control

This is the section people came for. Runway exposes motion control in two main ways according to its documentation: text-driven camera language in your prompt, and dedicated interface controls for camera movement and motion intensity. Used together, they’re powerful. Used carelessly, they fight each other.
Start with prompt-level camera direction. Gen-3 responds to real cinematography vocabulary, so use it precisely:
- Dolly in / dolly out — the camera physically moves toward or away from the subject. Reads as intimate or revealing.
- Tracking / trucking shot — camera moves laterally alongside a subject. Great for walking or driving.
- Crane / boom up — vertical camera movement, useful for establishing scale.
- Orbit / arc shot — camera circles the subject. Impressive, but the most likely to warp geometry, so keep it slow.
- Static / locked-off — sometimes the most cinematic choice is no camera movement at all. Say so explicitly, or the model may add drift.
The mistake advanced users still make is stacking three camera moves in one prompt. “Dolly in while orbiting and craning up” gives Gen-3 an impossible instruction and you’ll get warping and morphing artifacts. One primary move per shot. If you need a complex move, break it into two shots and cut between them — which, conveniently, is also how real films handle it.
Motion Brush and Motion Intensity
Runway’s Motion Brush feature (documented as a way to paint motion onto specific regions of a starting image) is your precision tool. Instead of the whole frame animating, you mask exactly what should move — the water in a river, a character’s hair, drifting smoke — and leave the rest stable. This is the secret behind those eerily controlled clips where one element moves and everything else stays rock-steady.
Pair that with motion intensity settings. Lower intensity gives you subtle, believable movement that’s easy to composite; high intensity gives you dramatic action but raises the risk of distortion. For anything that needs to look professional rather than experimental, err low. You can always add energy in the edit with speed ramps; you can’t easily remove melting faces.
Multi-Shot Consistency and Scene Sequencing
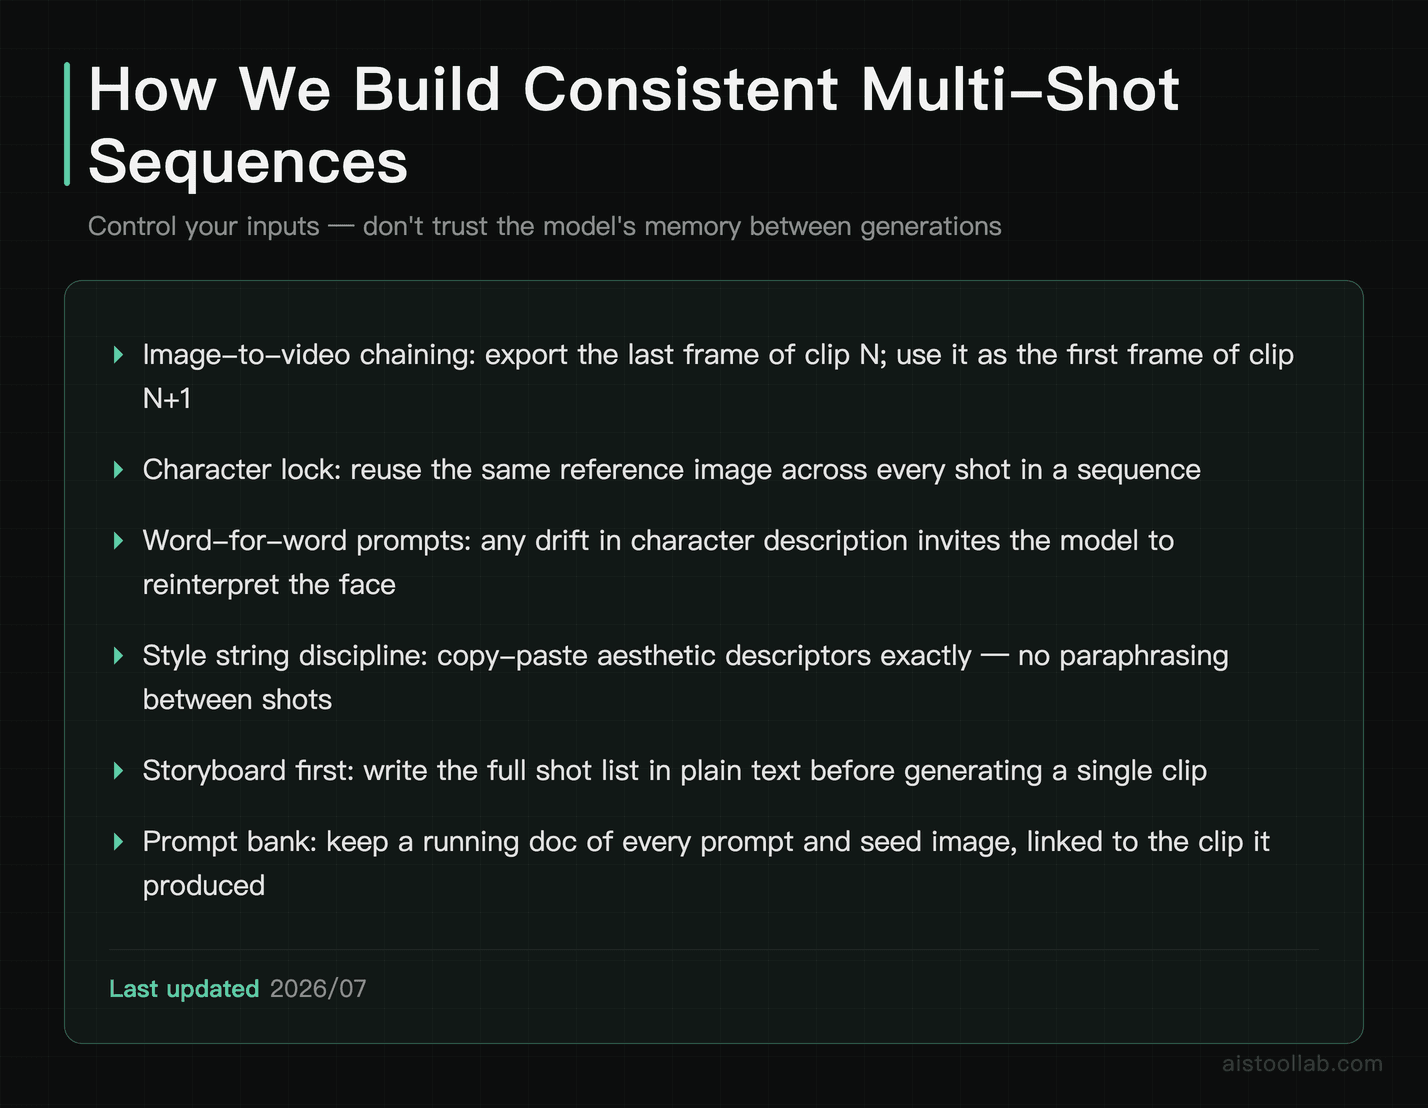
A single good clip is a demo. A sequence of clips that feel like they belong to the same film is a project. Consistency is Gen-3’s genuine weak spot — and the workflows that beat it are all about controlling your inputs rather than trusting the model’s memory between generations.
The most reliable approach is image-to-video chaining. Rather than generating each shot from text independently, you generate a strong keyframe image (in Runway, an external image model, or from a previous clip’s final frame), then use that as the starting frame. For sequential shots, export the last frame of clip one and feed it as the first frame of clip two. Continuity of lighting, wardrobe, and setting carries over far better than text prompts alone can manage.
For character consistency specifically, lock down a reference. Generate or source a clean character image, reuse it as the input image across shots, and keep the character description word-for-word identical in every prompt. Any drift in your wording — “young woman” in one prompt, “woman in her 20s” in the next — invites the model to reinterpret the face.
A Practical Sequencing Workflow
- Storyboard first. Write out your shot list in plain text before generating anything. Shot 1: wide establishing. Shot 2: medium tracking. Shot 3: close-up reaction. Know the cut before you generate.
- Generate keyframes. Produce a strong still for each shot that establishes look and composition.
- Animate with matched style strings. Keep the aesthetic portion of every prompt identical; vary only action and camera.
- Chain frames where continuity matters. Use end-frame-to-start-frame handoffs for shots that flow directly into each other.
- Generate extra takes of pivotal shots. Your hero shots deserve five variations; your throwaway cutaways need one.
It’s slower than firing off random prompts, but it’s the difference between a montage that reads as intentional and a pile of unrelated clips.
From Runway to Your Editing Pipeline
Runway is a generator, not a finishing suite — and treating it like the last step is a common mistake. The clips that look professional almost always get cleaned up downstream. Here’s how the handoff typically goes.
Export your generations at the highest quality available on your plan, then bring them into a real editor for the work Runway isn’t built for: precise cuts, color grading, audio, titles, and pacing. Gen-3 clips often benefit enormously from a proper color pass — matching the grade across shots does more for perceived consistency than most people expect, because it papers over small lighting differences between generations.
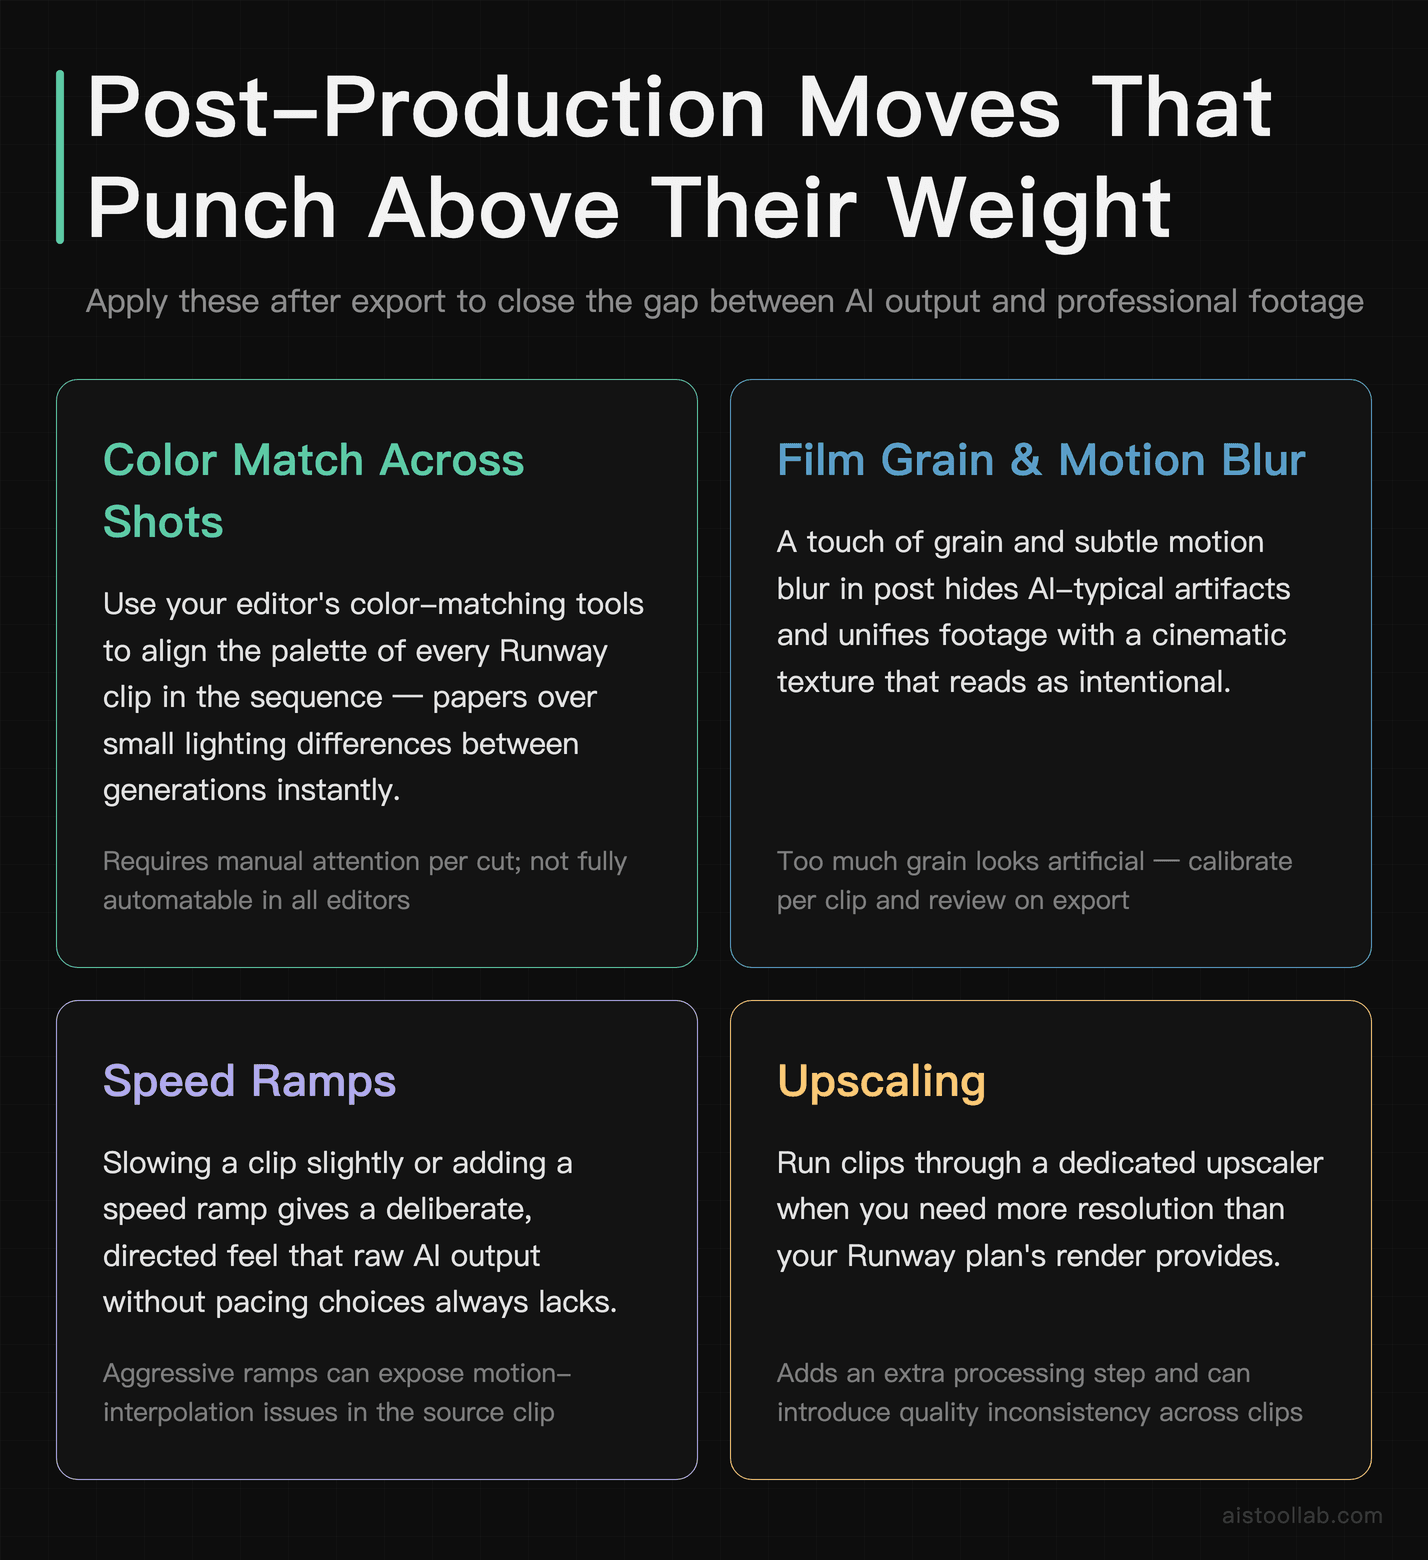
A few post-production moves that punch above their weight:
- Color match across shots. Use your editor’s color-matching tools to align the palette of every clip in a sequence. Instant cohesion.
- Add motion blur and grain. A touch of film grain and subtle motion blur in post hides AI-typical artifacts and unifies the footage.
- Speed ramps. Slowing a clip slightly or ramping speed adds a deliberate, edited feel that raw AI output lacks.
- Upscaling. If you need more resolution than your render gives you, run clips through a dedicated upscaler. I walked through the general approach in the Let’s Enhance tutorial — similar logic applies to video frames.
- Audio is half the battle. Runway doesn’t hand you a soundtrack. Sound design and music turn a silent tech demo into something that feels like content.
Optimizing Render Settings for Format, Resolution, and Frame Rate
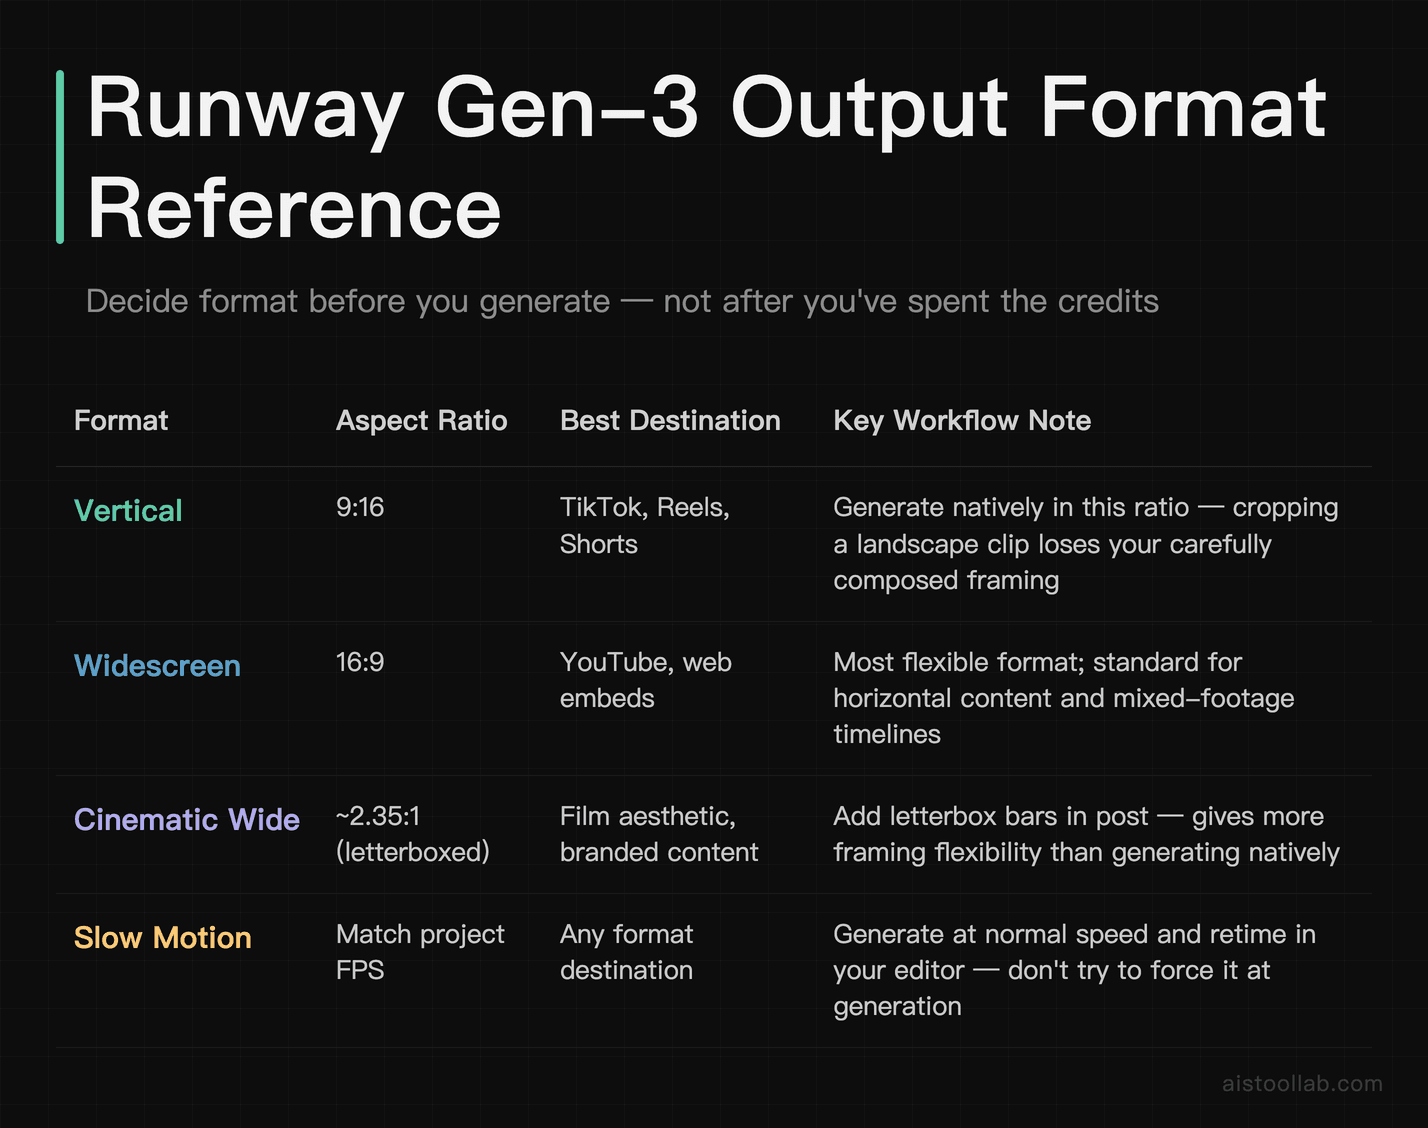
Getting the output specs right saves you from re-rendering and burning credits. According to Runway’s documentation, Gen-3 supports different aspect ratios and durations, and the exact resolution and options available depend on your plan and the model variant you choose.
Think about the destination before you generate, not after:
- Vertical (9:16) for TikTok, Reels, and Shorts. Generate in the native ratio rather than cropping a landscape clip — cropping loses your carefully composed framing.
- Widescreen (16:9) for YouTube and most web embeds.
- Cinematic wide when you want that letterboxed film feel — though you can also achieve this by adding bars in post, which gives you more flexibility.
On frame rate: AI-generated clips are often short, so plan your project frame rate in the editor and conform Runway’s output to it there. If you’re mixing Runway footage with real footage or motion graphics, matching frame rates in your editing timeline prevents the subtle stutter that comes from mismatched cadence. For slow-motion looks, generate normally and retime in post rather than trying to force it at generation.
One credit-saving habit: draft with the faster, cheaper model variant (Gen-3 Alpha Turbo, per official docs) to lock composition and motion, then regenerate your winners with the higher-fidelity model only once you’re happy. Iterating on the expensive model is how people torch their monthly credits by Tuesday.
Frequently Asked Questions
Is Runway Gen-3 worth paying for, or is the free tier enough?
The free tier is genuinely fine for kicking the tyres and seeing whether AI video fits your workflow at all, but it’s not enough for the advanced work in this guide. The core problem is credits: serious iteration — generating five takes of a hero shot, chaining frames across a sequence, drafting on Turbo then finalizing on the higher-fidelity model — eats through free credits quickly. If you’re producing anything for clients, a channel, or a real campaign, a paid plan pays for itself in saved time almost immediately. For exact current pricing and what each tier includes, check Runway’s official pricing page rather than relying on figures that change often. My honest take: if you’re using it professionally even a few times a month, the paid tier isn’t the expensive part of your workflow — your time is. Test seriously on the free credits first, confirm the output quality meets your bar, then upgrade once you know it’s earning its keep.
Why do my characters keep changing faces between shots?
This is the single most common frustration with AI video, and it comes down to how the model treats each generation as a fresh interpretation. Gen-3 doesn’t inherently “remember” your character between separate clips. The fix is controlling your inputs relentlessly. Use image-to-video with the same reference image across shots rather than generating from text each time. Keep your character description word-for-word identical — even swapping “young woman” for “woman in her 20s” gives the model permission to reinterpret. For shots that flow directly into each other, export the final frame of one clip and use it as the starting frame of the next, which carries facial features and lighting across the cut. And accept a hard truth: perfect character consistency across a long sequence is still an unsolved problem in AI video generally. Plan your edits so cuts happen at moments where minor drift is less noticeable, and lean on color grading in post to unify the footage. Reviewer consensus is that input discipline, not prompt magic, is what wins here.
How do I stop the camera from adding random drift when I want a static shot?
Gen-3 has a tendency to add subtle movement even when you don’t ask for it, because most of its training footage contains some motion. The solution is to be explicit. State clearly in your prompt that you want a “static shot,” “locked-off camera,” or “no camera movement,” and lower the motion intensity setting if your interface exposes it. Even then, you may get slight residual movement — that’s the model’s nature. If you need a truly frozen frame, the reliable move is to stabilize the clip in post using your editor’s stabilization tools, or in extreme cases, freeze-frame a single clean frame and hold it. For anything where a genuinely static camera is critical, consider whether AI generation is even the right tool versus a still image with a subtle Motion Brush effect applied only to specific elements. Sometimes the “shot” you want is actually a static image with one moving component, and framing it that way in Runway gives you far more control than fighting the whole-frame animation.
What’s the difference between Gen-3 Alpha and Gen-3 Alpha Turbo?
According to Runway’s official documentation, the two variants trade off speed and cost against fidelity. Gen-3 Alpha Turbo is the faster, more credit-efficient option — designed for quick iteration and situations where you’re drafting rather than finalizing. The standard Gen-3 Alpha model is positioned for higher-quality output and takes more time and credits per generation. The workflow that most experienced users land on is a two-stage approach: draft on Turbo to lock in your composition, camera movement, and overall look while burning minimal credits, then regenerate only your keeper shots on the higher-fidelity model once you’re confident in the direction. This stops you from wasting expensive generations on ideas that don’t pan out. Exact capabilities, resolution limits, and credit costs vary by plan and change over time, so verify current specifics against Runway’s own documentation before building a production workflow around either one. The general principle — cheap and fast for drafting, expensive and polished for finals — holds regardless of the specific numbers.
Can I use Runway output commercially for client work?
Generally yes, but the details matter and you should confirm them against Runway’s current terms of service rather than my summary, because licensing terms in AI tools change and vary by plan. As a rule, paid plans typically grant broader commercial usage rights than free tiers, so if you’re delivering to clients, being on an appropriate paid plan is the safer footing. Beyond Runway’s own terms, think about your client’s expectations: some brands are perfectly happy with AI-generated content, while others have policies against it or want disclosure. Have that conversation upfront rather than after delivery. There’s also the broader, still-unsettled legal landscape around AI-generated media, copyright, and training data — current evidence and regulation are genuinely in flux across the US, UK, EU, and elsewhere. For high-stakes commercial work, it’s worth a quick check with a lawyer familiar with your jurisdiction. For most everyday marketing and social content on a paid plan, creators are using Runway commercially without issue, but “read the current terms yourself” is the only responsible answer here.
Which external editor pairs best with Runway?
There’s no single right answer, but the strongest free option is DaVinci Resolve — its color grading is genuinely professional-grade, which matters enormously because color matching across shots is what unifies AI-generated sequences. If you’re already in the Adobe ecosystem, Premiere Pro integrates smoothly with the rest of your creative stack and handles the cutting, audio, and effects work well. For lighter, faster social content, CapCut or similar tools are perfectly adequate and quicker to learn. The editor matters less than what you do in it: color match every clip in a sequence, add subtle film grain and motion blur to disguise AI artifacts, use speed ramps for a deliberate edited feel, and — this is the one people forget — do real sound design, because Runway hands you silent footage and audio is half of what makes video feel finished. Whichever editor you choose, treat Runway as the generation stage and your editor as the finishing stage. The clips that look professional almost never come straight out of the generator untouched.
How do I get consistent results when style blending?
The trick is restraint. Style blending in Gen-3 works well when you pick one dominant aesthetic and layer only one or two modifiers on top — for example, “shot on 16mm film” as the base with “muted color palette” and “soft grain” as modifiers. Where people go wrong is stacking competing styles: cyberpunk plus watercolor plus photorealism gives the model contradictory instructions, and it averages them into something muddy. Once you’ve found a style string you like, the real power move for consistency is keeping that exact string identical across every generation in a project. Only change the action and camera portions of your prompt; leave the aesthetic language untouched. This single habit does more for a coherent-looking sequence than anything else, because it removes the variable that most often causes shots to feel disconnected. Save your winning style strings in a text file so you can reuse them across projects. Think of your style string as a reusable preset you’re building, not something to rewrite from scratch every time.
Why does fast motion in my clips look distorted or warped?
Warping and morphing during fast motion is one of Gen-3’s known limitations, and it happens most when you push motion intensity high or ask for complex camera moves combined with fast subject action. The model struggles to maintain object coherence when too much is changing at once. The practical fixes: keep motion intensity lower and add energy in post with speed ramps instead, use one primary camera move per shot rather than stacking several, and avoid asking for both dramatic camera movement and fast subject motion in the same generation. If you genuinely need a high-speed action shot, generate it at more moderate motion and then speed it up in your editor, which gives you a cleaner result than forcing the model to render extreme motion directly. Slow, controlled movement almost always looks more professional than fast, chaotic movement anyway — that’s true in real cinematography too. When in doubt, dial the motion back, get a clean generation, and add the drama during editing where you have precise control and can undo mistakes without spending more credits.
The Bottom Line
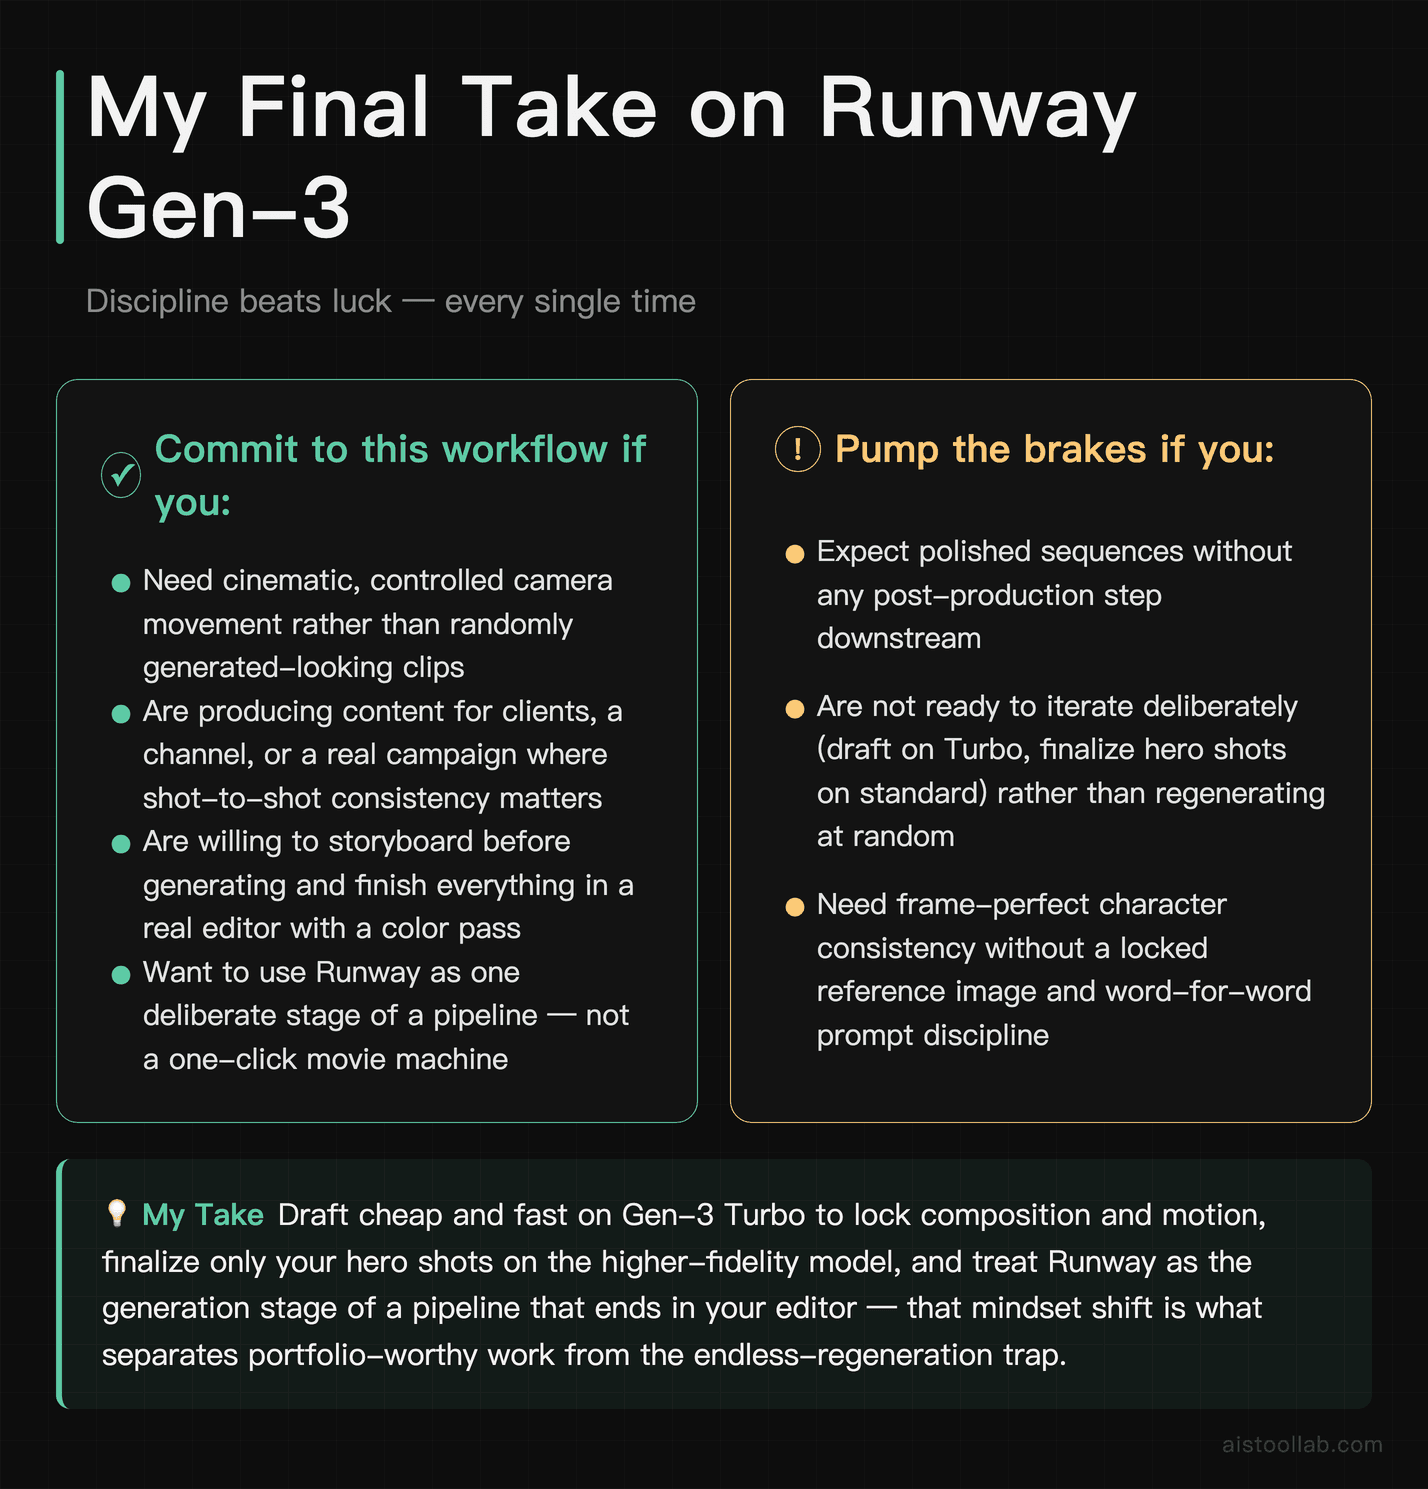
Runway Gen-3 rewards discipline more than luck. The people getting cinematic, consistent, genuinely usable results aren’t rolling the dice on vague prompts — they’re structuring their prompts like shot briefs, controlling their inputs with reference images and frame chaining, using one deliberate camera move per shot, and finishing everything in a real editor with a proper color pass.
If it were my project on the line, I’d commit to the two-stage workflow above: draft cheap and fast on the Turbo variant to lock composition and motion, then finalize only your hero shots on the higher-fidelity model, and treat Runway as the generation stage of a pipeline that ends in your editor — not as a one-click movie machine. That mindset shift is what separates the portfolio-worthy work from the endless-regeneration trap.
Next step: pick one 15-second sequence you actually need — an intro, a b-roll shot, an ad concept — storyboard three shots, and run them through this workflow end to end. You’ll learn more from finishing one deliberate sequence than from generating fifty random clips.
Last updated: 2026
Found this review helpful?
Subscribe to aistoollab.com for weekly AI tool reviews, tutorials, and comparisons — straight to your inbox.
👉 Browse the AI Tools Library to find the right tools for your workflow.
Related reading: Let’s Enhance Tutorial 2026: Master AI Image Upscaling with Real-World Use Cases